VOSKER V300 Ultimate Camera Setup and User Guide, EXPERIENCE THE ULTIMATE OUTDOOR SURVEILLANCE SOLUTION Whether you’re looking to protect your property or business, the V300 ULTIMATE provides autonomous surveillance that can keep going for months in the most challenging conditions. Say goodbye to cables and hello to effortless setup in any outdoor environment away from Wi‑Fi.
VOSKER V300 Ultimate Camera Setup and User Guide
HOW TO UPDATE YOUR V300 ULTIMATE CAMERA FIRMWARE
VOSKER V300 Ultimate
.
Latest firmware released: January 23, 2024
Installation instructions for PC :
2.Download the update file:
3.Open the downloaded .zip file by double-clicking on it.
4.Extract the files from the .zip file.
5.Copy the extracted files into the SD card.
It is essential to copy the files AND NOT the folder:
Good: “SD Card/ Files”
Not Good: “SD Card/301/Files”
6.Make sure the camera is turned OFF.
7.Insert the SD card into the camera.
8.Cover the camera or put it on a table (face down), to avoid any false trigger during the update.
10.Wait until the LED status light completely turns OFF.
Installation instructions for MAC :
2.Download the update file:
3.Double-click on the .zip file.
4.Copy the extracted files onto the SD card.
It is important to copy the files AND NOT the folder:
Good “SD Card/Files”
Not Good “SD Card/301/Files”
5.Eject the SD card from the computer.
6.Make sure the camera is turned OFF.
7.Insert the SD card into the camera.
8.Cover the camera or put it on a table (face down), to avoid any false trigger during the update.
10.Wait until the LED status light completely turns OFF.
How to Install your V300 Ultimate Camera
Before installation
Verify:
• All batteries are fully charged.
• The camera is synchronized in the VOSKER app.
• The camera gets a good signal strength on location.
• Photos and videos are displayed in the events tab.
What you’ll need for installation
Choose between:
• wood screw mounting option.
Recommended installation – Camera
1.Avoid direct sunlight hitting the lens. The camera should be facing North or South to avoid glare or overexposure as the sun rises or sets.
2.Avoid moving objects causing false detection (branches, long grass, etc).
3.Place the camera about 10ft to 100ft away from your target to have a good field of view.
4.From the VOSKER app, adjust the motion sensor sensitivity setting to “Medium” as a starting point.
5.Always test your camera before leaving the area. Make sure you receive a photo in your mobile app.
Recommended installation – Universal Solar Power Bank
1.Place the panel within the range of the supplied USB-C cable (approx. 3ft.)
2.Make sure it facing South, in an area that gets a good amount of sunlight during the day. This will help maximize the battery life of your camera.
3.Tilt the panel at about 45°.
For more information on how to install your VOSKER camera to get the best picture quality, read the article “What Can I Do To Increase My Photo Quality?”.
Download:
› Quick Start Guide (PDF)
Troubleshooting steps:
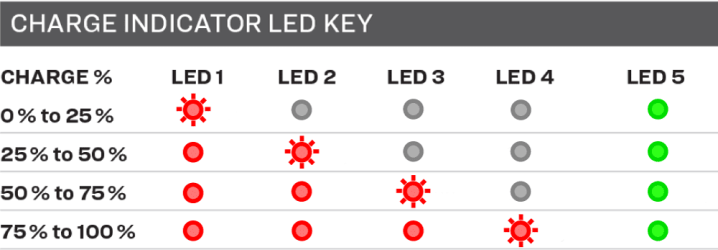
1.Check if the Universal Solar Power Bank is charged by holding TEST button for 5 seconds. All the red lights should turn on.

If the Universal Solar Power Bank is discharged, charge it by plugging the DC power adapter in the 5 V IN port.
2. Use the supplied USB-C cable from the camera to the USB-C port on the back of the Solar Power Bank.
3.Check if the output cable is in good condition (not chewed, cut, etc).
4.Clear all debris, dust and snow off the Universal Solar Power Bank.
5.Reassess if the location and orientation provide optimal sunlight to the solar panel. If possible, choose a south-facing position.
6.Before leaving the area, trigger a photo and check your app to ensure proper network connection.
CAUTION:
• Do not drop, disassemble or puncture the power pack.
• Do not place in fire, extremely high temperature, or water.
• If you notice something not right when in use or when charging, like melting, a bulge in the housing or the unit getting extremely hot, stop using it immediately.
WARNING: Failure to follow these safety instructions may result in fire, electric shock, damage, or other injuries. This power pack is not a toy. Keep away from children and operate outside.
.
HOW TO INSTALL YOUR V300 CAMERA
Before installing your camera, we recommend that you test the coverage of the location you will be placing your camera. Consider using a VOSKER security box to protect your V300 security camera against theft and breakage.
Here are some of the best practices for installing your VOSKER camera:
1.Place the camera about 3 feet above the ground or at the subject’s height.
2.Make sure your camera is perfectly upright, aiming parallel to the ground
3.Place the camera about 10ft to 100ft away from your target to have a good field of view.
4.Adjust the motion sensor sensitivity setting to “Medium” as a starting point.
5.The camera should be facing North or South to avoid glare or overexposure as the sun rises or sets.
Note: Make sure to place the camera in an area that gets a good amount of sunlight during the day (enough to cover 50% of the solar panel). This will help maximize the battery life of your camera.
For more information on how to install your VOSKER camera to get the best picture quality, read the article “What Can I Do To Increase My Photo Quality?”.
.
HOW TO ACTIVATE MY V300 CAMERA?
Before activating your camera:
• Charge the battery unit, V-LIT-B3, for at least 24 hours before putting it into the camera. Use the provided USB cable for charging. Once plugged in, the LED on the battery unit will turn red. You will know the charge is complete when the LED turns green.
• Open the panel at the bottom of the camera and insert the provided MicroSD card into the slot.
Note: A 24-hour charge of the battery unit is recommended before the first-time installation.
Activating your camera with VOSKER mobile app:
1.Download the VOSKER mobile app. This will allow you to control your VOSKER camera remotely.
2.Activate the first camera in your account.
1.Open the VOSKER app and log in to your account.
2.Press “ACTIVATE NEW CAMERA” from the Welcome screen. Follow the instructions.
3.Activate subsequent cameras in your account.
1.Press the “CAMERAS” tab, at the bottom of the screen.
2.Press the “+” button in the upper right corner.
3.Follow the instructions.
Activating your camera with the VOSKER web app:
2.Click the “+” button on the main screen.
3.Follow the instructions.
Turning your camera on:
1.When you turn on the camera, it will start searching for a signal and the status light will flash green.
2.Once the signal is stable, you should see steady signal bars, depending on coverage strength.
3.A 30-second countdown will start when the front delay LED starts flashing red.
4.Once the countdown is complete, the photo mode is activated.
The V300 powers on and secures a strong signal.
5.All the lights will turn off and the camera is now ready to take photos/videos.
6.In the “Cameras” tab, press the camera’s “…” menu to access the “Status” tab of your VOSKER application. This will allow you to check the “Last sync” to see if the camera has updated its status with the most recent information.
7.You can then change the settings according to your preference. The new settings will take effect at the next transfer time.
Note: There may be a 20-120 seconds delay for the camera to make the first communication or transfer the first photo/video to the app.
EVERYTHING YOU NEED TO KNOW ABOUT V300 LIVE STREAMING
A strong cellular signal on both devices will ensure smooth live streaming.
The V300 series offers the amazing feature of live-streaming as a 40-minute add-on that can be shared between compatible devices over a 12-month period.
Want to test it out first? Upon activation, every V300 includes two minutes of live streaming during the free seven-day trial period.
How to start a live-streaming
1.Check the signal. Make sure you have a good signal on the V300 and on your smartphone. A strong signal on both devices will provide a smooth experience and image quality.
Check
how to improve your connectivity.
2.Press the yellow button. You have two ways of starting a live-streaming session.
• Via the Home screen. Click on the round yellow button to get to the live-streaming screen. If you have many V300, you will have a button for each one.
• Via every photo/video. Click on a picture or a video taken by a V300, and press the yellow button “Start Live Streaming”.
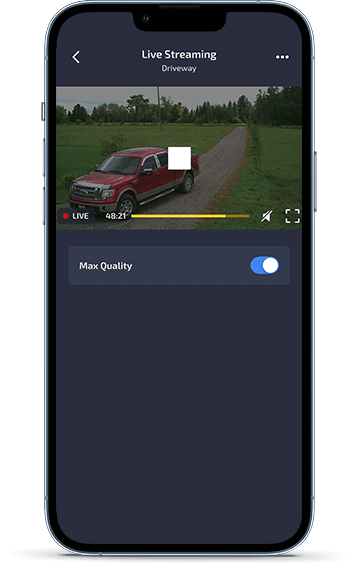
3.Press “PLAY” in the dark video screen. It might take a few seconds to load on your phone. The stronger the signal, the less time it will take to start.
4.OPTIONAL – Boost the quality. Toggle on the Max Quality under the video to get a higher bit rate (960 kbps). At this pace, the time left is reduced by four. It means if you have 40 minutes left in High Quality, it will turn into 10 minutes in Max Quality.
Remember: if the live-streaming may be choppy at times, a recording in Full HD will appear in the app after the session, and will also be saved on your MicroSD card.
5.Monitor how much time is left. In the video, you can see how much time is left on your Live Streaming add-on and make smart decisions. If you are running out of minutes, you can buy another add-on, valid for the next 12 months, shareable among your live-streaming cameras.
6.Watch it again in Full HD. Get the full quality once the live-streaming is over, without any buffering. It will be available in the app for a full year. You can also find The Full HD video on the MicroSD card in the camera.
What is the difference between live-streaming and 10-second Full HD video?
The live-streaming allows you to see what is happening live around your camera. It can last as long as you have live-streaming minutes in your account. It is great when you receive a notification, and you want to check if there are still some movements.
Your camera stores a 10-second Full HD video on the servers at every detection. You can request the video to understand better what happened during the detection. Simply click on a photo and press the button “Request Full HD video”.
What is the impact on the battery life?
The more you use those features, the more it takes a toll on the battery life.
This is especially true if the V300 doesn’t get a steady and strong signal. Just like your cell phone, the camera will work harder to connect to the cellular tower and communicate information.
If you see the battery life dropping, consider adding the Universal Solar Powerbank to sustain your camera from 6 to 12 months.
How to buy additional live-streaming minutes?
You can easily purchase a live-streaming add-on which will add 40 minutes shareable among all VOSKER streaming devices for the next 12 months.
Mobile app:
1.Click on the “Cameras” tab at the bottom of the screen.
2.Click “See plan” under one of your V300 cameras.
3.From the “Plan” tab, click “ADD” live streaming.
4.Follow the purchasing steps.
Web app:
1.Once logged in to the
web app,
click on “MANAGE PLAN” under your V300 model.
2.Click on “Add” under the live streaming option.
3.Follow the purchasing steps.
Warning: you need a transmission plan (Base, Alerted or Elite) before buying the live-streaming add-on.
.

 The V300 powers on and secures a strong signal.
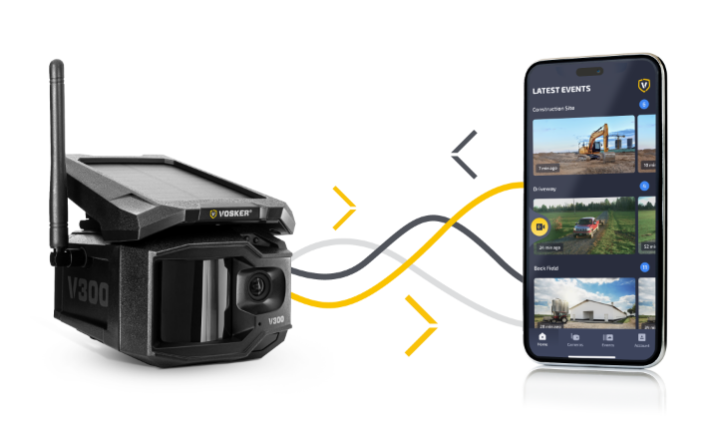 A strong cellular signal on both devices will ensure smooth live streaming.
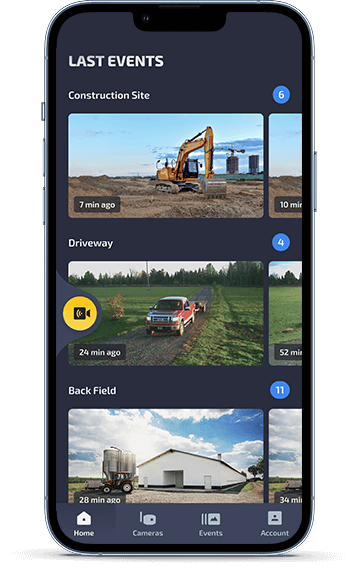
Add Comment