How to configure Deep Search function in the Portal
VORTEX Deep Search
Deep Search is a feature in VORTEX cameras that uses AI to enhance video searching. Instead of going through videos frame by frame, Deep Search sorts through metadata to quickly find specific scenes or attributes. This means you can easily locate moments with certain objects, like people or vehicles, using functions like Attribute Search, Scene Search, and Re-Search. In essence, it’s a smarter, faster way to find exactly what you’re looking for in your video recordings.
How to use the Deep Search feature?
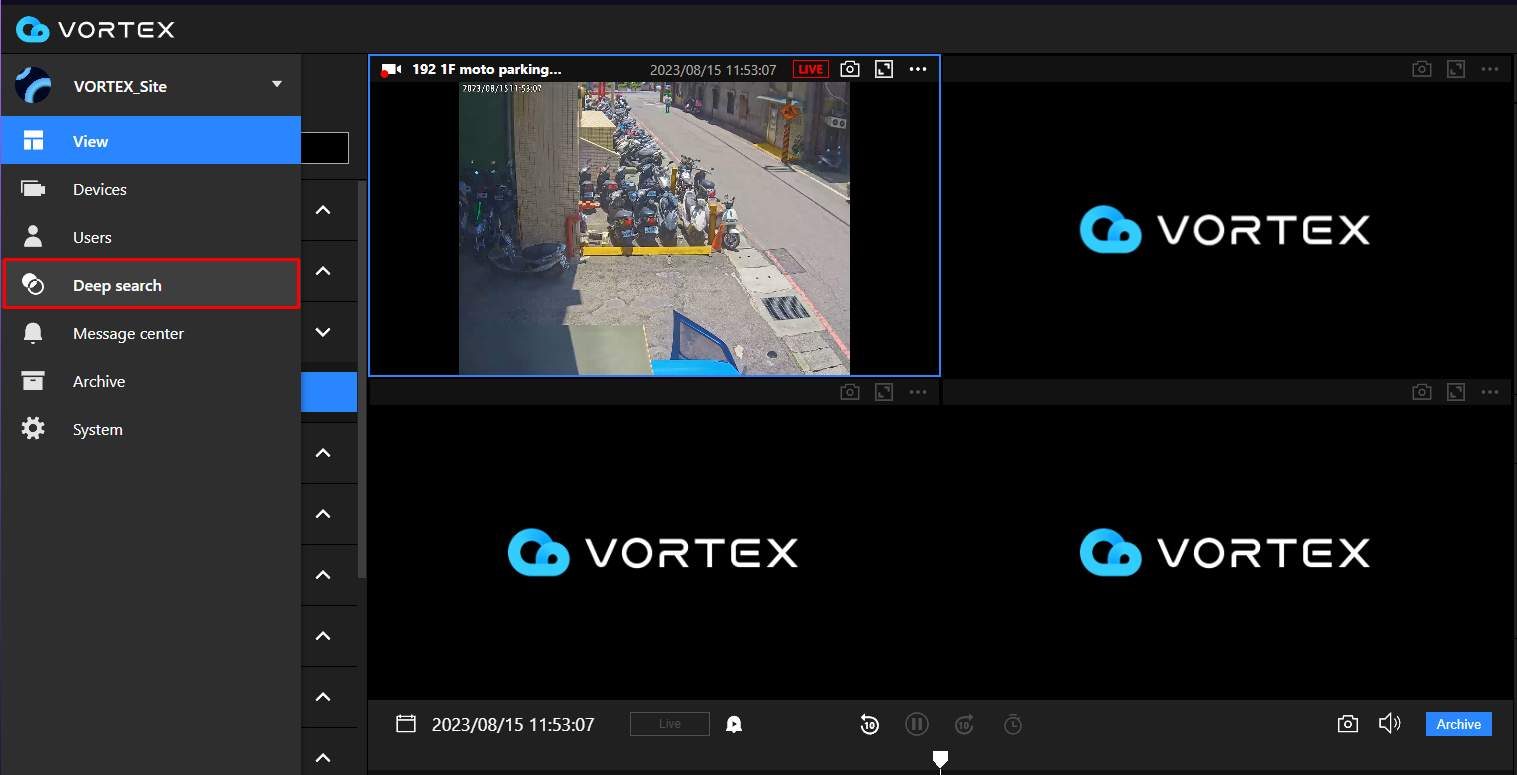
Step 1. In the Portal interface, go to the function tab and select “Deep Search”.
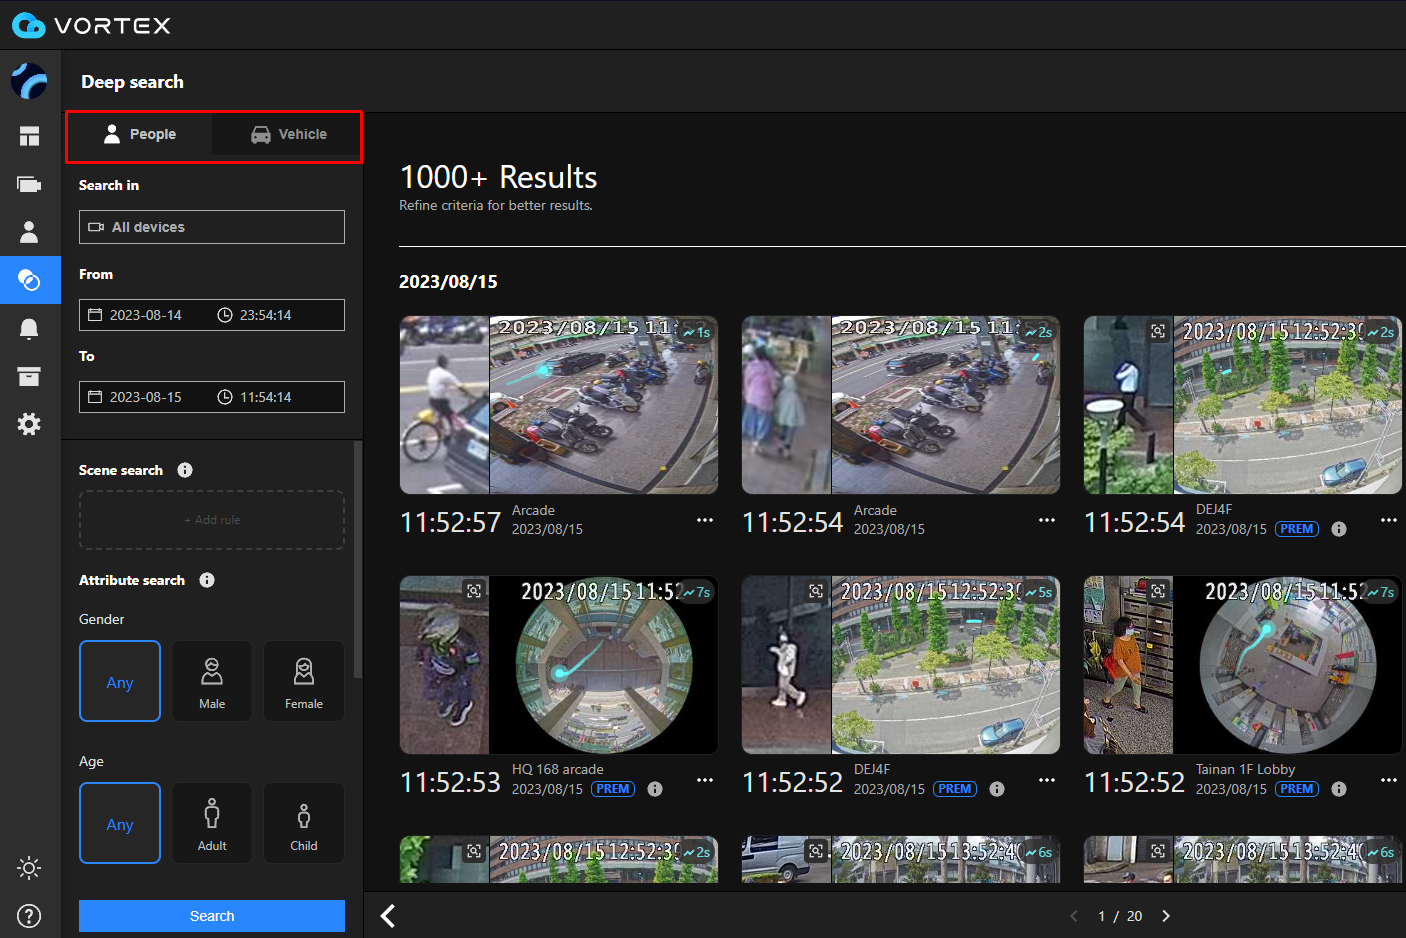
Step 2. By default, the Deep Search panel displays recordings from all cameras. If you want to search for people with specific features, select the “People” tab. If you’re looking for cars with specific features in your video recordings, choose the “Vehicle” tab.
Step 3. Select the group of cameras you wish to search by clicking the “Search in” button. This action will pop up a window displaying all the groups configured in your VORTEX account.
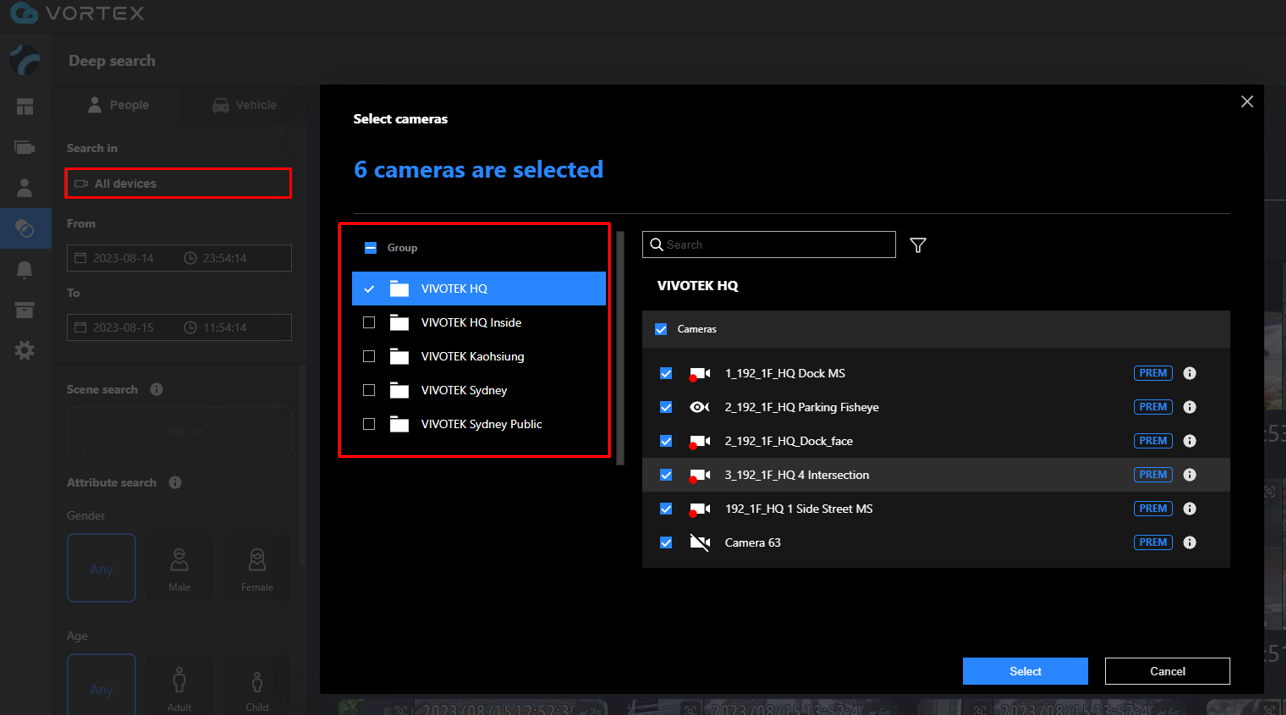
You are free to select multiple groups or individual cameras based on your needs.
Step 4. Configure your search parameters depending on your requirements:
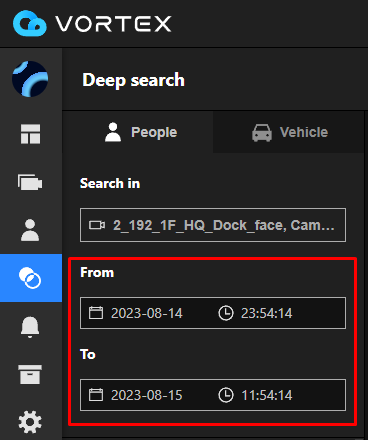
(A) From ~ To: Sets the time range that is going to be used for search.
(B) Scene search: A feature that is available when only one camera is selected. It enables you to search based on a specific camera rule.
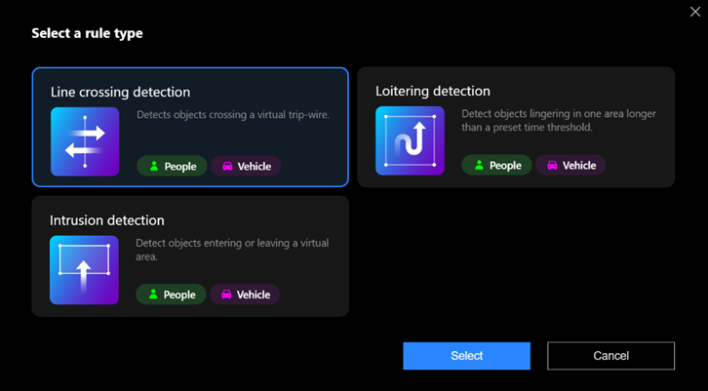
This feature allows you to establish video content analysis rules, such as Line Crossing, Loitering Detection, or Intrusion Detection, within the camera’s field of view.
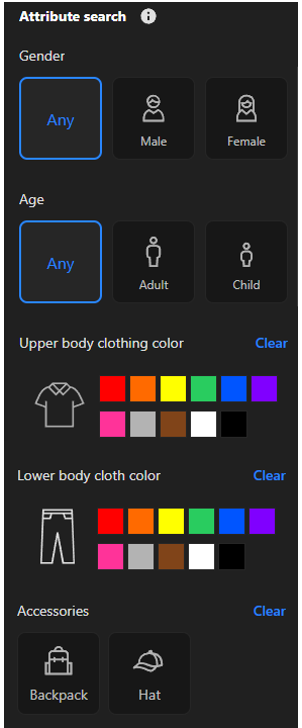
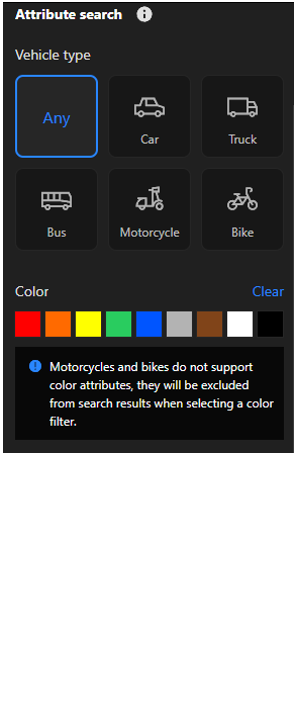
(C) Attribute search: This feature allows you to filter depending specific appearances.
|
People Attribute Search |
Vehicle Attribute Search |
|
|
|
If you want to search for a specific feature only, make sure to deselect the options you don’t need. For instance, in Vehicle Search, if you don’t wish to look for appearances of trucks, simply deselect the Truck type.
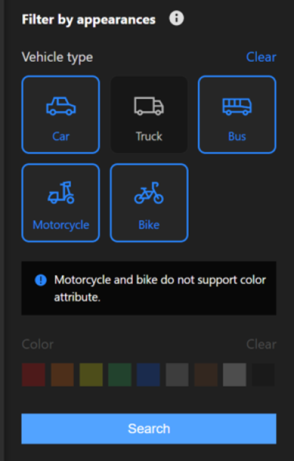
Similarly, in People Search, you can refine your search results by selecting or deselecting criteria like Gender, Age, Cloth Color, or Accessories.
Note: For people appearances in Deep Search, the search criteria are only applicable to Premium cameras. Choose one or multiple Premium cameras to initiate the search.
Step 5. After setting your search parameters, click “Search” to begin. your search.
Accessing past events using the portal Message center
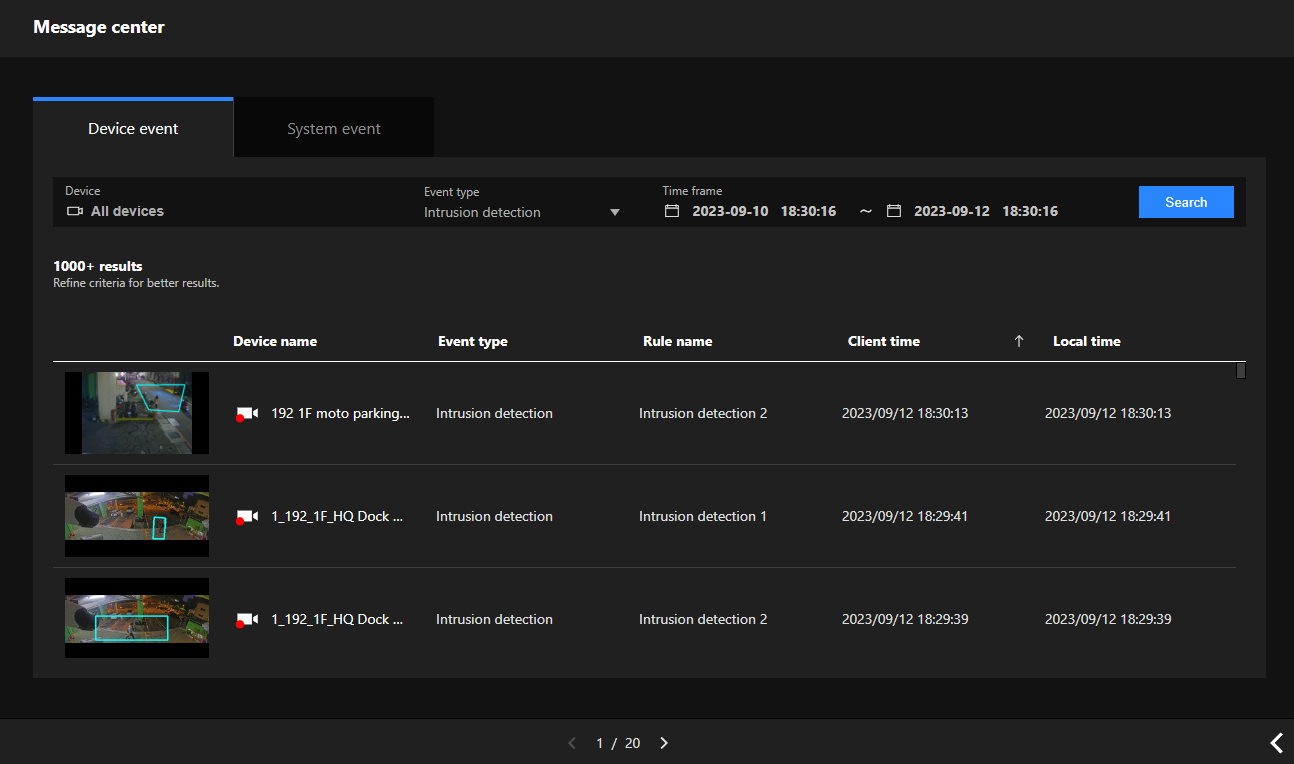
The Message Center serves as a hub for viewing past events. Only events that are associated with pre-configured triggers will appear in the list.
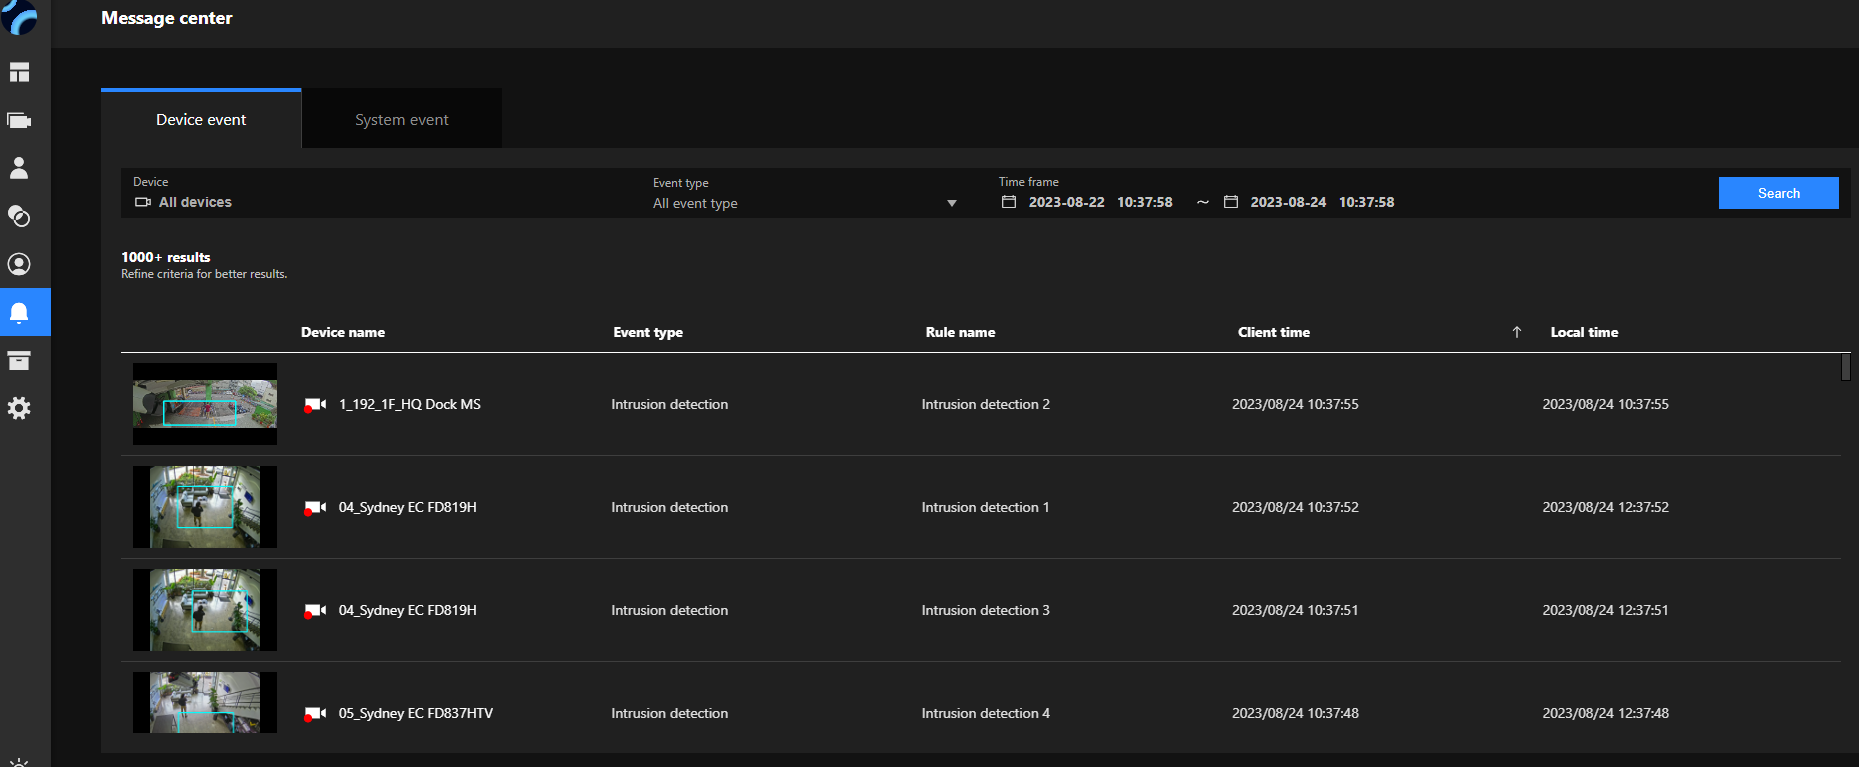
How to Filter Events:
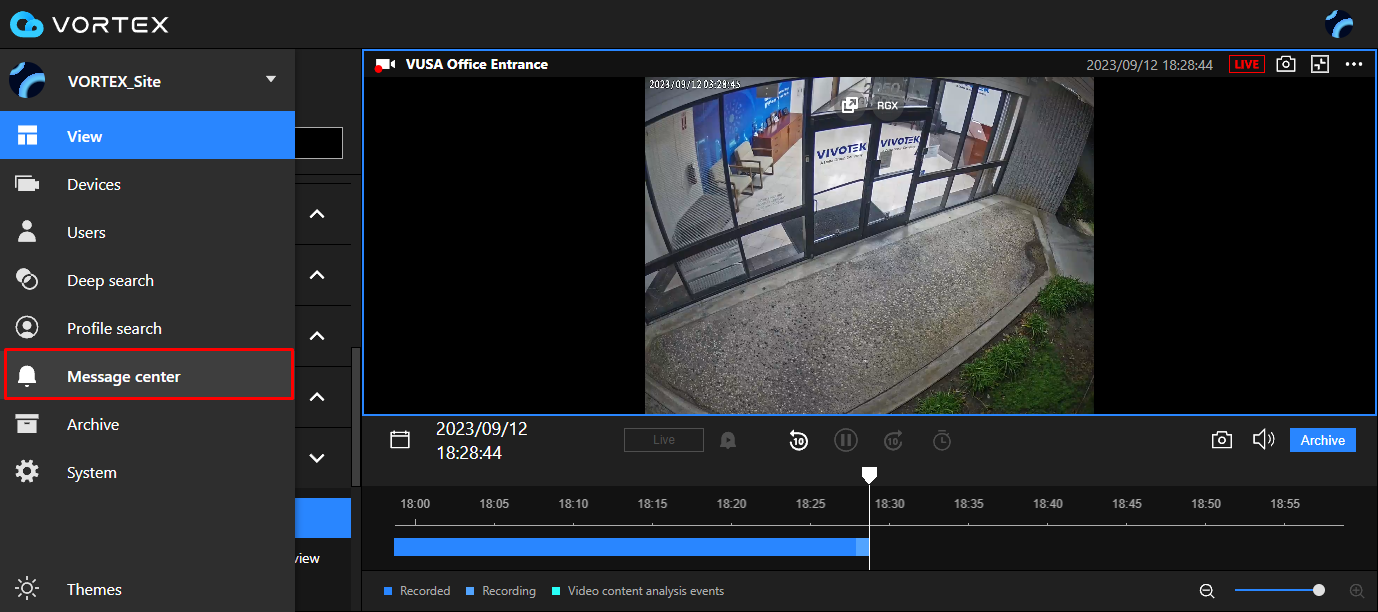
In order to filter events you will need to access the Message center interface, to do so click on the bell icon in the VORTEX Portal interface.
Once inside the Message Center, you’ll have the option to apply different filters according to your needs:
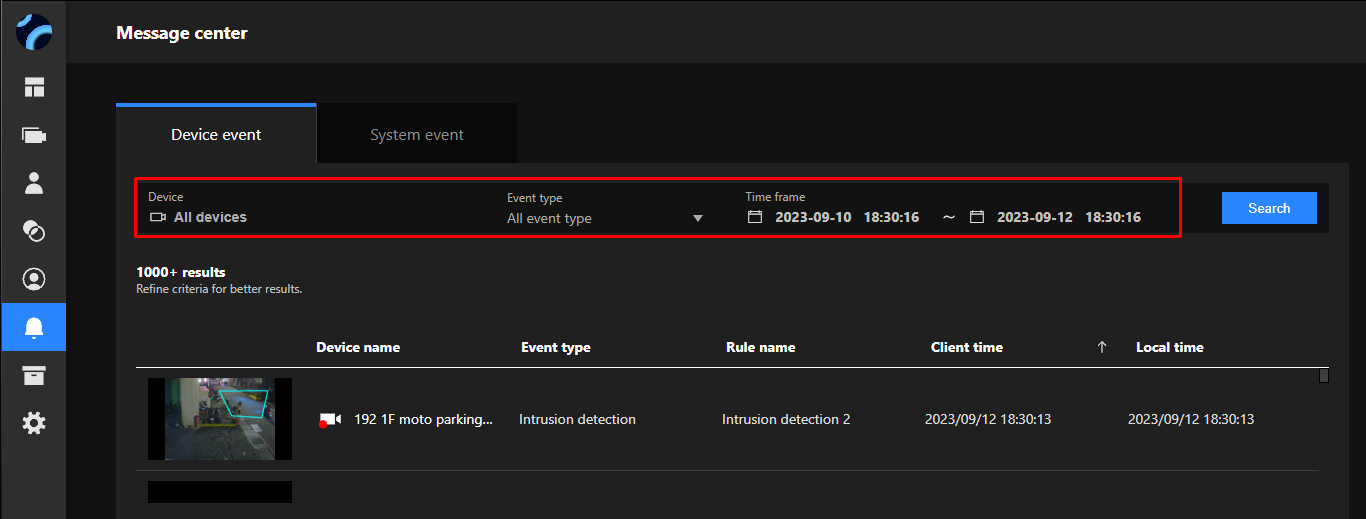
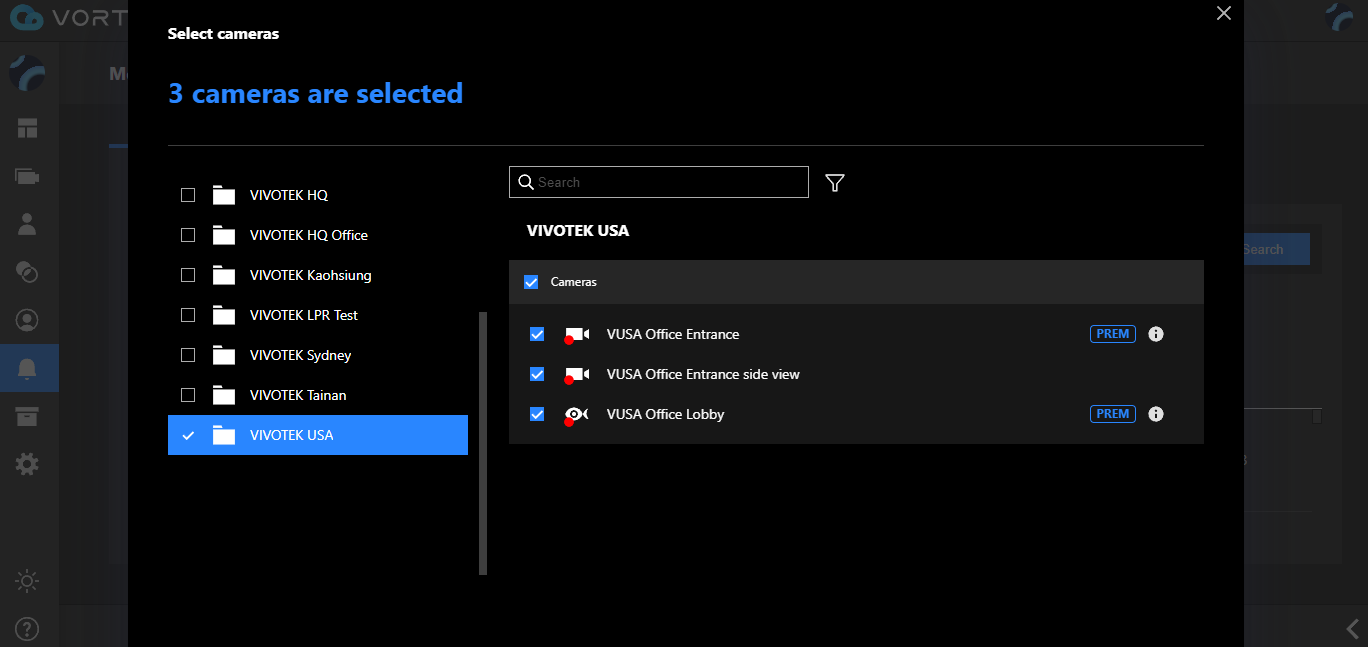
Device: Manually select which devices you want to filter events for.
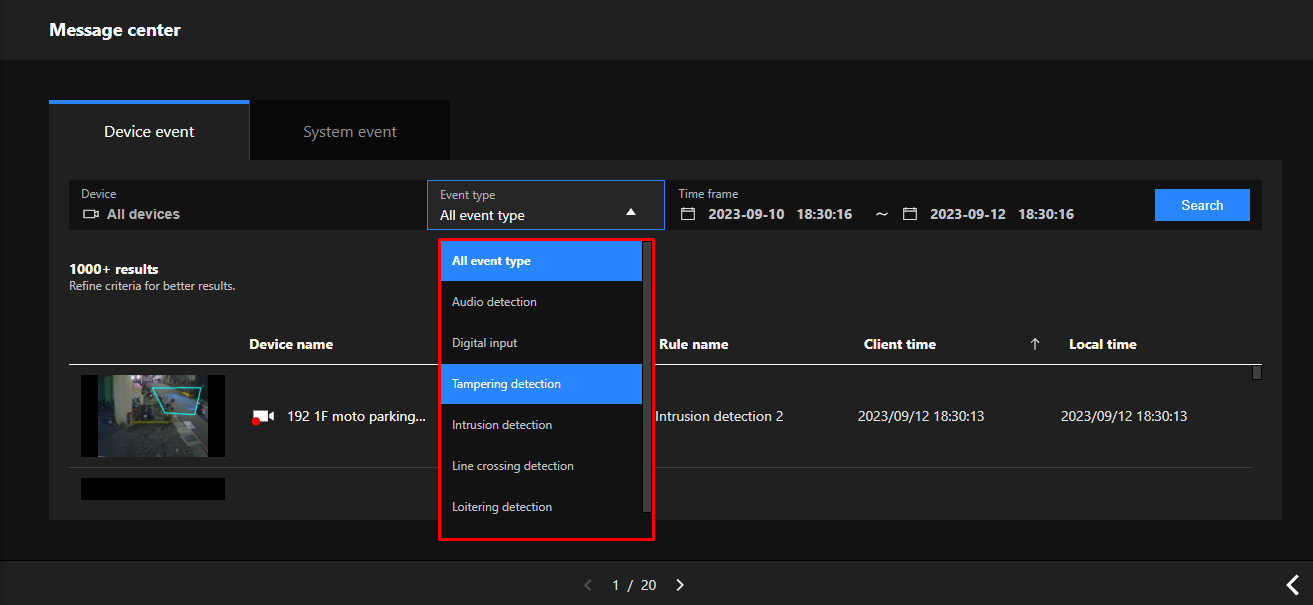
Event type: Choose the specific type of events you are interested in reviewing from already recorded videos.
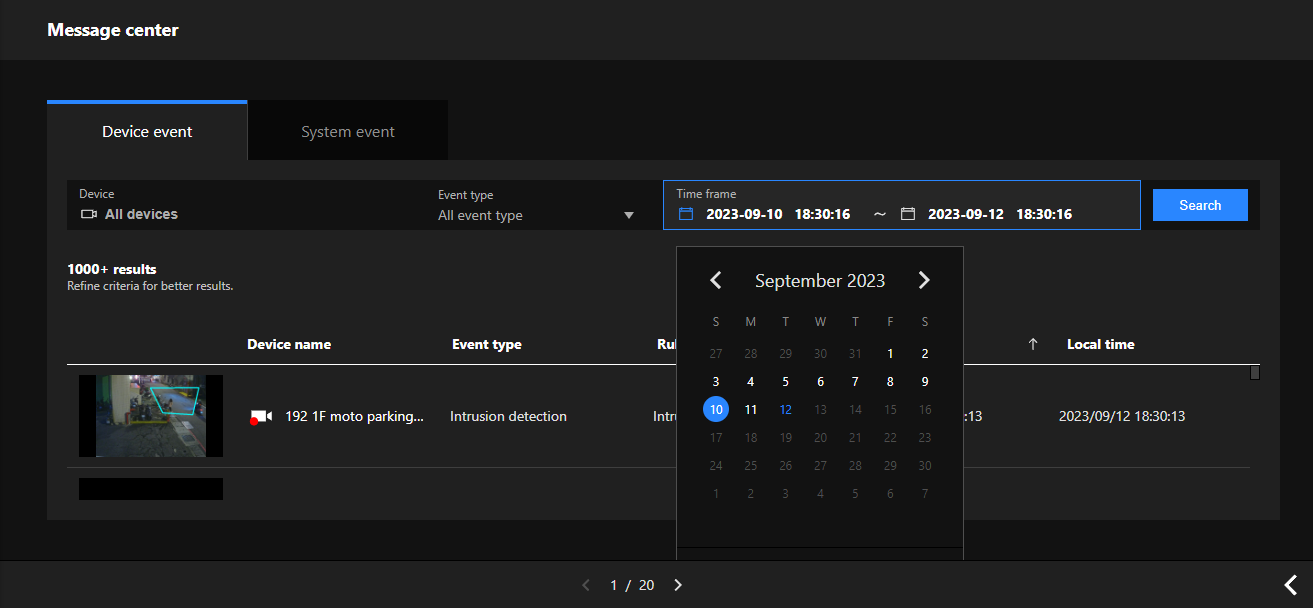
Time frame: As the name suggests, set a specific time range to narrow down your search results.
Example Scenario:
Let’s say you want to review any intrusions across all devices over the past two days. To do this follow the next steps:
Step 1. Select “All Devices” from the Device filter.

Step 2. Choose “Intrusion Detection” from the Event Type filter.

Step 3. Specify a two-day time frame in the Time Frame filter.

Step 4. Once all settings are configured, click the “Search” button.

Your list will now display all intrusion events from the past two days across all devices.
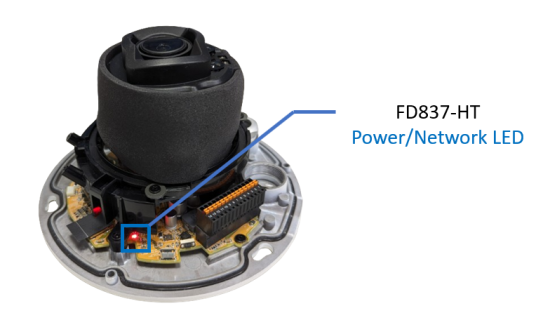
Understanding the LEDs Indicator of a VORTEX device
Question
How to interpret the meaning of LED light indicators on the VORTEX device?
Answer
In order to verify the LED status of a VORTEX camera you will need to remove the casing of your device.
This procedure necessitates the use of unpacking tools to remove the device casing.

Once the casing is removed, you’ll be able to observe the LED indicators on the VORTEX device.
The table below illustrates the various device-related indicator lights and their associated device statuses.
|
LEDs status |
VORTEX Device Status |
|
All LEDs light => All LEDs unlight => Steady Red =>Steady Red + Blink Green once per sec |
System booting |
|
Only Steady Red |
Power on; Network fail |
|
Steady Red and Blink Green every 1 sec |
Power on; Network works |
|
Steady Red and Blick Green every 0.15 sec |
Upgrading Firmware |
|
Blink Red every 0.15 sec |
Restore default |
|
Press the reset button util all LEDs blink fast (0.15sec/time) |
Reset button for reset |
How to configure a Network Speaker and trigger an automated broadcast
The AU-001 Network Horn Speaker is a specialized outdoor audio device designed to integrate with security systems. When activated, it broadcasts pre-recorded audio clips to deter intruders. Using this network speaker as a deterrent can help avoid confrontations that might otherwise occur if someone were to intervene physically.
The AU-001 can be integrated into the VORTEX platform and set to perform specific triggers depending on user requirements as long as you have acquired a Network Speaker license.
Device Discovery and Configuration
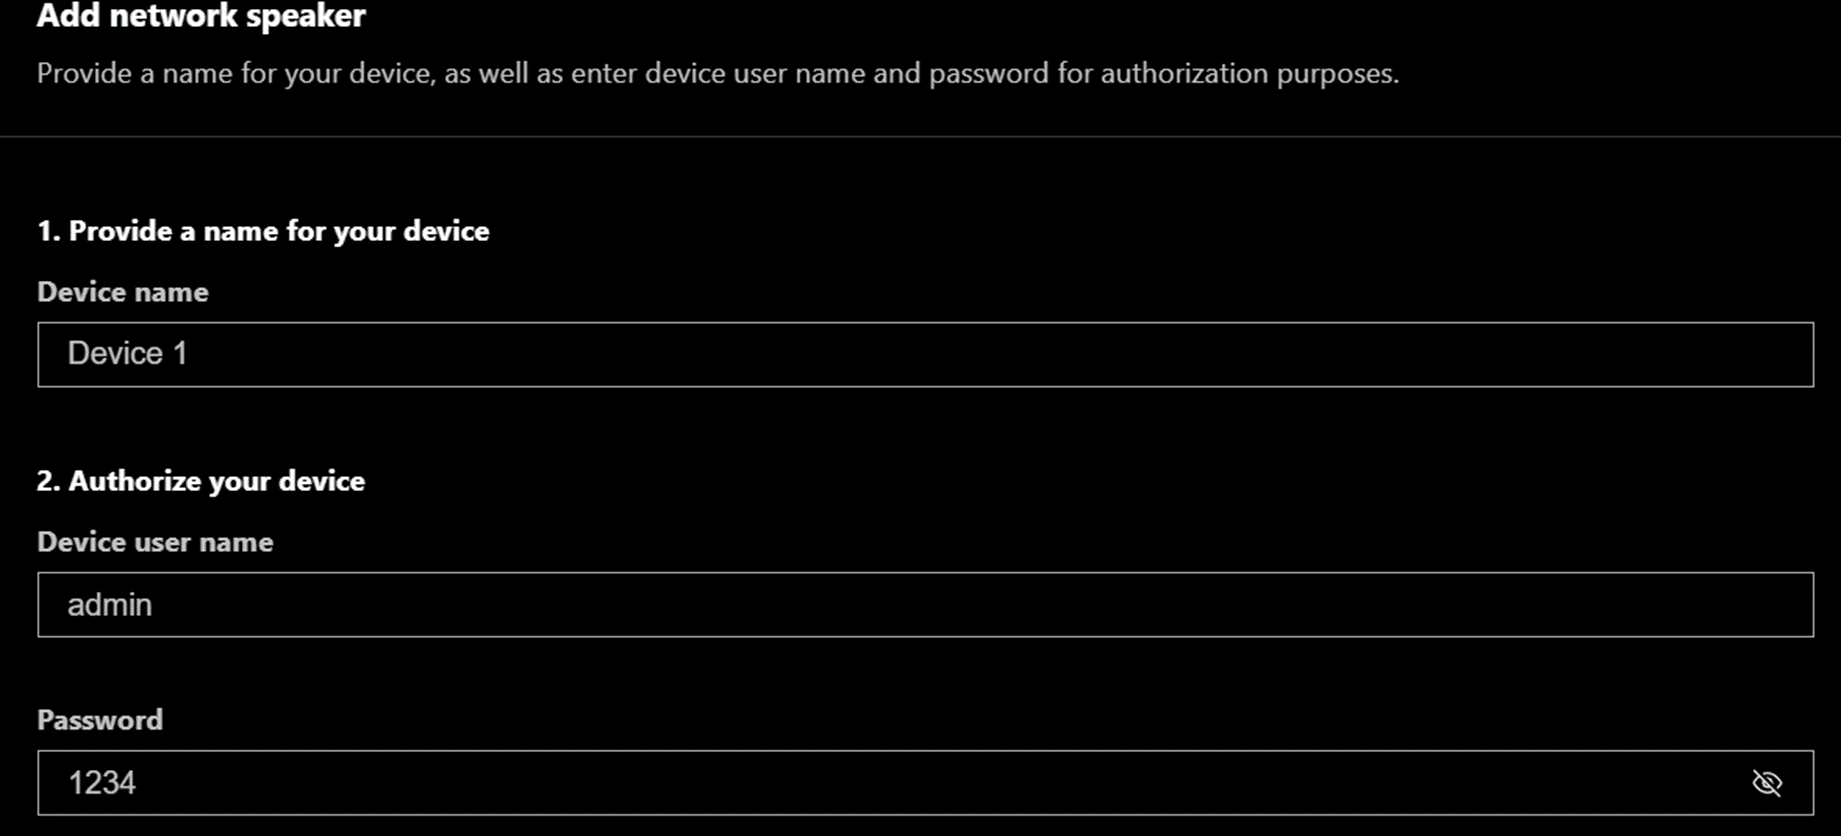
1. Device Discovery:
Navigate to the device settings page in VORTEX to find the network speaker you wish to add.
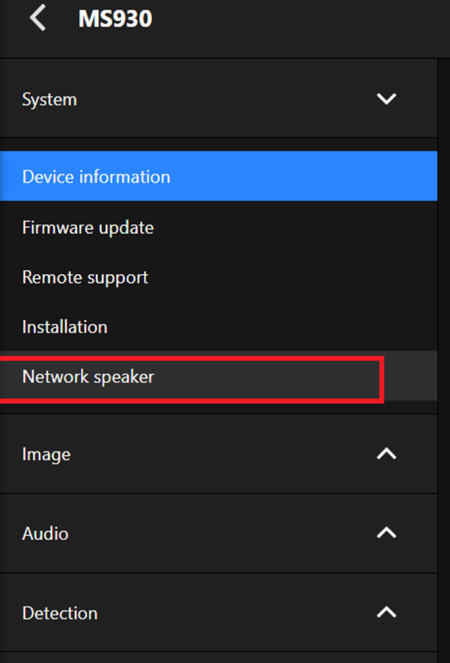
The software will automatically scan for all network speakers on the same Local Area Network (LAN) as the VORTEX camera.
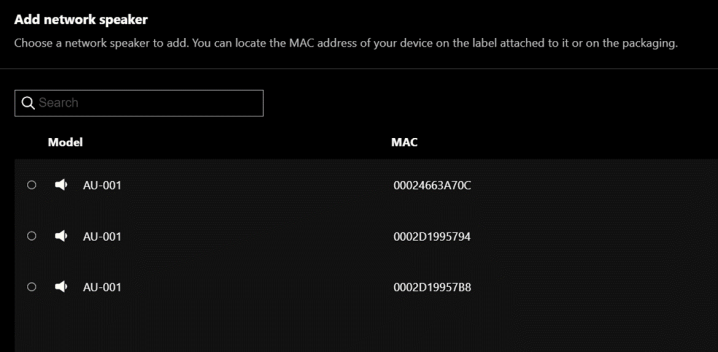
After all available network speakers are found, you can choose which speaker to add into VORTEX and configure.
2. Authorization:
To authorize your device, enter the default username/password. The default credentials are admin/1234.
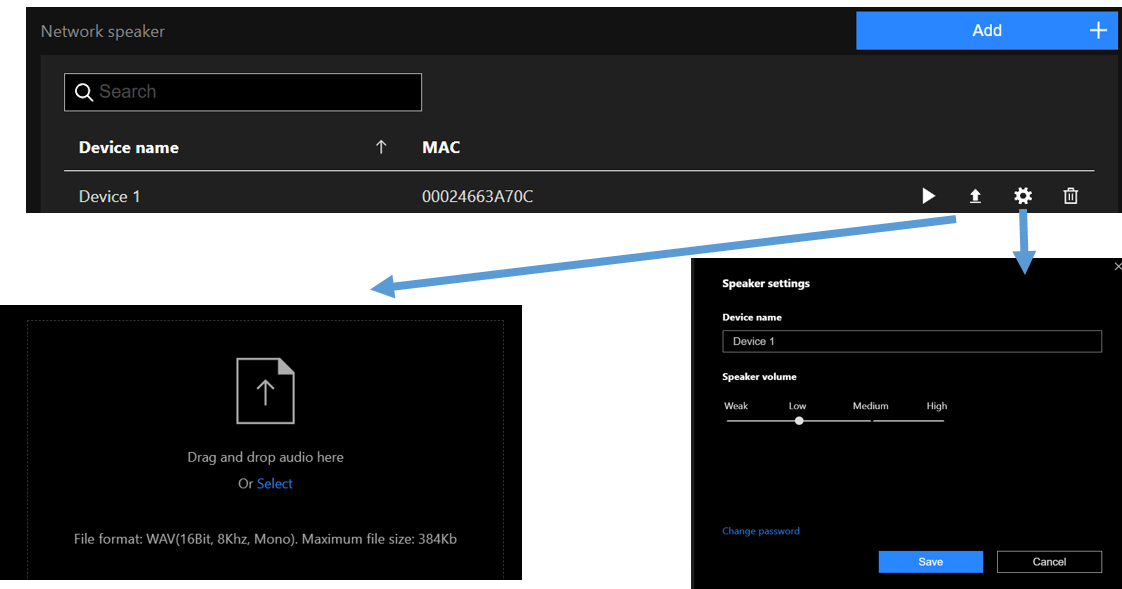
3. Operational Settings:
After you have associated the network speaker with a camera, you can upload audio clips, adjust the volume, and change the password for added security.
Alarm Management
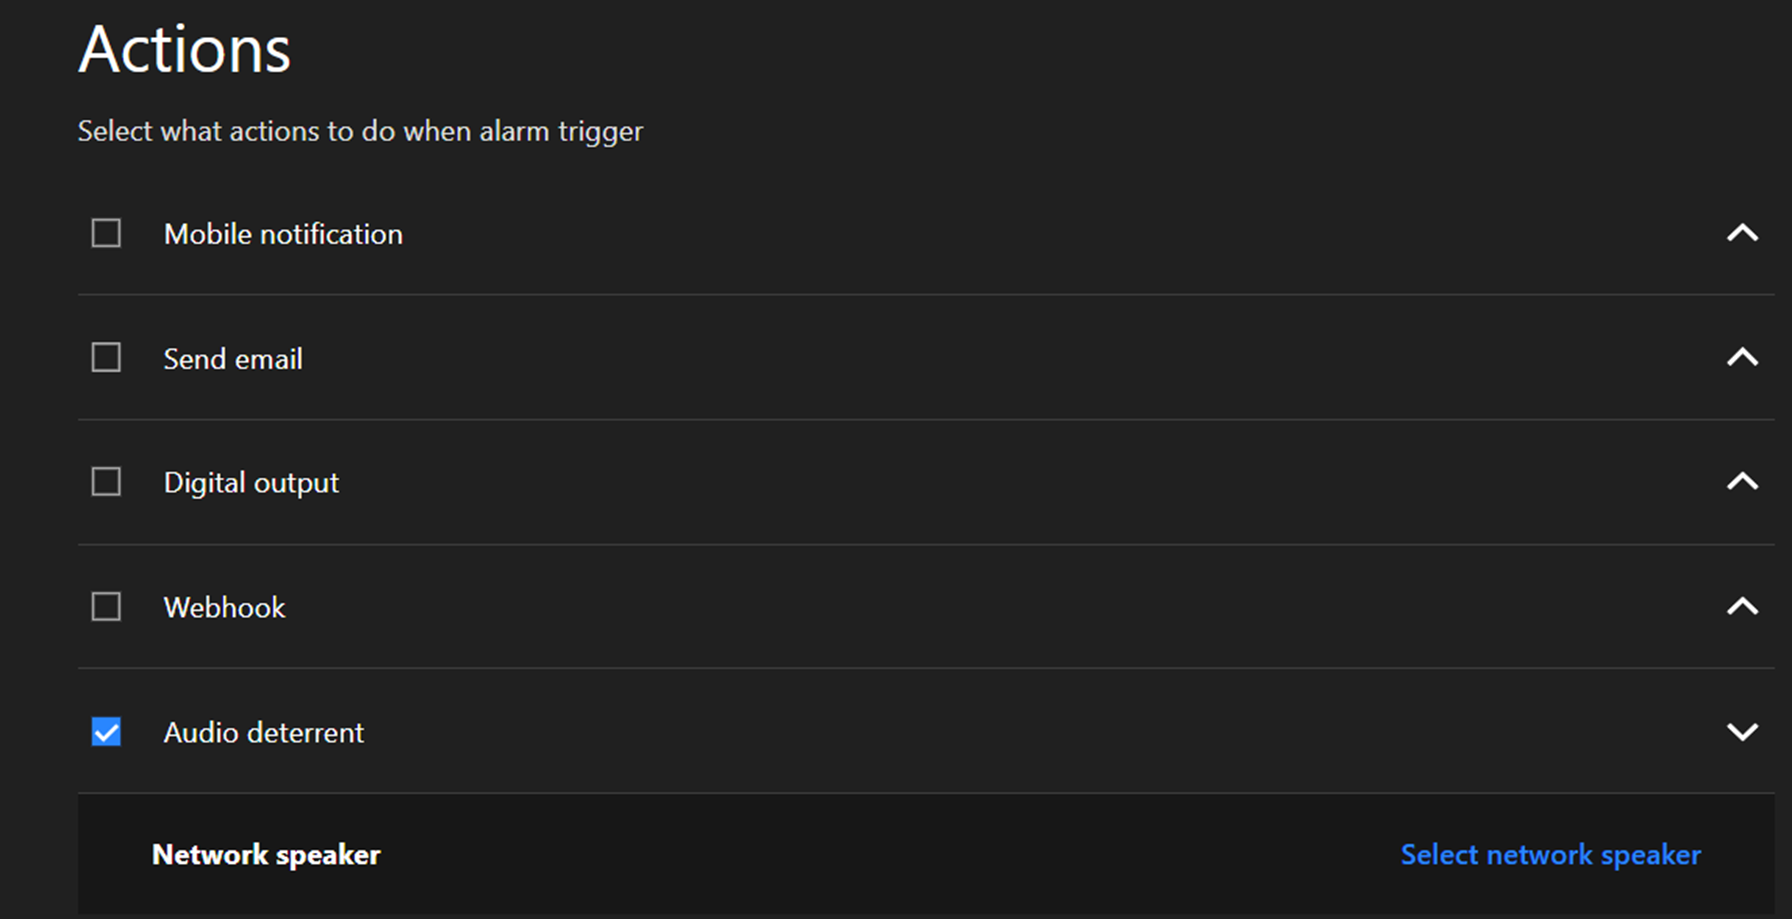
If you have successfully configured your network speaker, an “Audio Deterrent” option will appear in the alarm management actions menu. From here, you can select which associated network speaker should sound the alarm in case of an intrusion.
How to configure camera exposure setting
If you would like to configure exposure settings for each camera. You can find it under image tab.
WDR Pro: This refers to the Wide Dynamic Range function that enables the camera to capture details in a high contrast environment. Use the slide enable to enable and disable the function.
WDR PRO default is on for all vortex camera You can also configure exposure level here, with ranges from -0.7 to +0.7 (dark to bright).

Please note that FD639/IB639 do not support WDR PRO, and therefore don’t have this page.
How to create Your First Group and Add Your Camera
Invite a User:
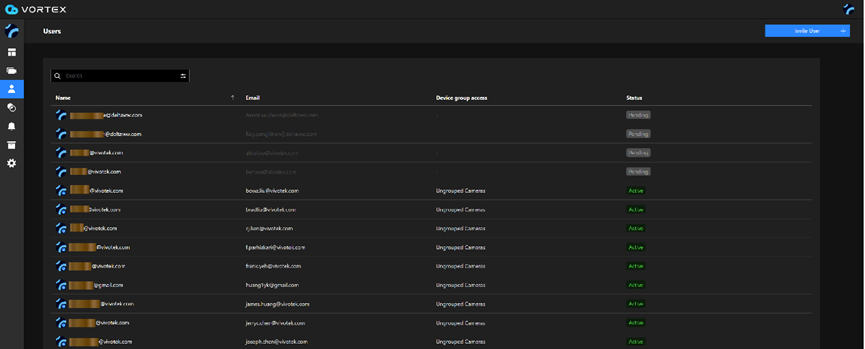
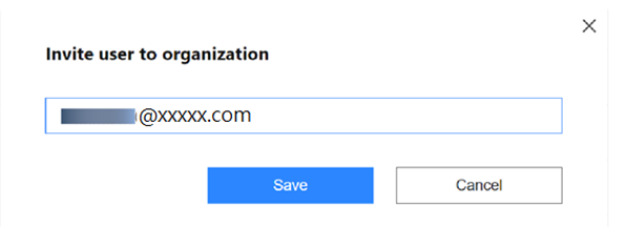
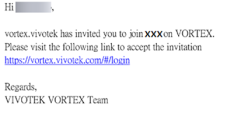
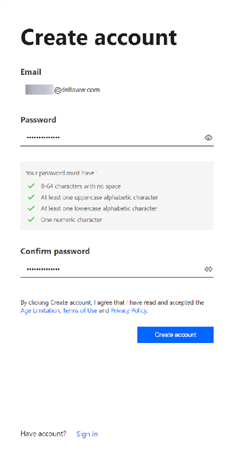
4. The invited user should then log in to create a VORTEX account. Click Create account.
Enter a valid Email address and password.

6. The invited user will receive the following Email. He/she should then click to confirm the invitation.

7. Click Accept to confirm the invitation.
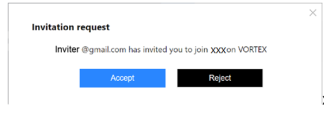
Creating a Group
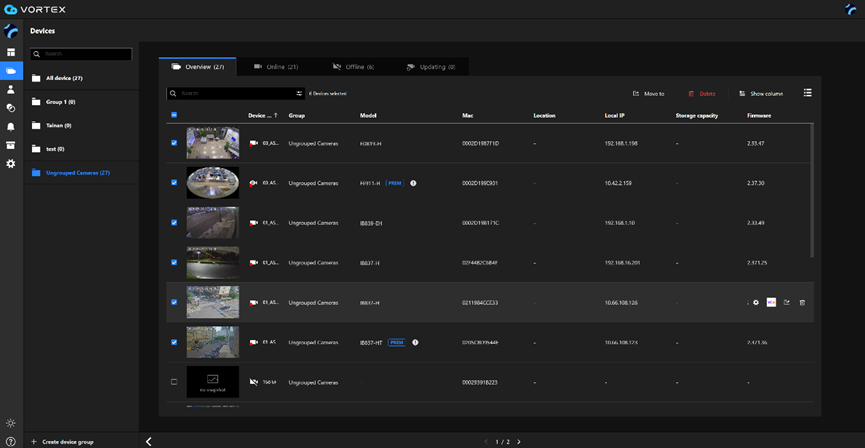
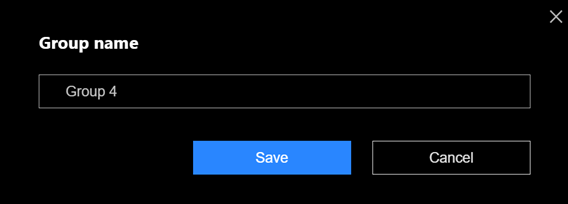
Enter a name for the group.
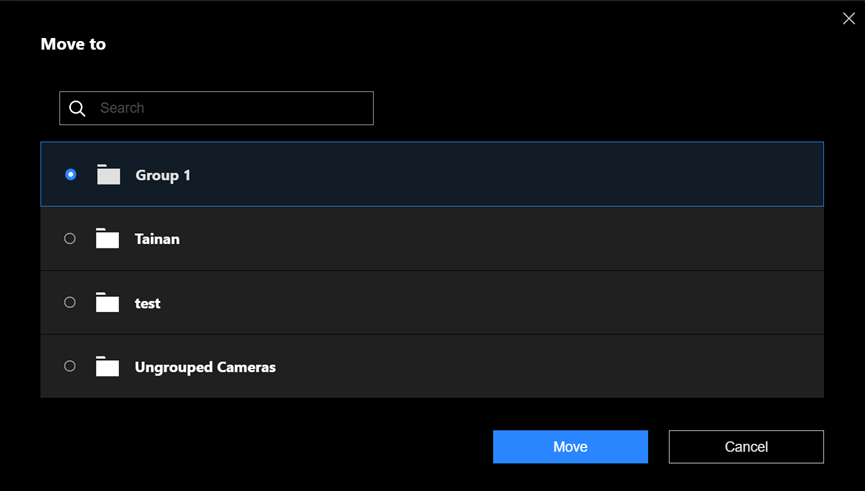
Camera information and firmware upgrade
The Devices panel provides access to all connected cameras.
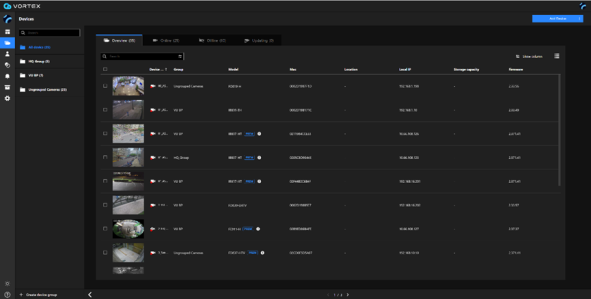
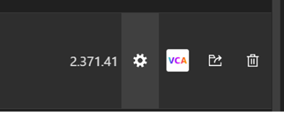
To access the Settings page of an individual camera, click on the Settings button at the far-right end of the attributes row.
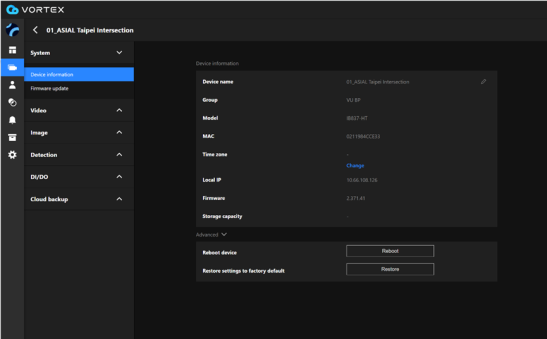
The Information page will prompt. To reboot or restore camera defaults, click on the Advanced button.
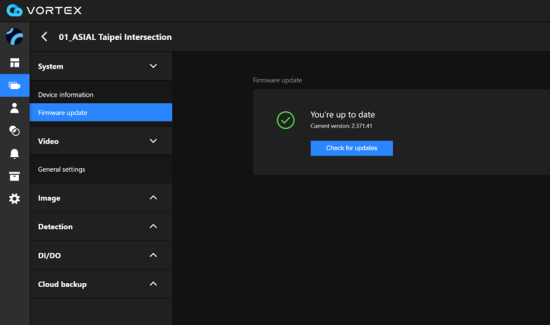
For checking the Firmware update, click on Firmware update.
Cloud backup settings
Professional license is required to back up your videos to the cloud.

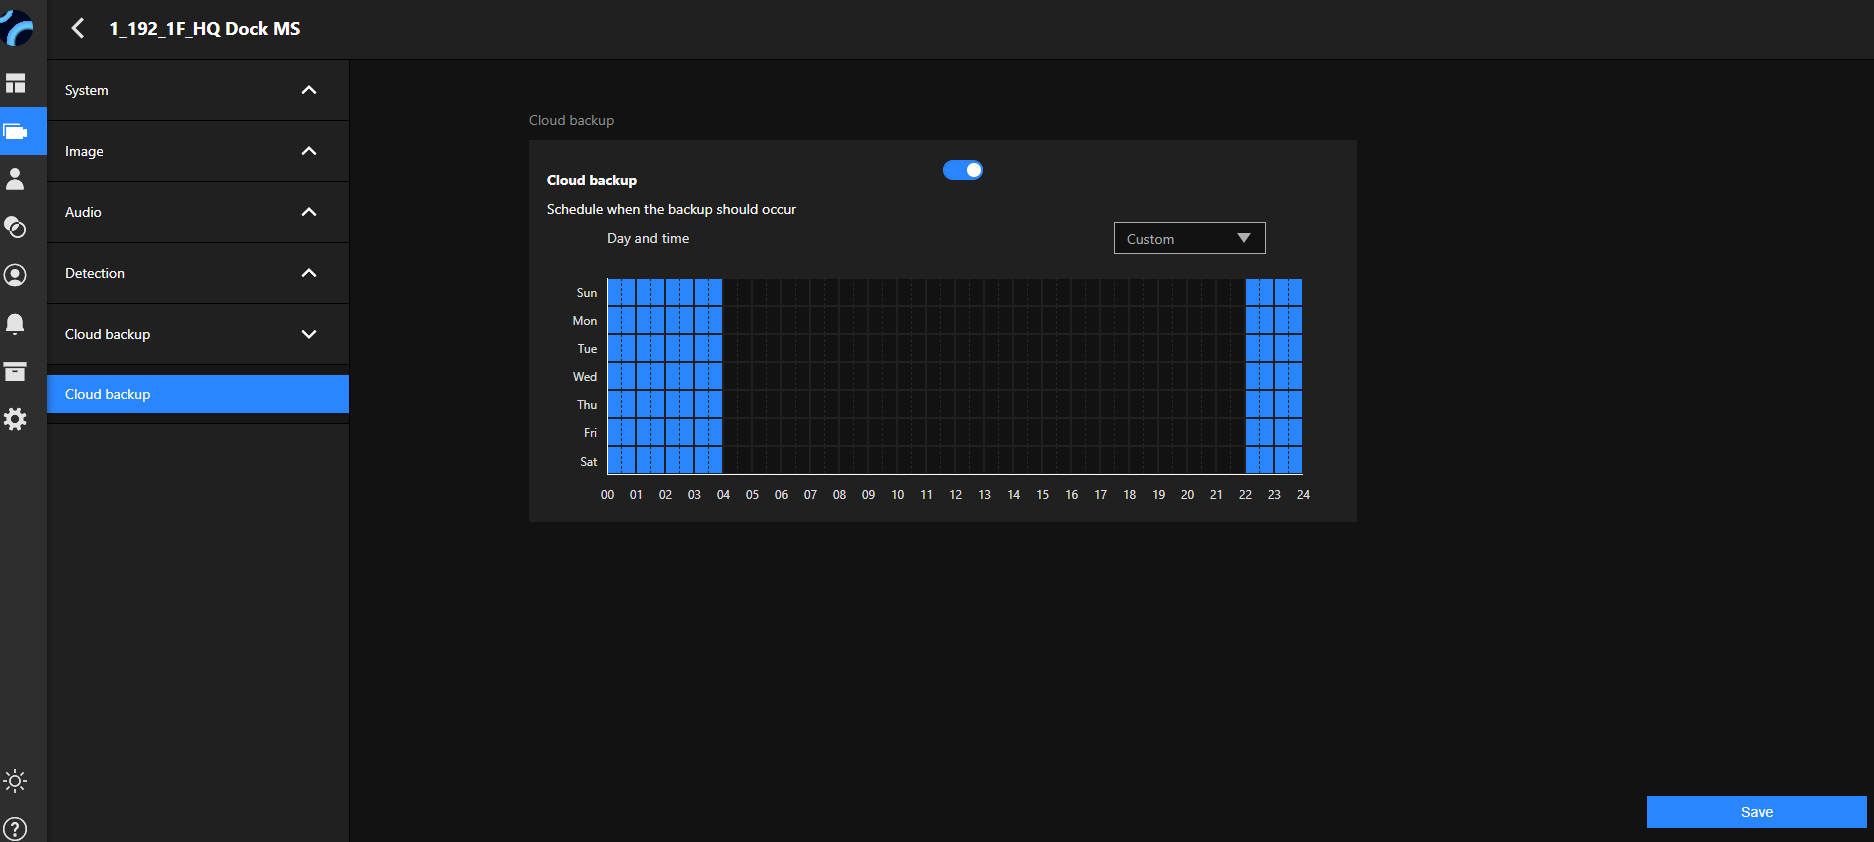
By default, Cloud backup is disabled.
Enable the Cloud backup by sliding the toggle button. When enabled, videos will be stored to the cloud storage. Set your desired schedule to backup your video footage to the cloud by dragging the mouse across the screen.
Click Save to preserve your setting.
How to search for archives
Archive
The Archive page provides access to the video clips you saved on the View page. The default displays 50 video archives.
You can search for a specific archive using the Search function using the came name or footage time frame using the time frame calendar on top.
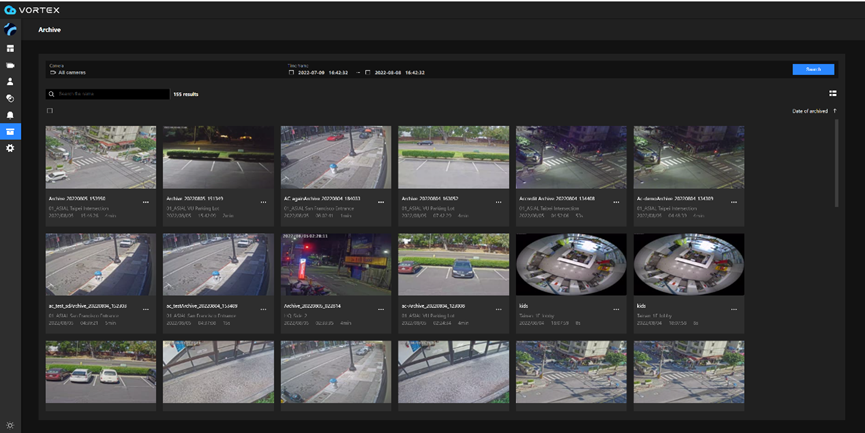
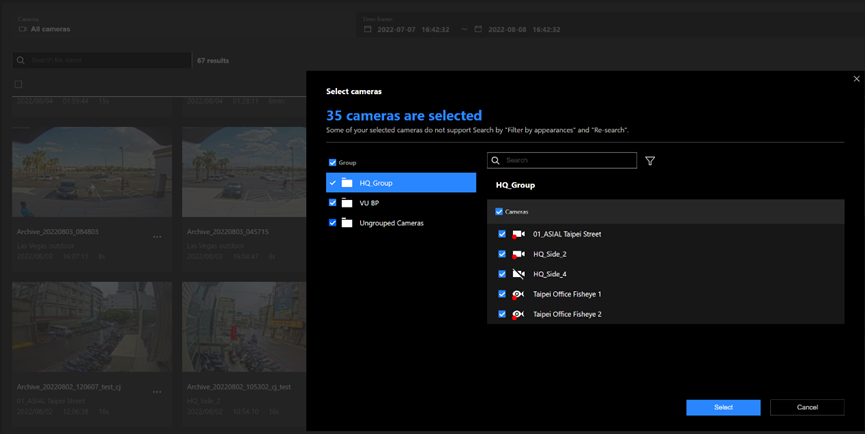
If you want to search for archives from specific cameras, click the camera tag on the upper left. The camera selector will appear. Click on Groups to reveal the cameras within the groups, and then click Select.
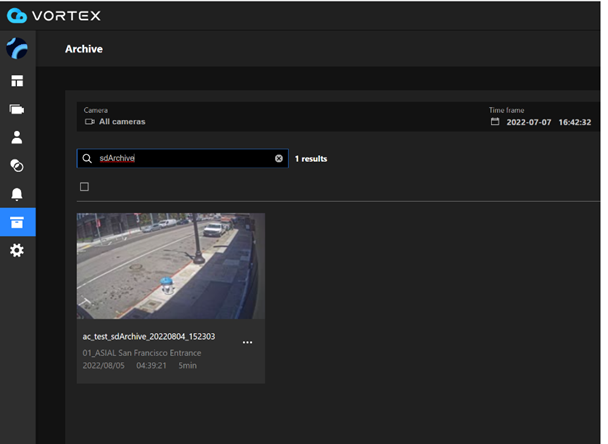
You can also search for archives using key words by entering a keyword (camera name) in the Search pane.
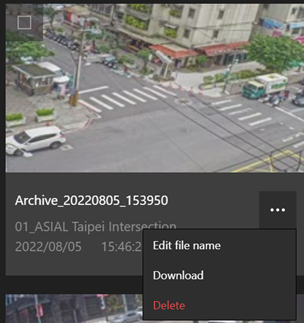
With the results displayed on screen, select an archive by selecting the checkbox (mouse over the snapshot) on the upper-left of the snapshot, and click Download or Delete.
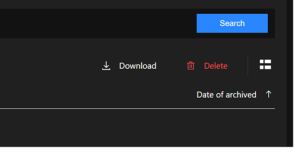
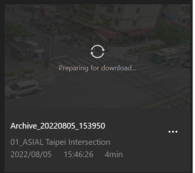
The download may take a short while during the initialization.
You can click on the properties button below the snapshot to edit the file name.
How to modify the video orientation and rotation of the camera in VORTEX Portal
In the VORTEX Portal interface, you can modify the video orientation or rotation of your camera based on your specific needs. You can access these functionalities by selecting your device and then navigating to System > Installation.
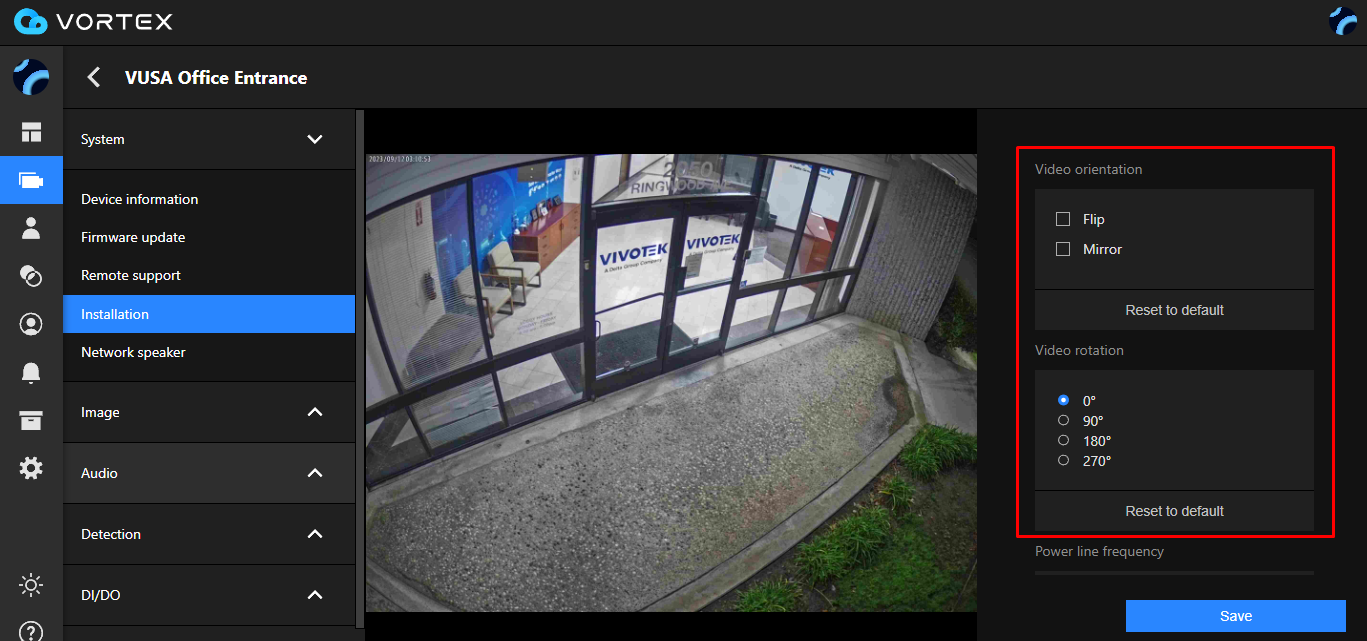
The following will explain in detail each function and its usage:
Video orientation:
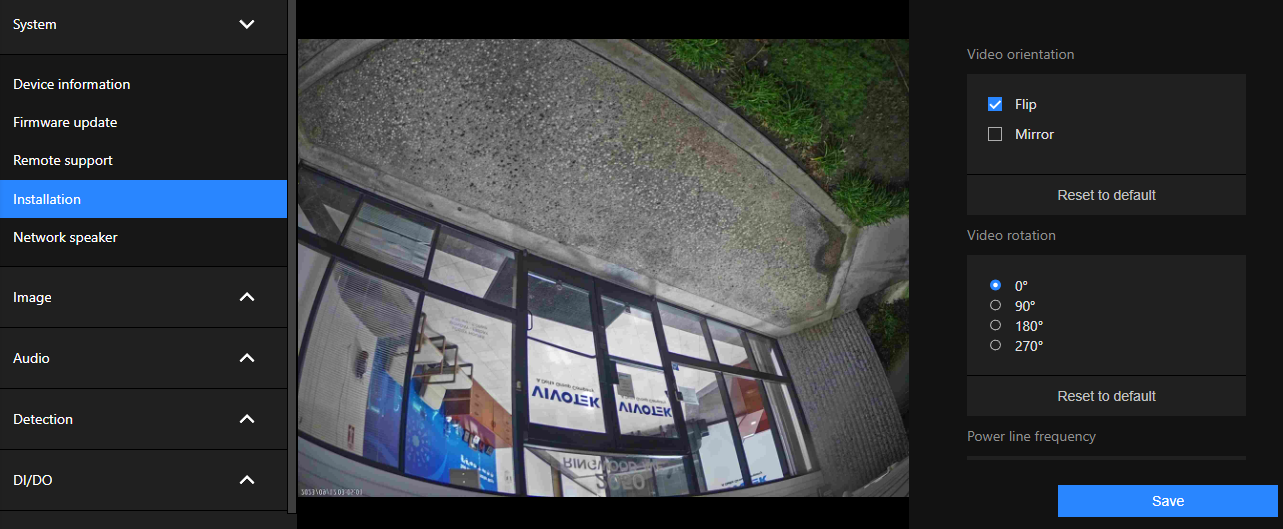
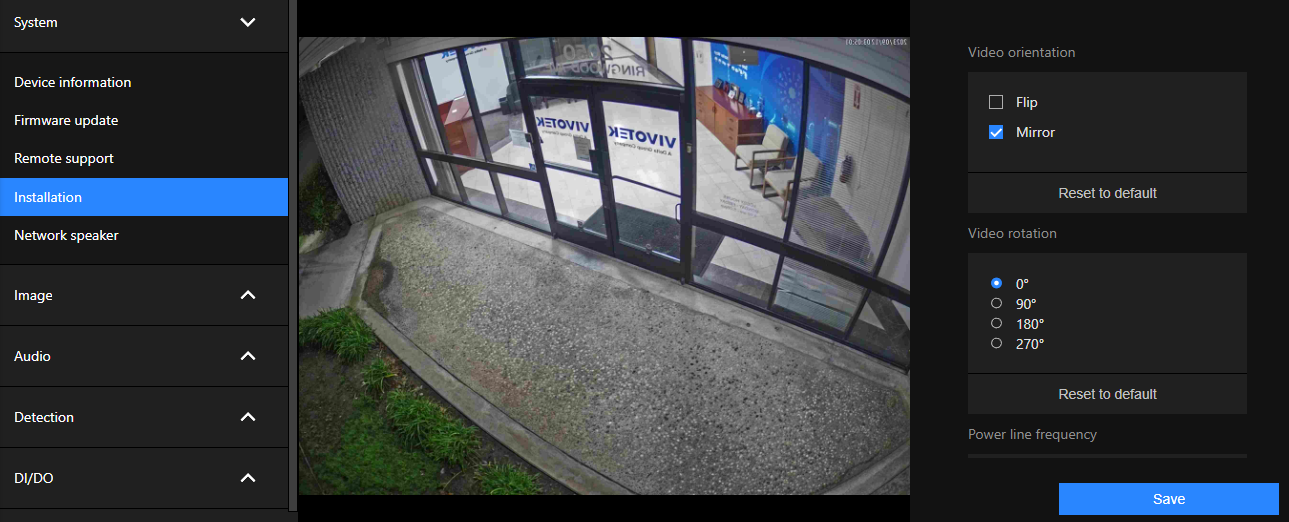
You can select both options if the Network Camera is installed upside-down (e.g., on the ceiling) to correct the image orientation.
Video rotation:
Rotation in this context refers to clockwise rotation. Rotation settings can be combined with flip, mirror, and physical lens rotation settings to adapt to various mounting locations.
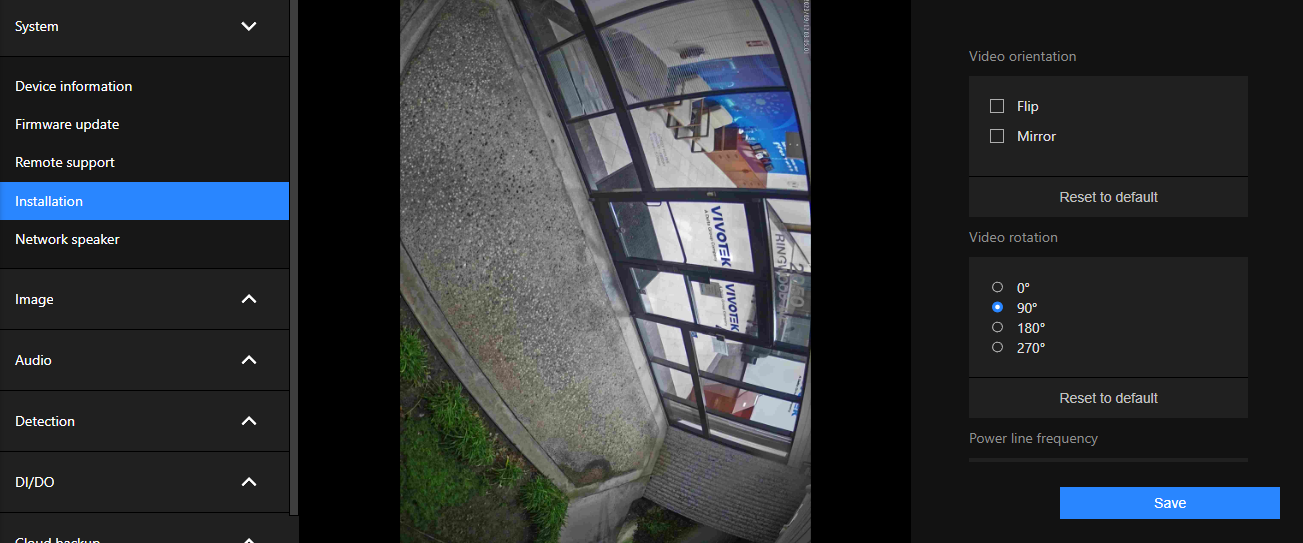
Use Cases:
Cameras can be installed on vertical, side-facing, or tilted surfaces to suit the interior or exterior design of a building. For example, the interior of a building may have narrow, rectangular spaces like corridors.
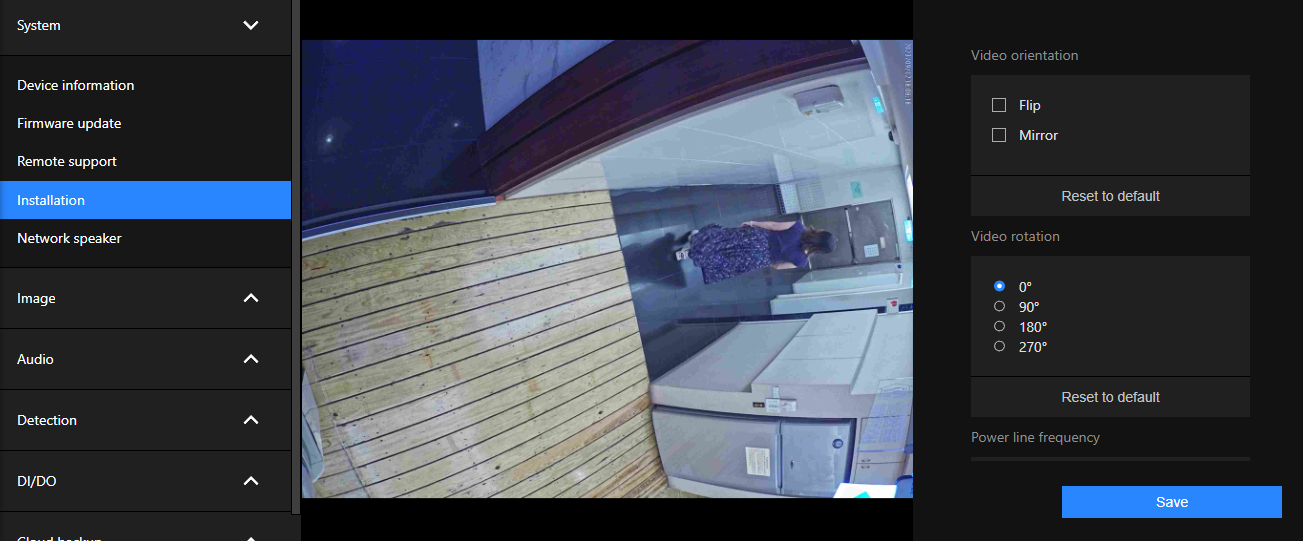
Traditional HD images, especially those with a 16:9 aspect ratio, may not align well with such settings due to their wide horizontal view.
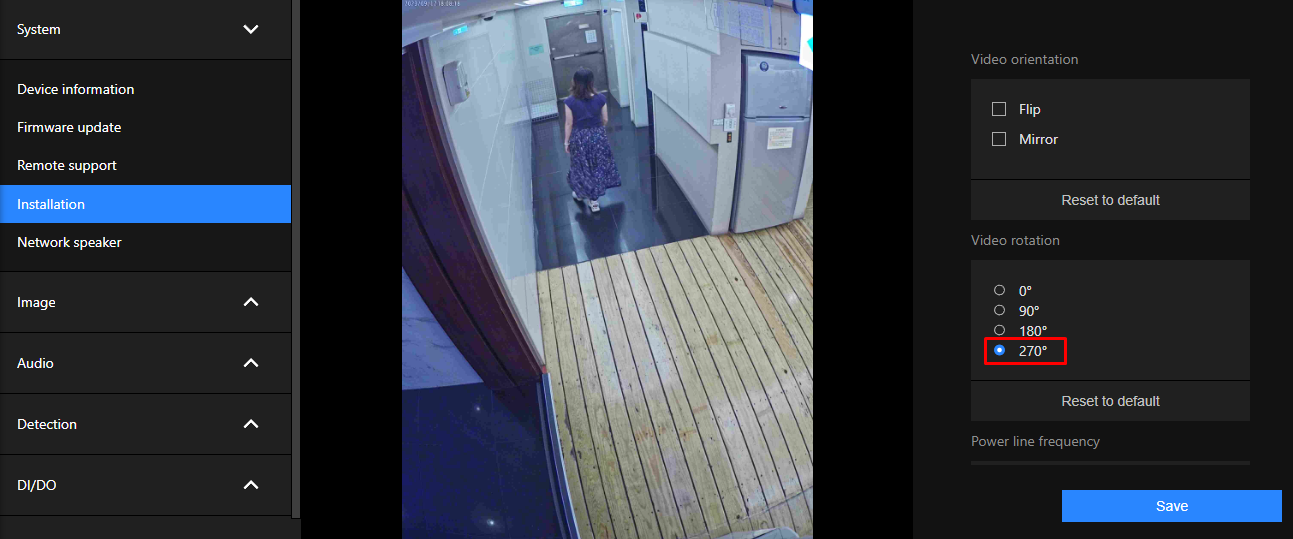
By utilizing video rotation, the camera can better cover tall and narrow scenes.
Video content analysis and rule settings
Video content analysis
provides the following features:
Intrusion detection, Loitering detection and Line Crossing detection.
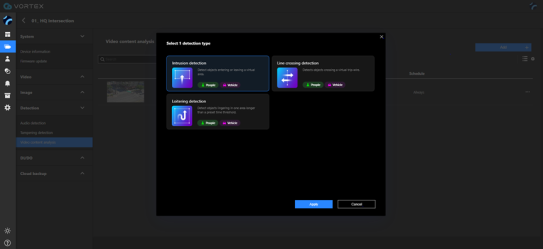
The maximum rules setting of Essential type is 5.
The maximum rules setting of Premium type is 10.
Video content analysis will detect the height of your camera at the installation site automatically. The video content analysis of fisheye model only supports it on ceiling mount.
Detection > Tampering detection
Tampering detection:
Please follow the steps below to set up the camera tamper detection function:
The tamper alarm will be triggered only when the tampering factor (the difference between current frame and pre-saved background) exceeds the trigger threshold. Conditions such as image too dark, too bright, or too blurry (defocused) can also be configured as tampering conditions. The Trigger threshold determines how sensitive your is tamper detection setting. Lower the threshold number, easier to trigger.
Detection > Audio detection
Audio capture serves as a valuable tool in surveillance, enhancing crime detection, protection, and forensic investigation. It provides essential context, alerts security teams to out-of-view activity, and proves valuable in situations where video surveillance falls short, such as low-light conditions.
Audio detection is applicable in the following scenarios:
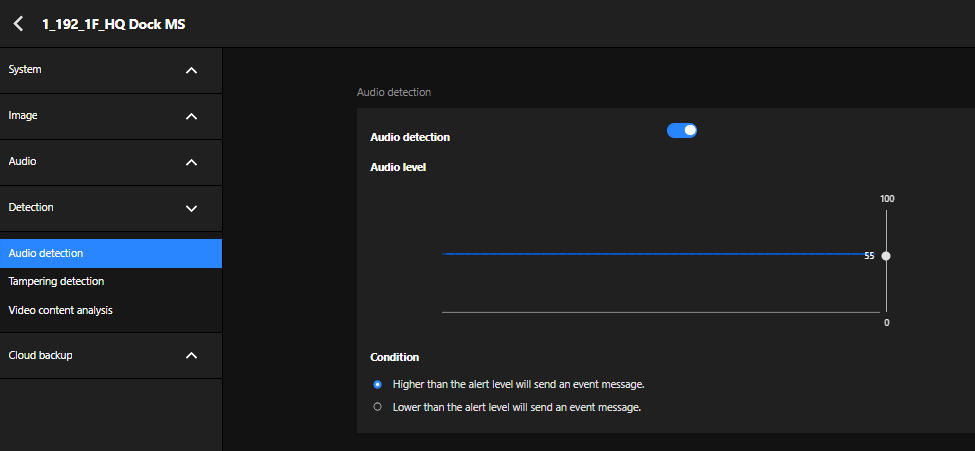
How to configure Audio detection:
NOTE:

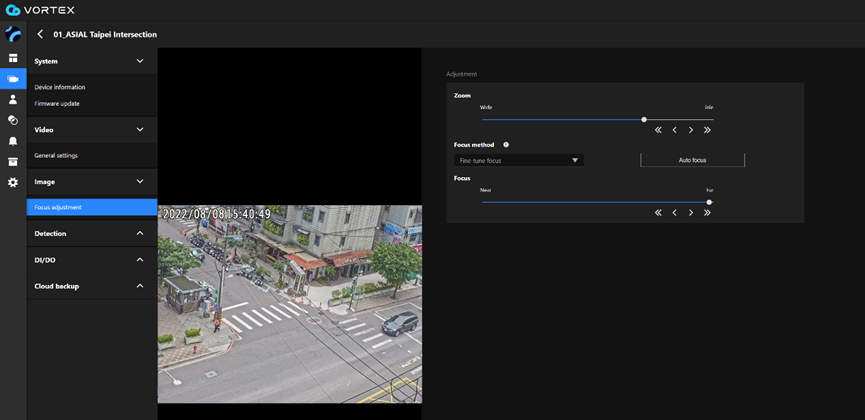
Remote Focus settings
Focus here refers to the Remote Focus, applicable to Network Cameras that are equipped with a stepping motor lens. The automated focus adjustment function eliminates the needs to physically adjust camera focus. In an outdoor deployment consisting of a large number of cameras, the auto focus function can be very helpful when these cameras become out of focus after days or weeks of operation. And that can easily result from the effects of natural forces, e.g., shrink and expand due to a wide range of operating temperatures and the vibration caused by wind.
DI/DO Settings

Digital input: Select High or Low as the Normal status for the digital input. Connect the digital input pin of the Network Camera to an external device to detect the current connection status.
Digital output: Select Grounded or Open to define the normal status for the digital output. Connect the digital output pin of the Network Camera to an external device to determine the current status.
Enable the detection and select the time frame of the effective time span if necessary.



Add Comment