How to use the Profile Search function?
What is Profile Search?
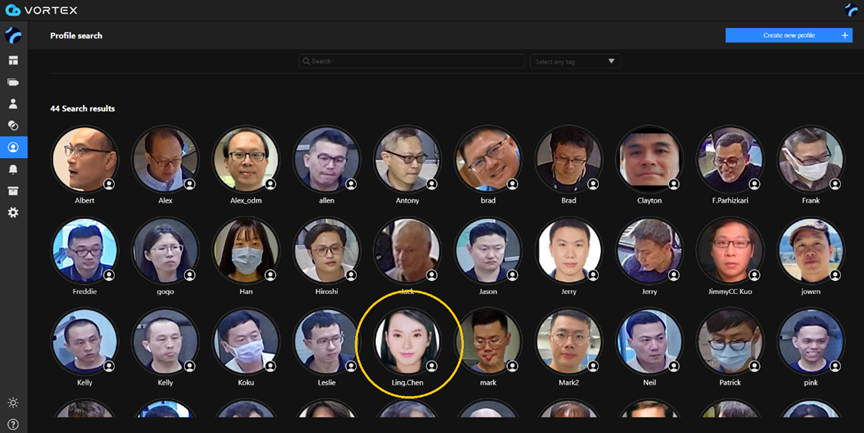
Profile Search is a feature that allows users to create a profile containing one or more face images of a person. These images can be uploaded by a user from a computer or saved from a Deep Search result. Once the profile is created, users can search for that person in recorded videos either immediately or at a later time.
Key Features of VORTEX AI
One of the main advantages of VORTEX AI is its edge-based video analytics, as opposed to relying solely on cloud servers. The system detects faces and extracts facial features on-board. This metadata is then saved in the cloud for subsequent searches.
How to Create a Profile
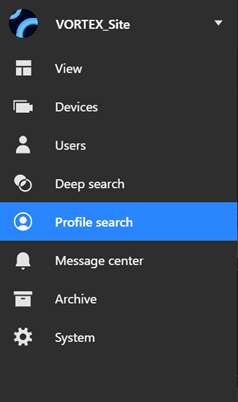
Open the VORTEX User Portal and click on the ‘Profile Search’ option in the left-hand menu.
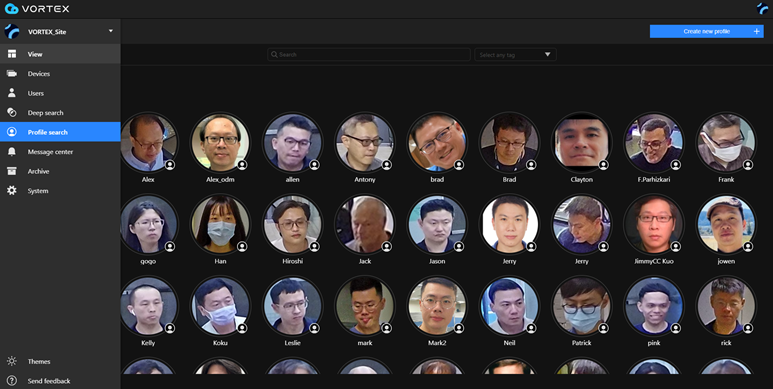
Once you’re on the Profile Search page, you can create a new profile by clicking the ‘Create New Profile’ button.
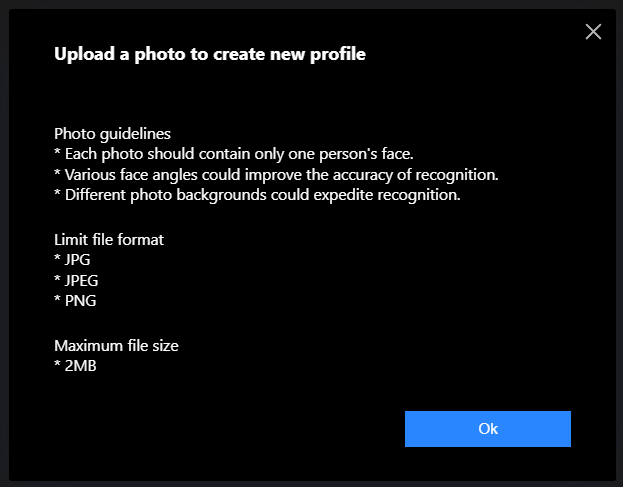
After clicking ‘Create New Profile,’ a tip will appear reminding you to upload a photo.
Choose a face image to upload and then fill in the Name, Note, and Tag information for the new profile.
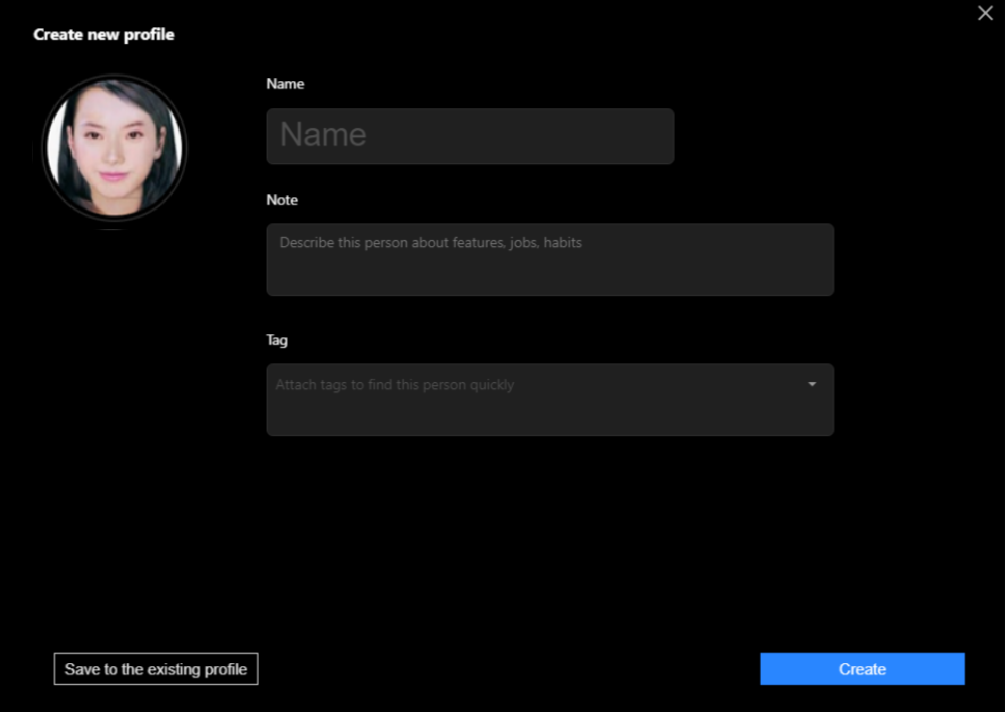
Note: If the uploaded image should be added to an existing profile, click ‘Save to Existing Profile’ instead.
Click the ‘Create’ button to finalize the profile. You should be able to see the new image listed in the profile search lists.
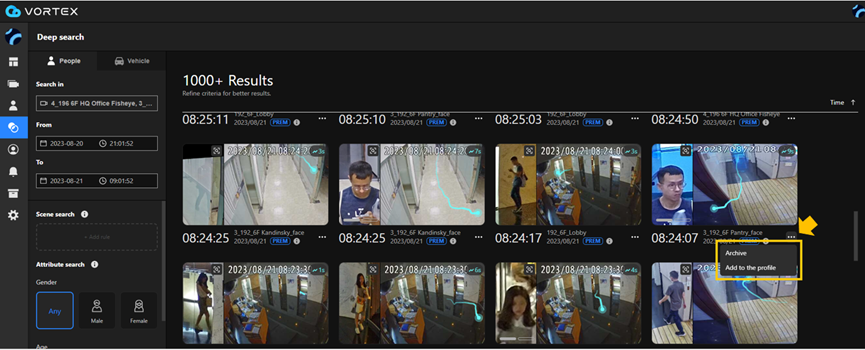
Another way to create a profile is to save a face image from Deep Search results by clicking on the “…” icon and selecting “Add to profile”.
How to Search
After creating a profile, users can search for a person using the face images stored in that profile in the recorded videos
Records
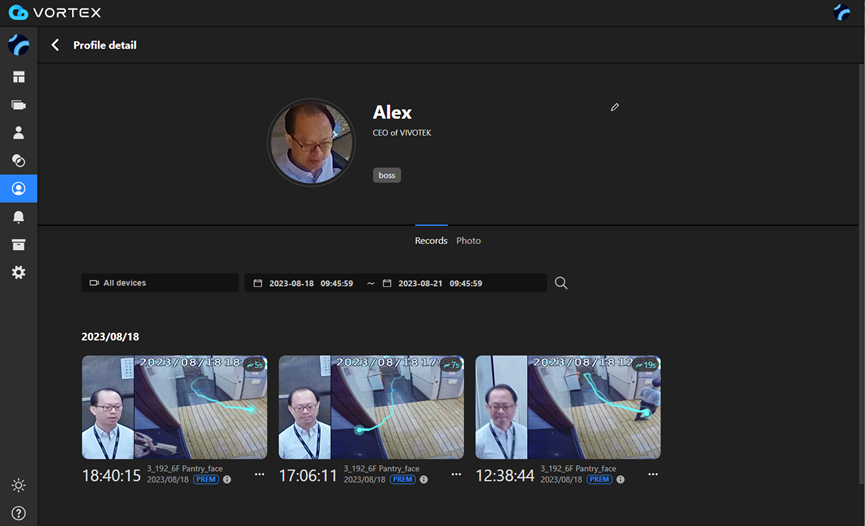
If you go to Profile Search > Profile detail and click on the “Records” tab, you will be able to perform a search based on specified conditions such as which cameras to use and what time period to search.
It is similar to the Re-Search function (search by an image) in Deep Search, while in Profile Search, multiple face images in a profile can be used together for the search, and the face image can be a photo uploaded by a user from a computer.
Photo
When users click the ‘Photo’ tab within a profile, the best facial shots of a person’s face within a month are searched and displayed.
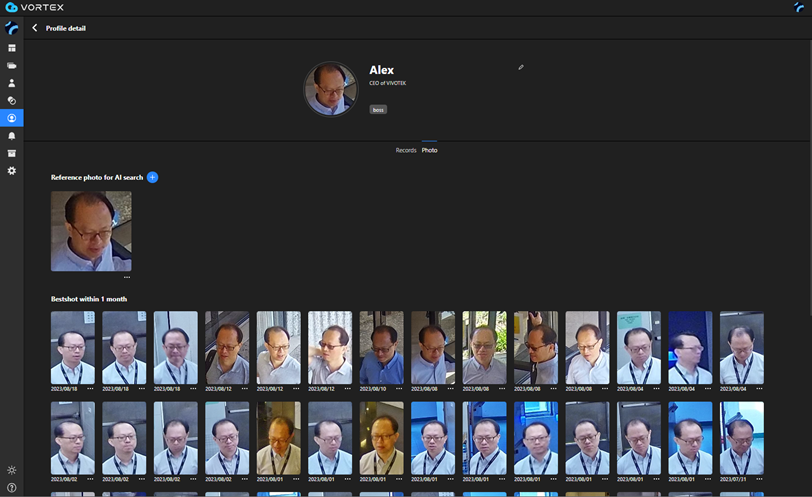
When clicking on the ‘…’ icon under any of the photos displayed, you will see two options: ‘Save to reference phots’ and ‘Not this person‘.
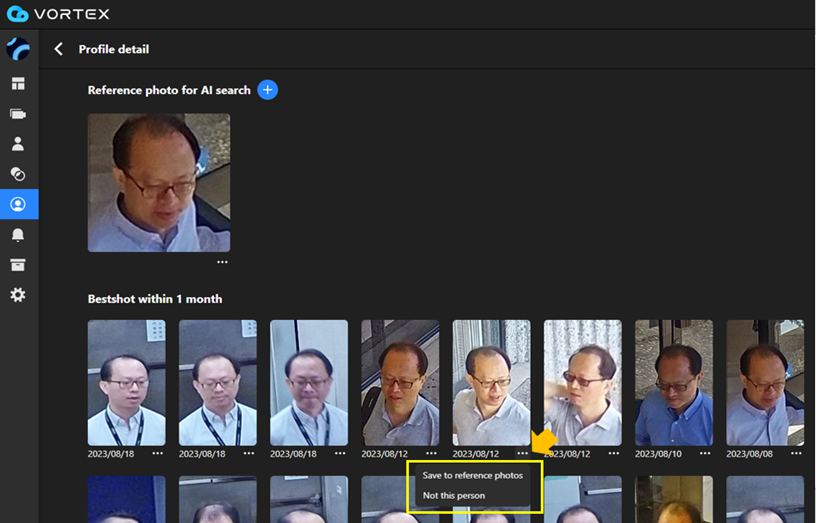
Save to reference photos: Use the ‘Save to reference photos’ option when you see a photo that accurately represents the person in the profile. By doing so, this image will be added to a set of reference photos within that profile. You can save up to 6 different reference photos in a single profile to improve the accuracy of future searches.
Not this person: If you notice that one of the ‘best shots’ does not actually match the person in the profile, you can select the option ‘Not This Person’. When you do this, the system recognizes the mistake and initiates a new search, using your feedback to refine its search algorithms.
By managing your reference photos and providing corrective feedback, you contribute to the system’s learning and help improve the accuracy of future searches.
How can I change the default device name of the camera after adding it to the VORTEX service?
Question
How can I change the camera default device name after adding it to the VORTEX service?
Answer
Usually, when you are adding the camera for the first time you have the option to change its name before adding it:
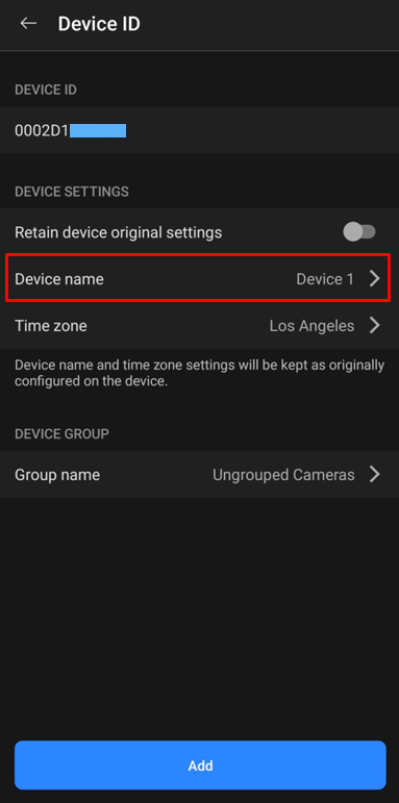
If you accidentally forgot to name the camera during this step or want to change the camera name, please follow the next steps:
Step 1. Using you VORTEX account, access the VORTEX Portal (https://portal.vortexcloud.com).
Step 2. Click the “Device” icon to access the device list interface.
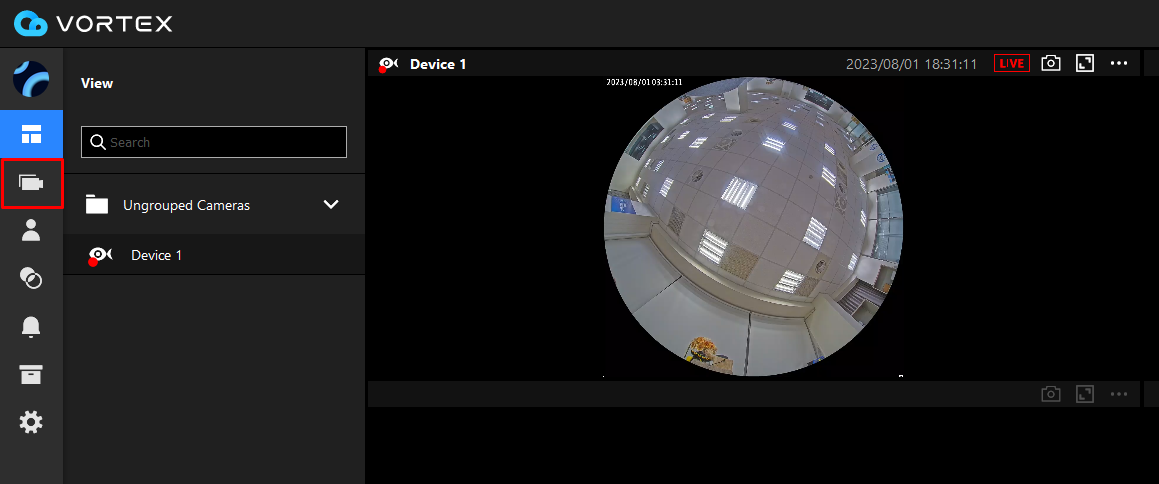
Step 3. Select the camera you want to modify and click the gear icon to access its general configuration.
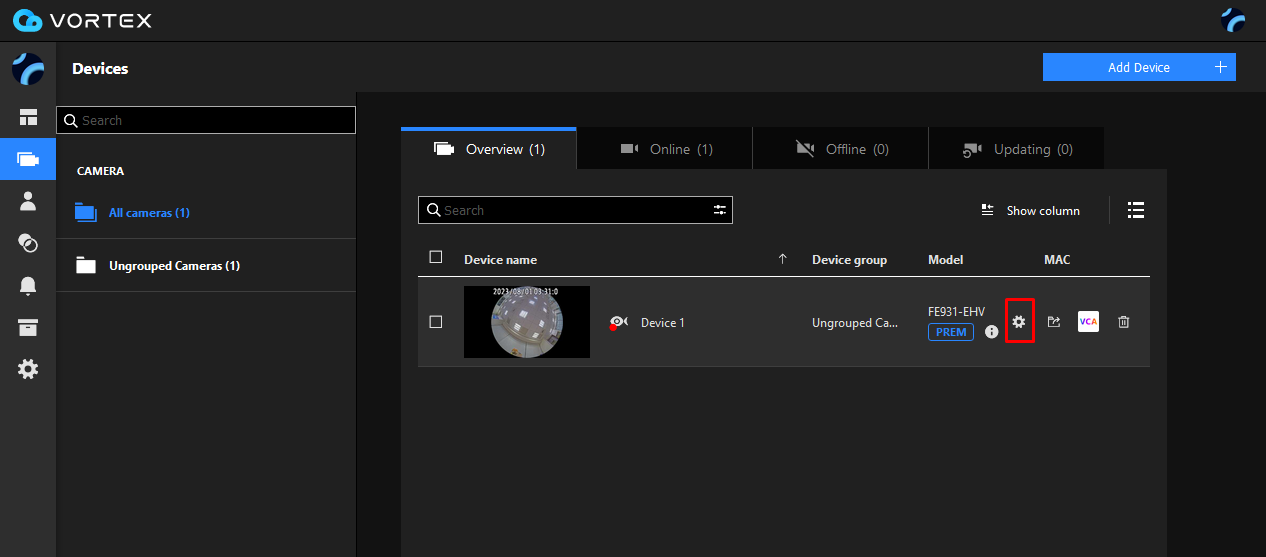
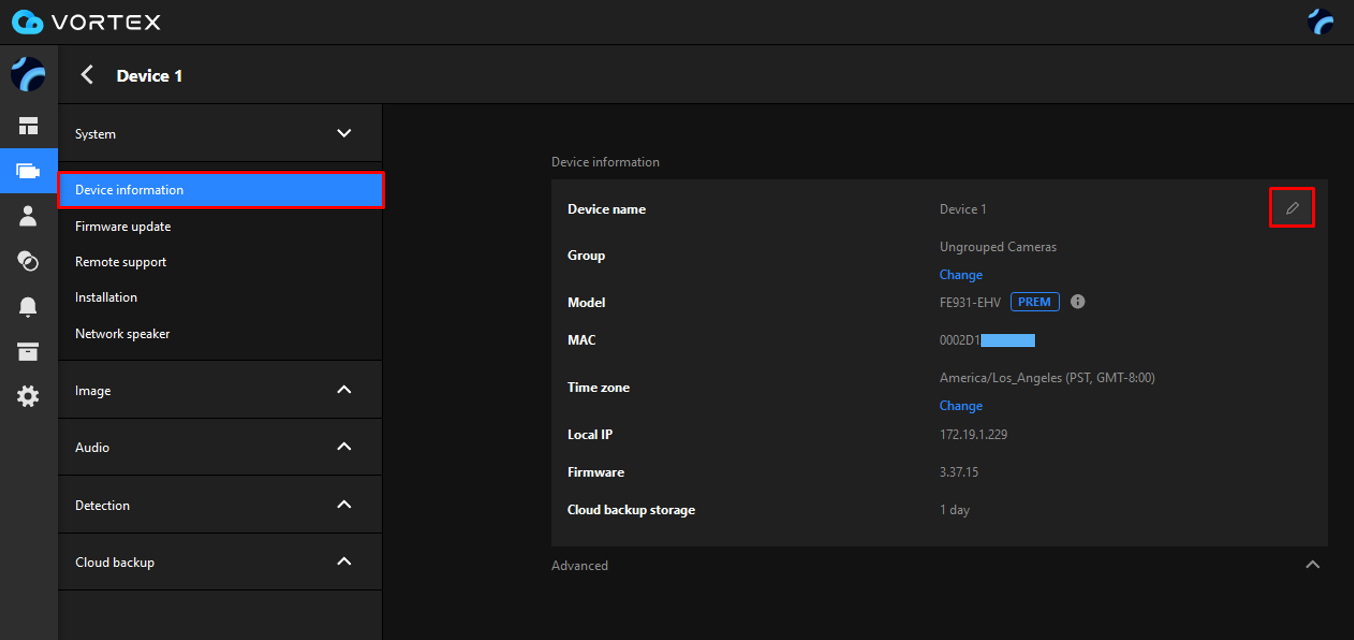
Step 4. Go to System > Device information and click on the pencil icon next to the “Device name” section.
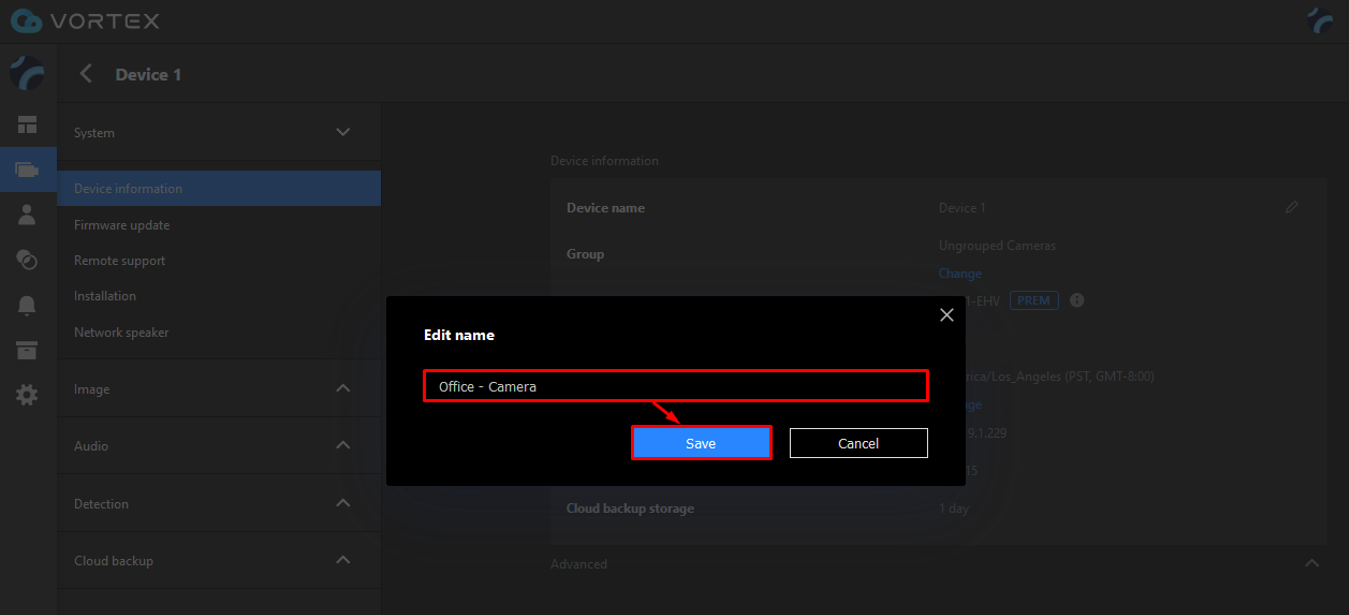
Step 5. In the “Edit Name” pop-up window, enter the desired name for the camera, then click the “Save” button to apply the changes.
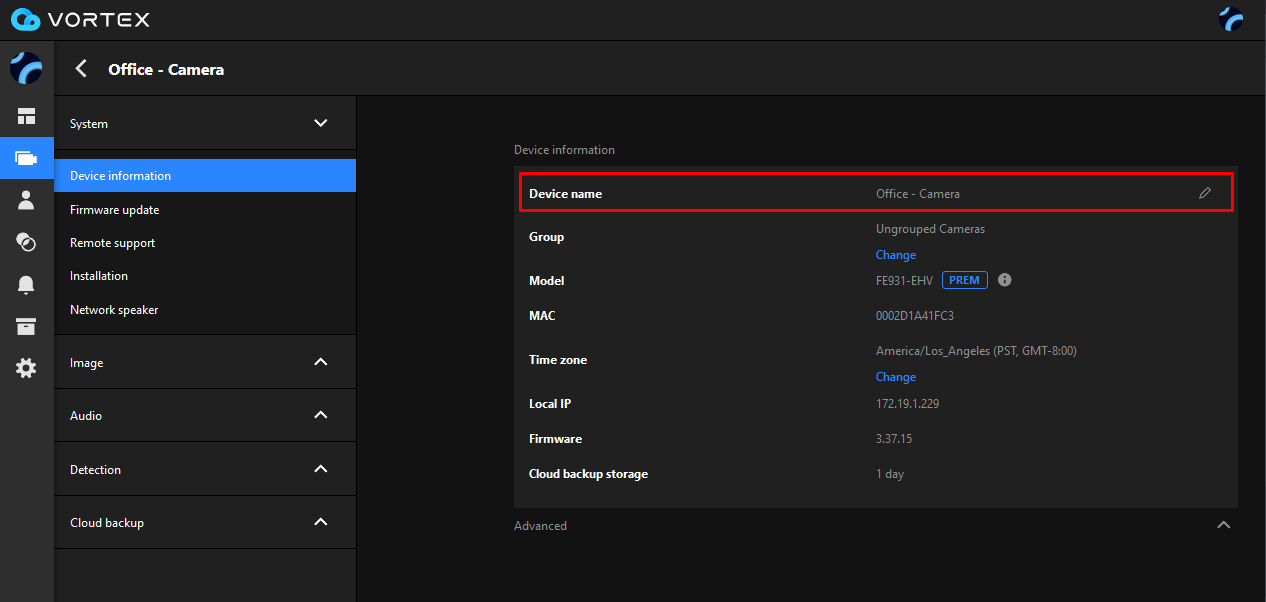
After a couple of seconds, the server will automatically update the camera information.
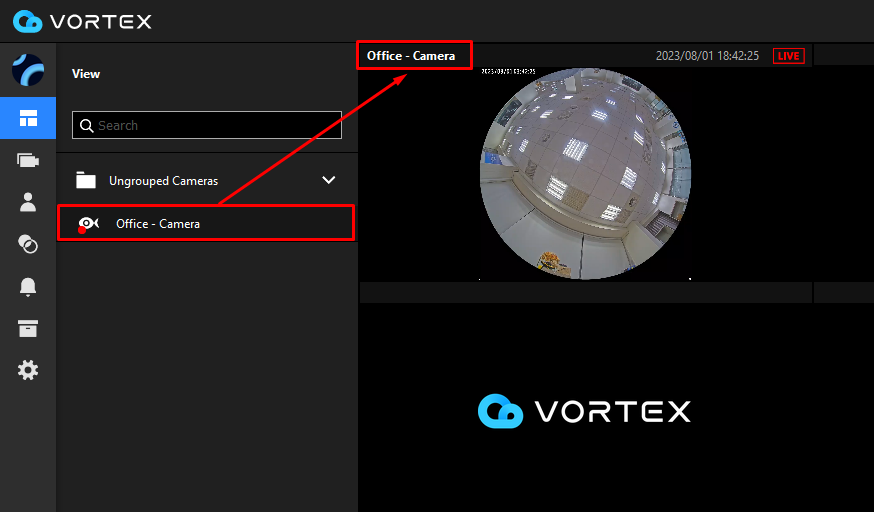
Step 6. Go back to the View interface and check that the new name is being displayed.
How do I set the camera’s digital output as an alarm action?
Question
How do I set the camera’s digital output as an alarm action?
Answer
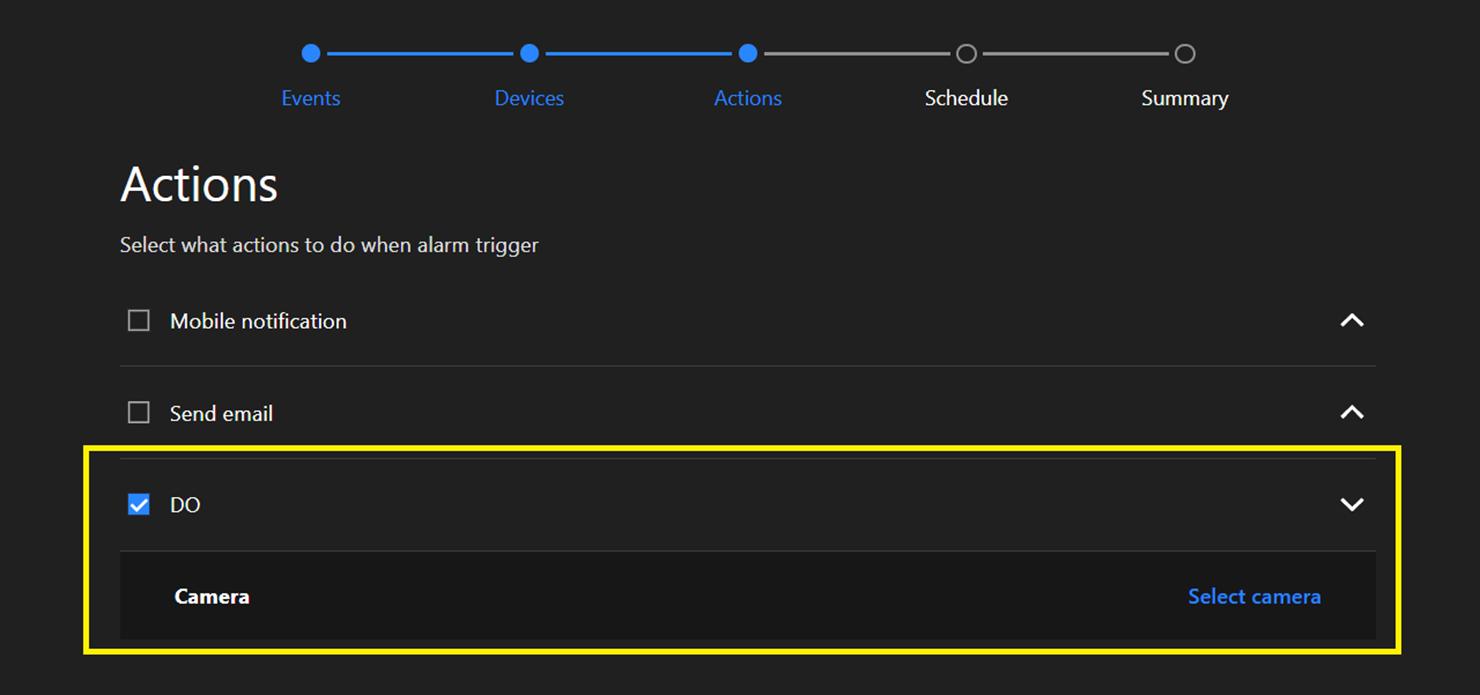
In the VORTEX Portal’s Alarm Management Settings, you can set Digital Output (DO) as an action method when an alarm is triggered. For example, triggering a siren or open a door.
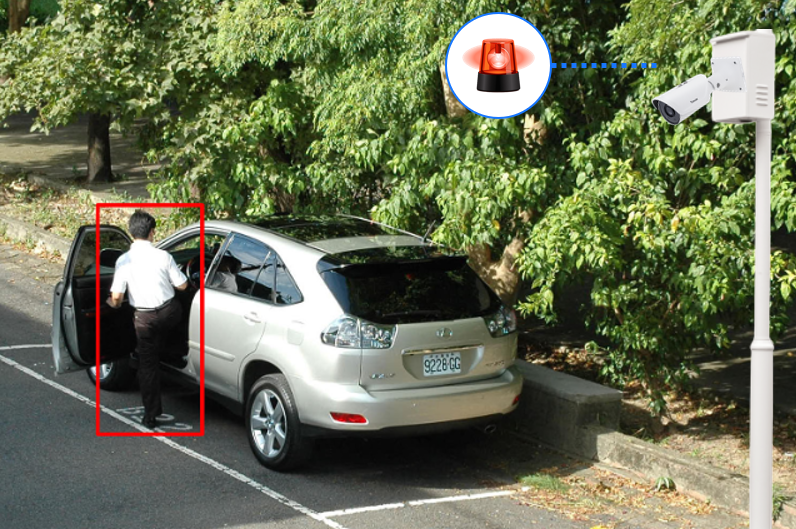
In order to do that, go to the VORTEX Portal and select a camera with DO (Digital Output) capability.
The duration (in seconds) can be set between 1 and 999 seconds. If you choose a camera with no DO capability, you will receive a reminder.
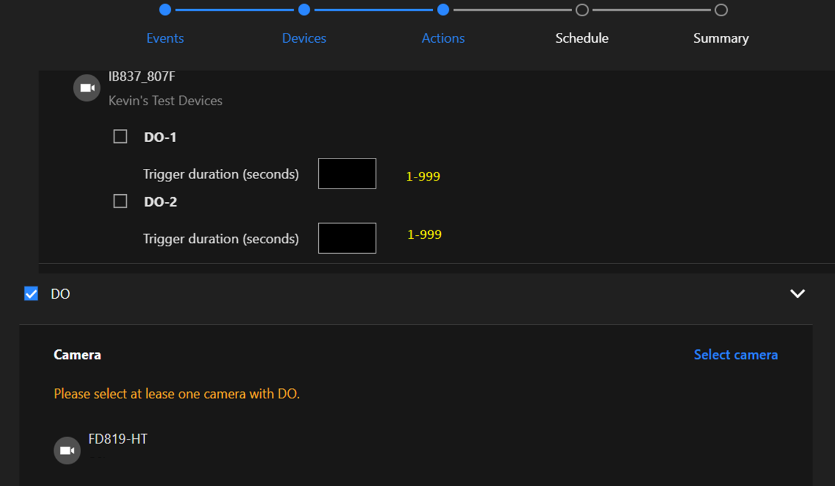
Note: The IB837-HT has two sets of DO, while the FD837-HTV has one DO.
Here’s an overview of how to set up the digital output as an alarm action once you’ve finished configuring all settings.
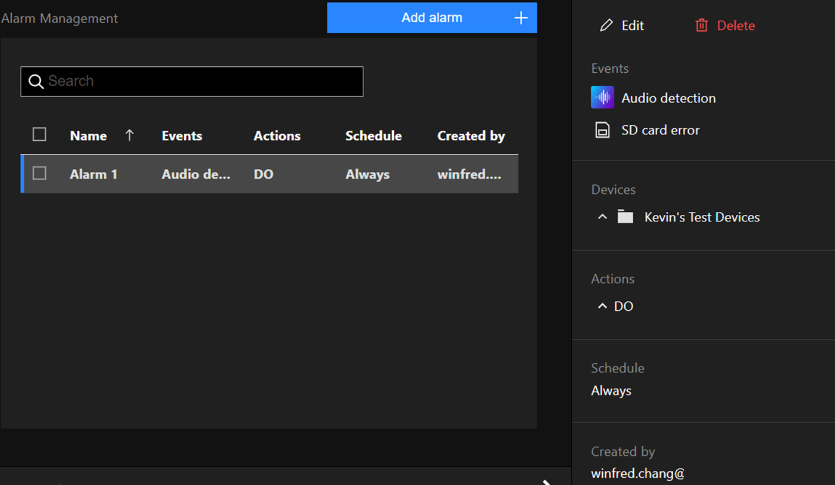
How to schedule automatic firmware updates on your VORTEX Camera
VORTEX automatically pushes firmware updates to your device on a regular schedule. The default schedule for these updates is between 00:00 and 02:00 every day, according to your camera’s local time.
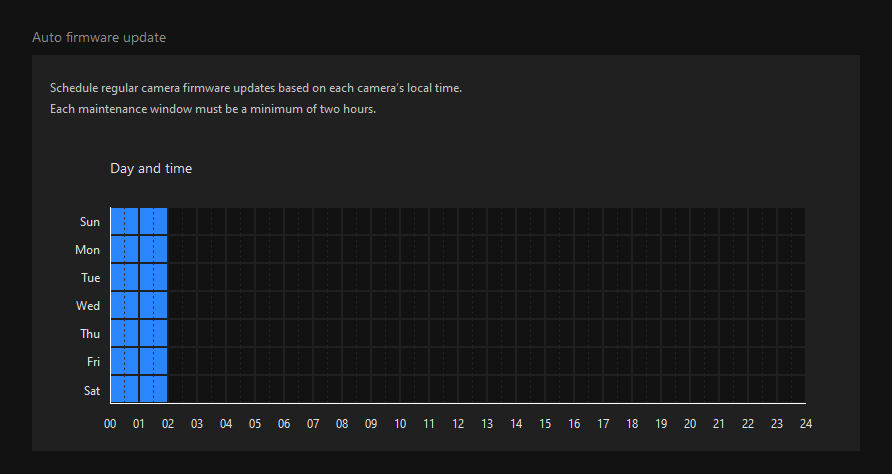
If you prefer, you can adjust this schedule to better suit your needs. You might want the updates to occur during a specific “maintenance window” that you specify. To do this, please follow the next steps.
Step 1. Go to the “System” tab in your camera’s settings. You should see a section titled “Auto Firmware Update“.
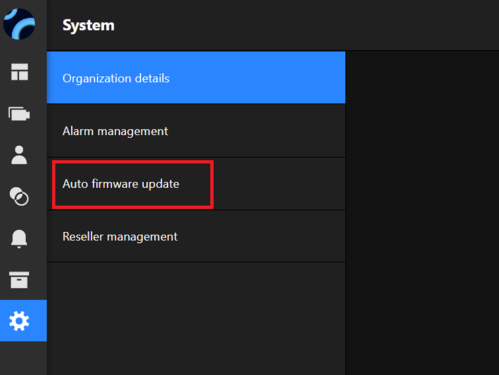
Step 2. In the “Auto Firmware Update” section, you can set your desired maintenance window. This window must be at least two hours long.
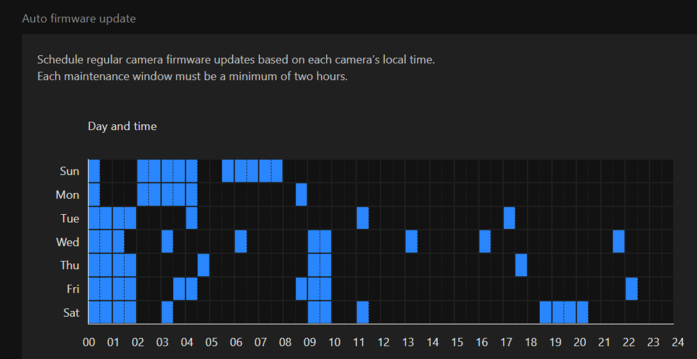
If you set the schedule to less than 2 hours you won’t be able to save your changes.

Once you’ve set your maintenance window, save your changes. Your camera will now automatically update its firmware during the window you’ve specified.
Receive notification via alarm management
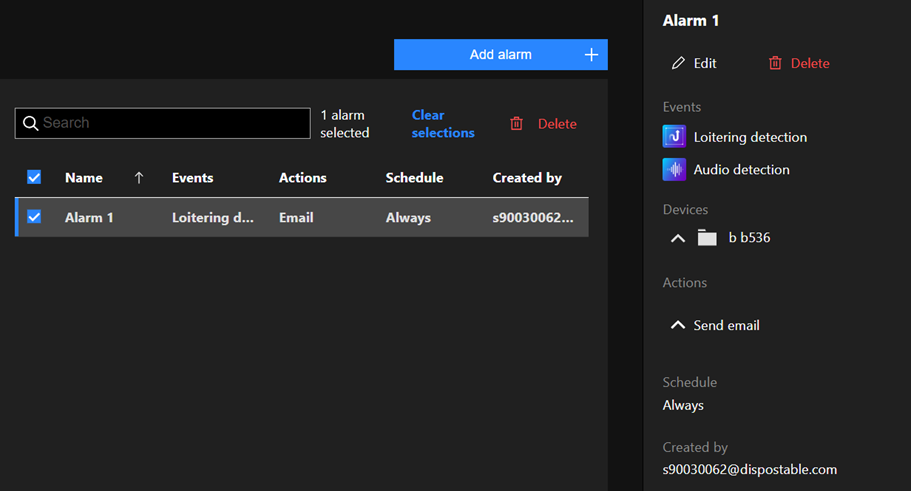
If you need to be notified for certain activities, such as VCA events, devices status, please go and configure in the setting area.

First step, choose any events you would like to receive notification for (multiple selections allowed). To receive device events, you must configure them in camera setting first. For example, if you would like to receive notification for line crossing detection, make sure you have set that rule in camera setting.
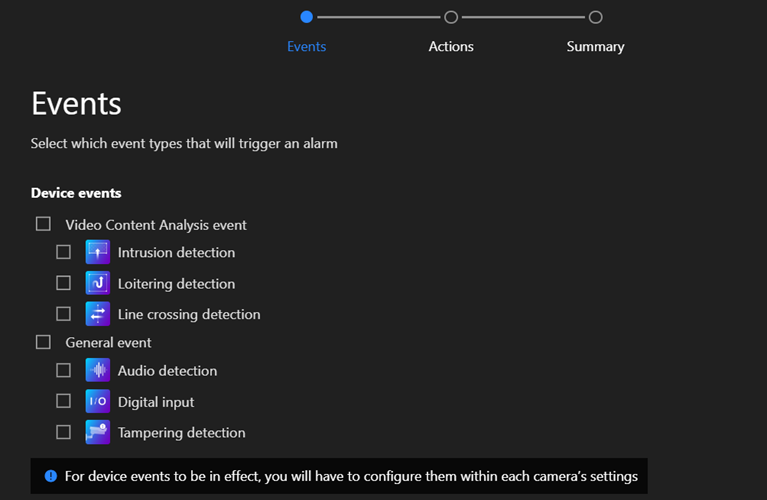
In 2nd step you can choose the devices you are interested in to send out notification
You can click select devices to come out a complete list of all devices for selection

In 3rd step, you can choose the notification method and set the desired recipients.
Click “select recipient” to come out a list of all org members, where you pick the recipients
Here, for system events, you can also set your system integrator to receive the notification.

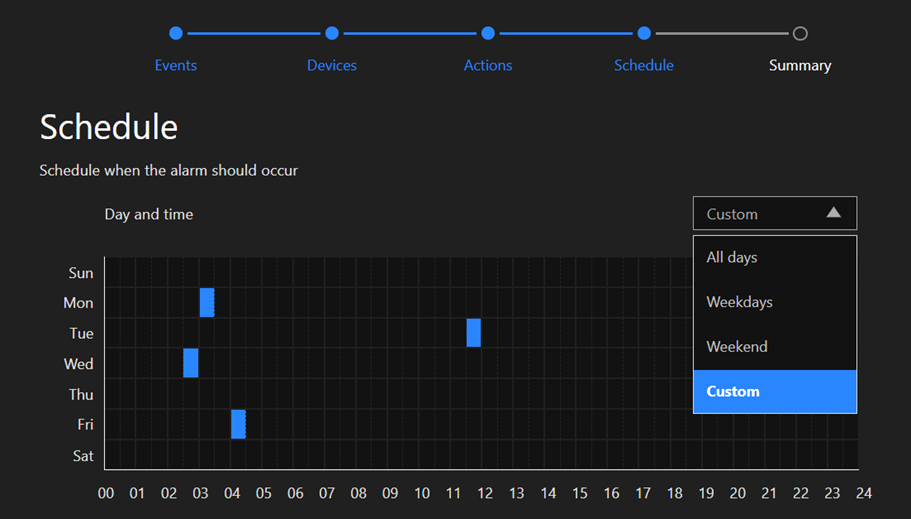
Lastly, you can customize schedule when you wish notification to be sent
Overview
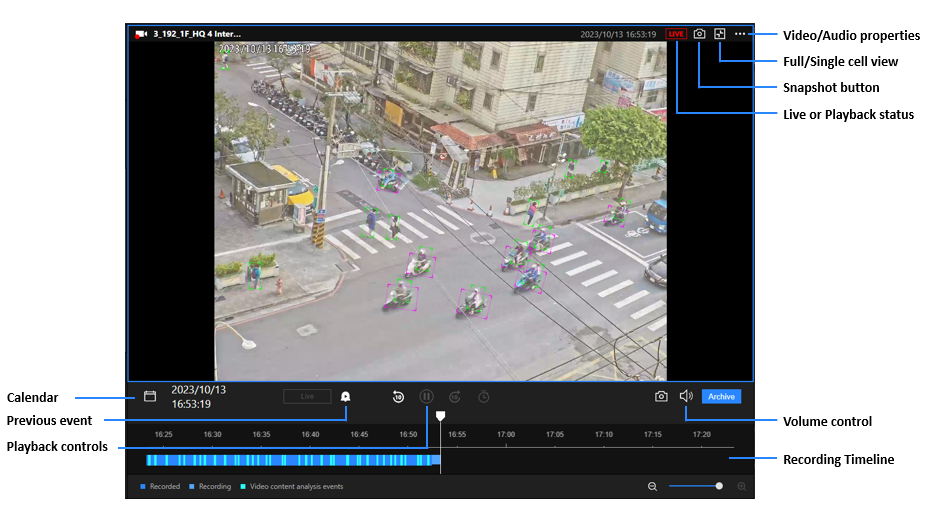
Navigating the Live View and it’s Controls
The VORTEX Portal ‘Live View’ feature provides you with real-time access to all connected cameras. Simply click on the designated Groups, and you’ll be presented with the live footage from your cameras.

Each individual view cell offers a range of controls, allowing you to:
Every single view cell will have its own controls:
Should an important event occur, the ‘Archive’ feature comes in handy. With a simple click, you can save a specific duration of video directly to the cloud archive.
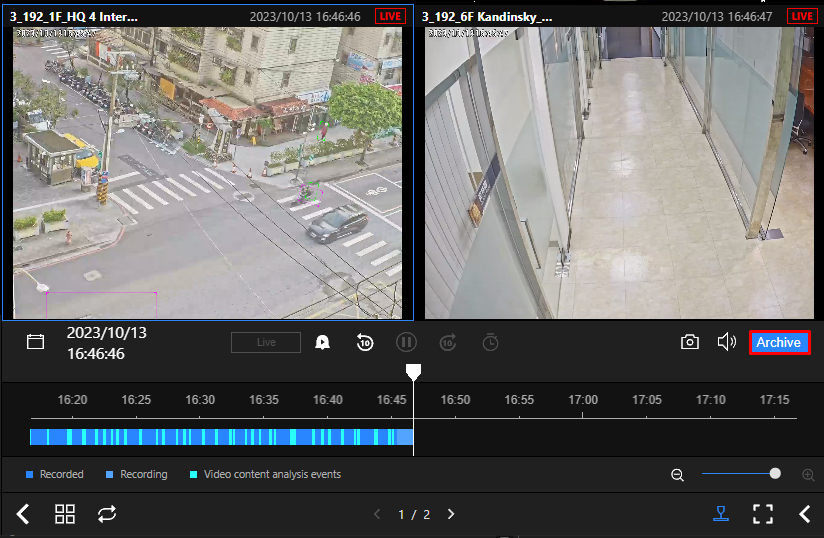
The duration or length of the video you want to save is fully configurable to suit your needs.
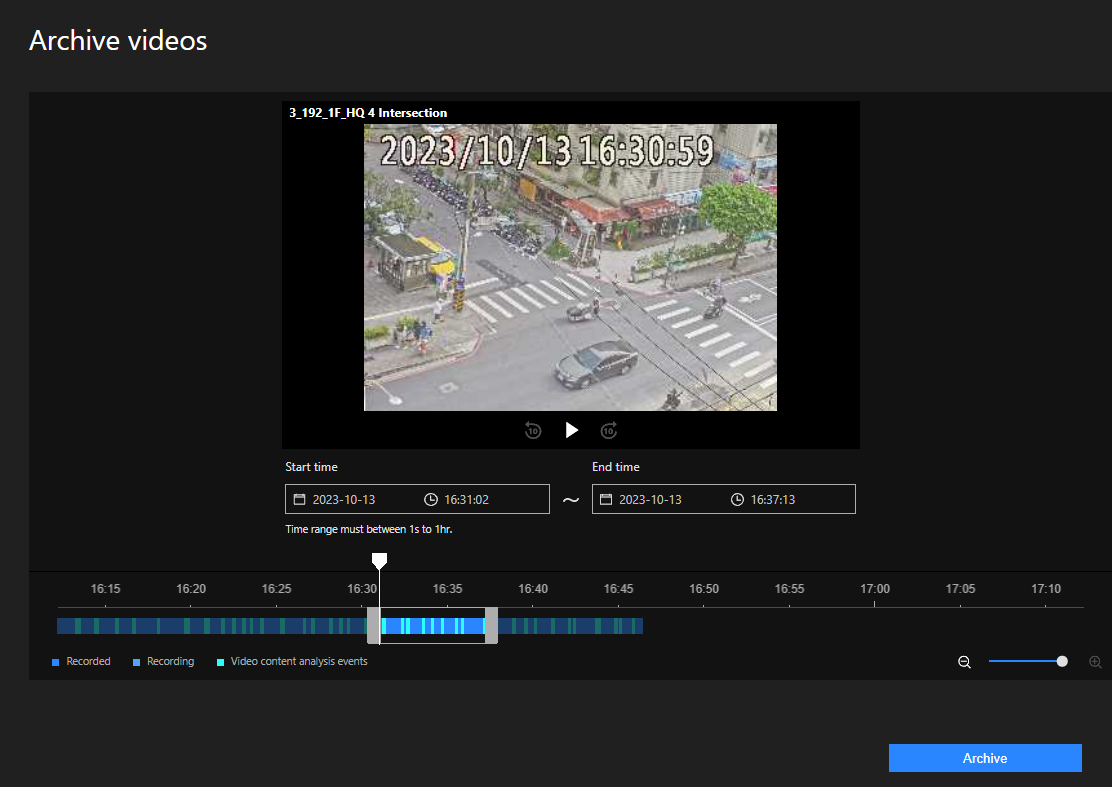
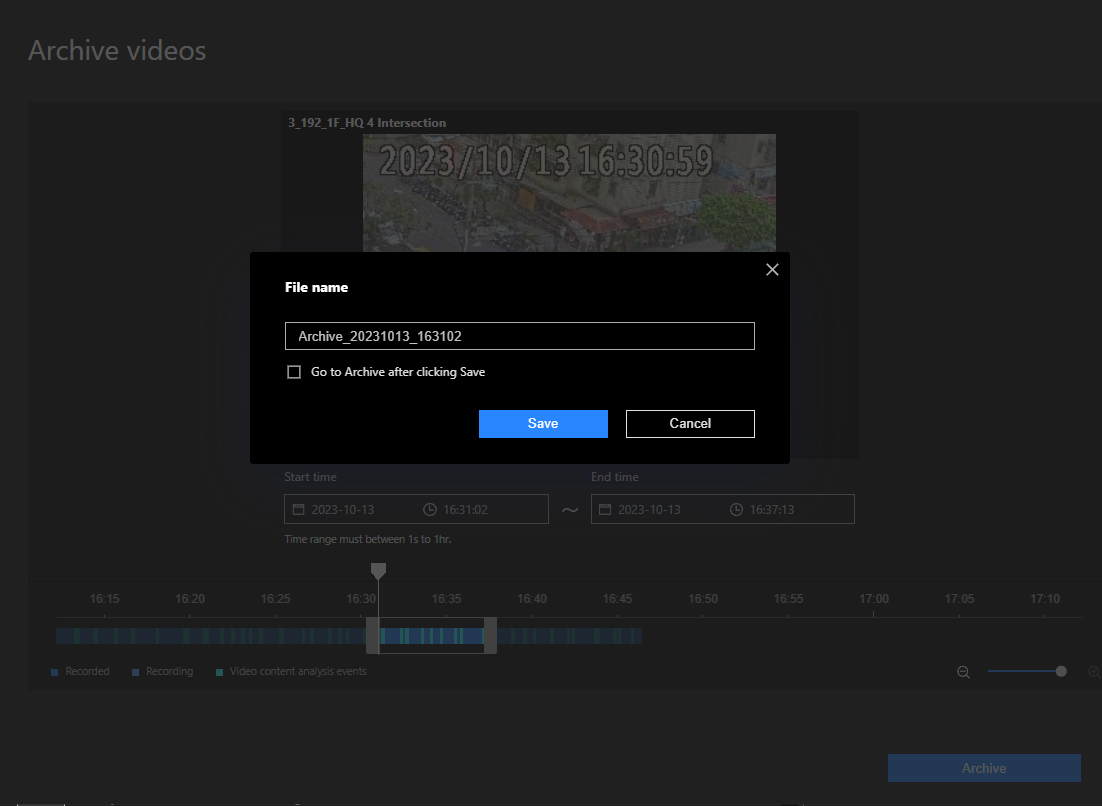
Once you have selected the video range you want to ‘Archive’, click on the ‘Save’ button to store the data in your cloud storage.
Lastly, for easy navigation and control of the Live View interface, you’ll find a control panel situated at the bottom of the screen.




Add Comment