Can my camera record in low-light?
Adjusting your video settings for Night Vision
Yes! Blink cameras have an 850nm infrared (IR) LED light to show you clear video in areas of complete darkness. This feature is known as Night Vision. When enabled, your camera will be able to view and record in a low light or non-lit environment.
Note: Placing your camera on a deep ledge or beside any reflective surface can result in glare that can impact image quality. Learn more about camera placement.
Using Night Vision
 above your camera’s Live View thumbnail on the home screen and select Video and Photo Settings.
IR Intensity
You can fine-tune intensity depending on how strong you want the IR LED light to shine while using Night Vision.
You can use Live View ![]() to test your settings and select the best options for your situation.
to test your settings and select the best options for your situation.
Learn more about device settings in the Blink app.
How to enable Temperature Alerts
This article shows you how to enable Temperature Alerts and calibrate the temperature sensor of the camera.
Note: The Blink Mini Camera and Blink Video Doorbell do not have temperature sensors; therefore, you will not see this option in their Settings.
Enabling Temperature Alerts
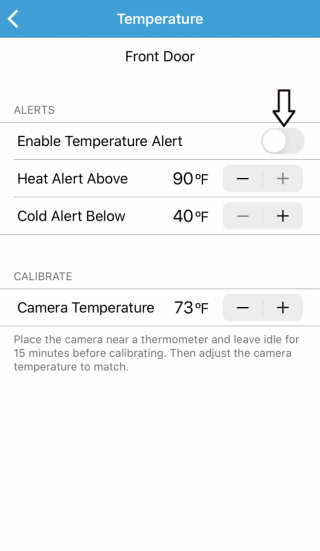
Calibrating your camera’s temperature sensor
If you find that your camera’s temperature reading isn’t accurate, use the Camera Temperature under the CALIBRATE section. Place your camera near a thermometer and leave the camera there for at least 15 minutes. Adjust the camera’s temperature to match your thermometer by tapping the plus or minus buttons.
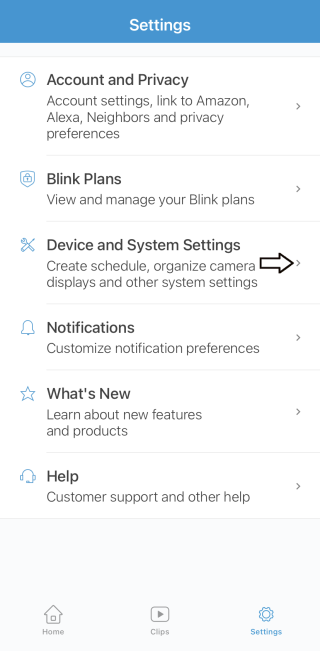
Fahrenheit and Celsius
Select the units of measurement displayed in the Blink app by navigating to Settings and then tap Device and System Settings.
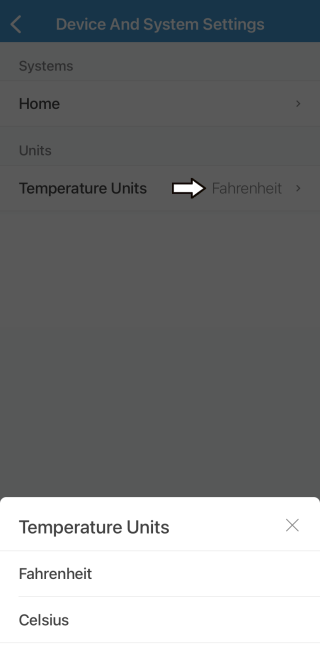
Next, tap on Temperature Units and select either Fahrenheit or Celsius.
How to set up Privacy Zones
A Privacy Zone is an area you select that will not be recorded by your camera. For example, you may want exclude a neighbor’s door or window from being viewed or recorded by your camera. Up to two Privacy Zones can be set and they are easily recognized as gray areas of the screen.
Note: Privacy Zones are only available for the Outdoor 4, Wired Floodlight, Video Doorbell and Indoor and Outdoor (3rd Gen) Camera.
To use this feature, access the settings of the camera that you want to modify.
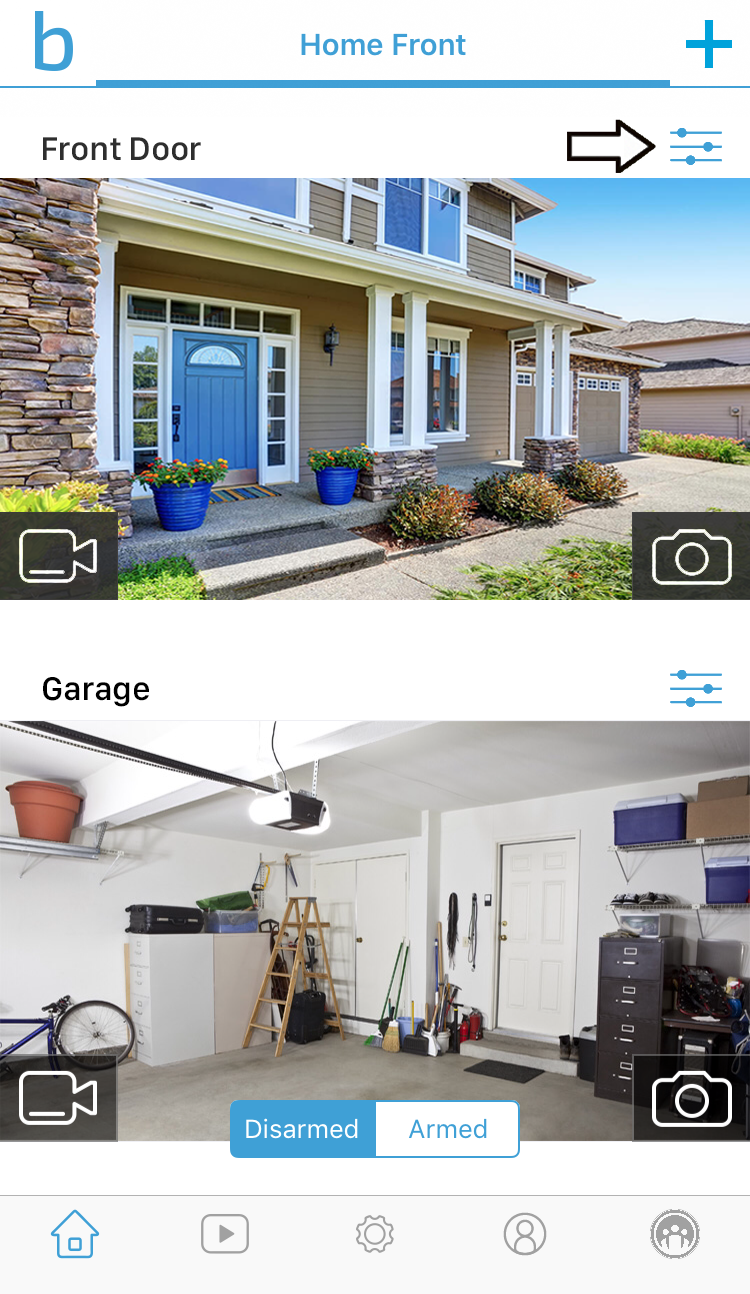
From camera settings, select Motion Settings and then tap Motion Zones.
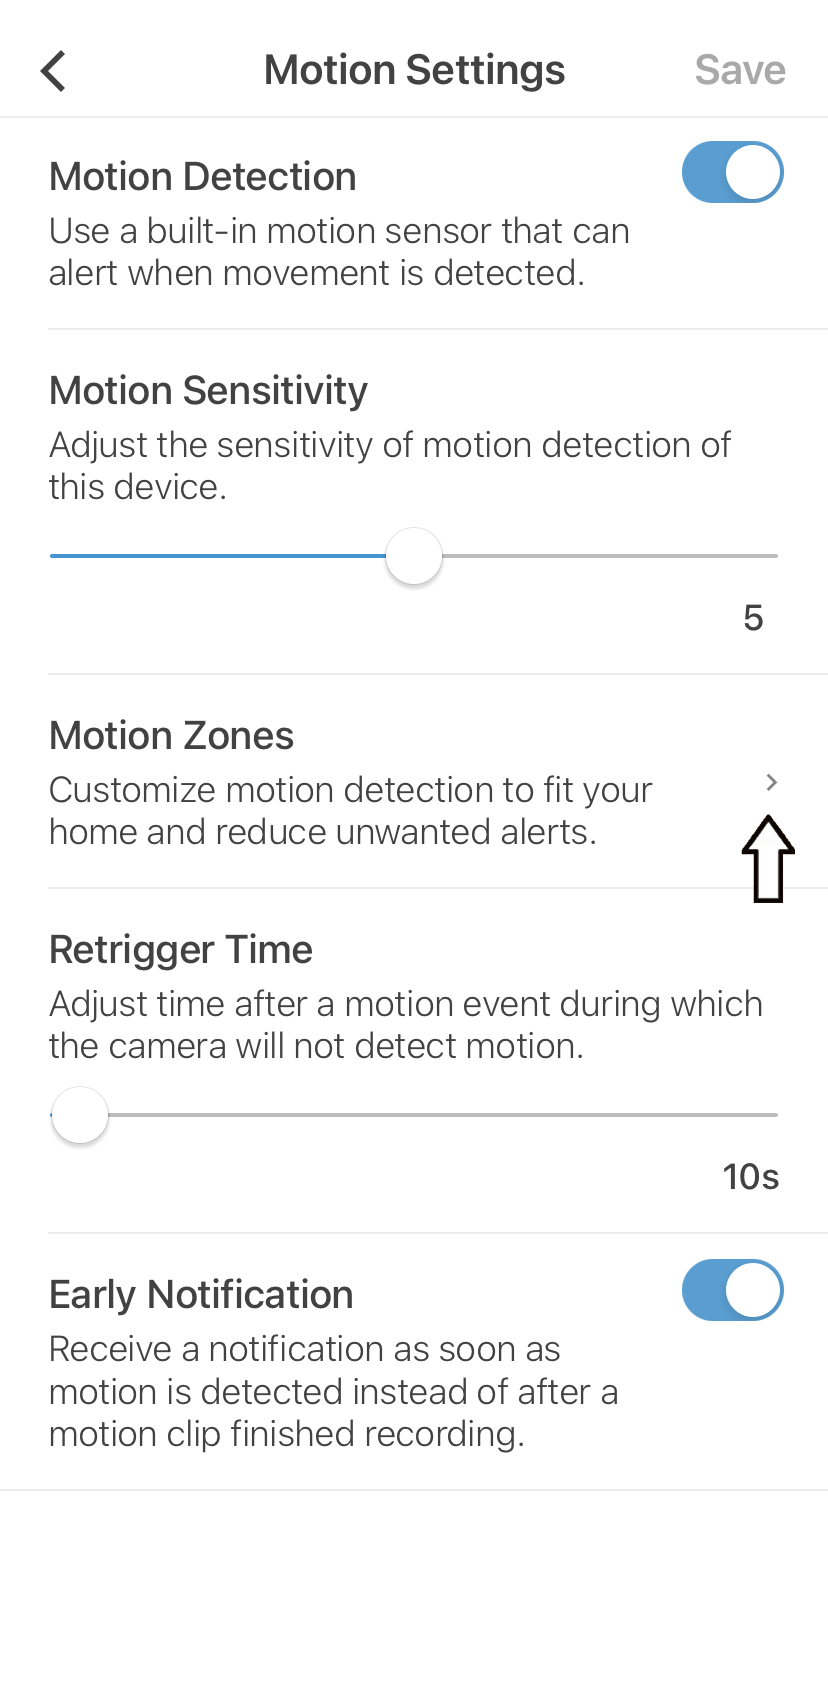
You will then see options for Motion Zones and Privacy Zones. Learn how to set up Motion Zones.
Tap the Privacy Zones button to view the screen. You now see the camera thumbnail with a grid pattern. You can also tap the Update Photo button to refresh the thumbnail image. Tapping Reset Privacy Zones deletes the existing zones. Privacy Zones cannot be edited, only deleted (reset) and recreated.
Tap and drag on the screen to draw up to two zones you want selected within the thumbnail image. Once zones are created they can be moved and resized by dragging on the blue dots at the corners of each.
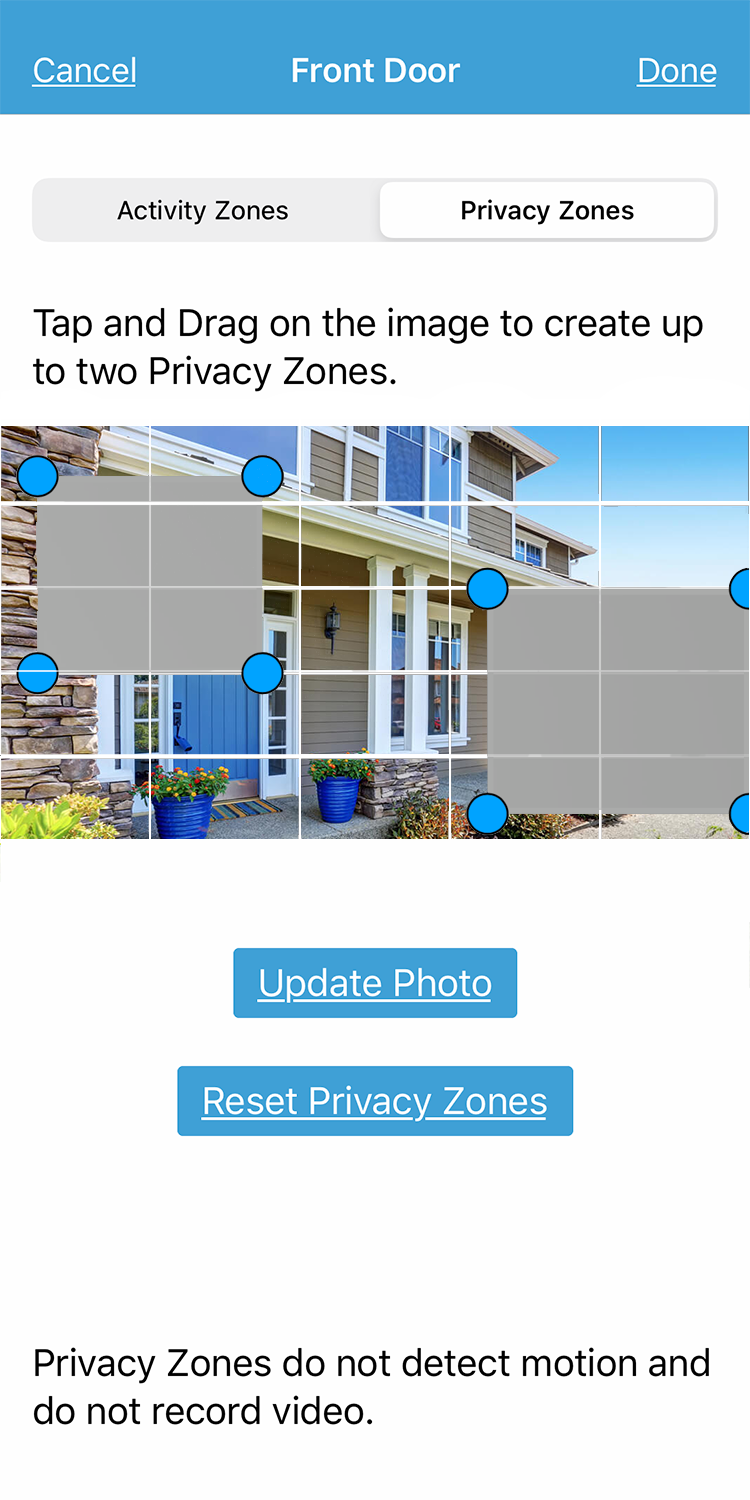
After your zones are drawn, tap Done to save them. You can tap Save to apply all settings changes and be sent to the Home screen.
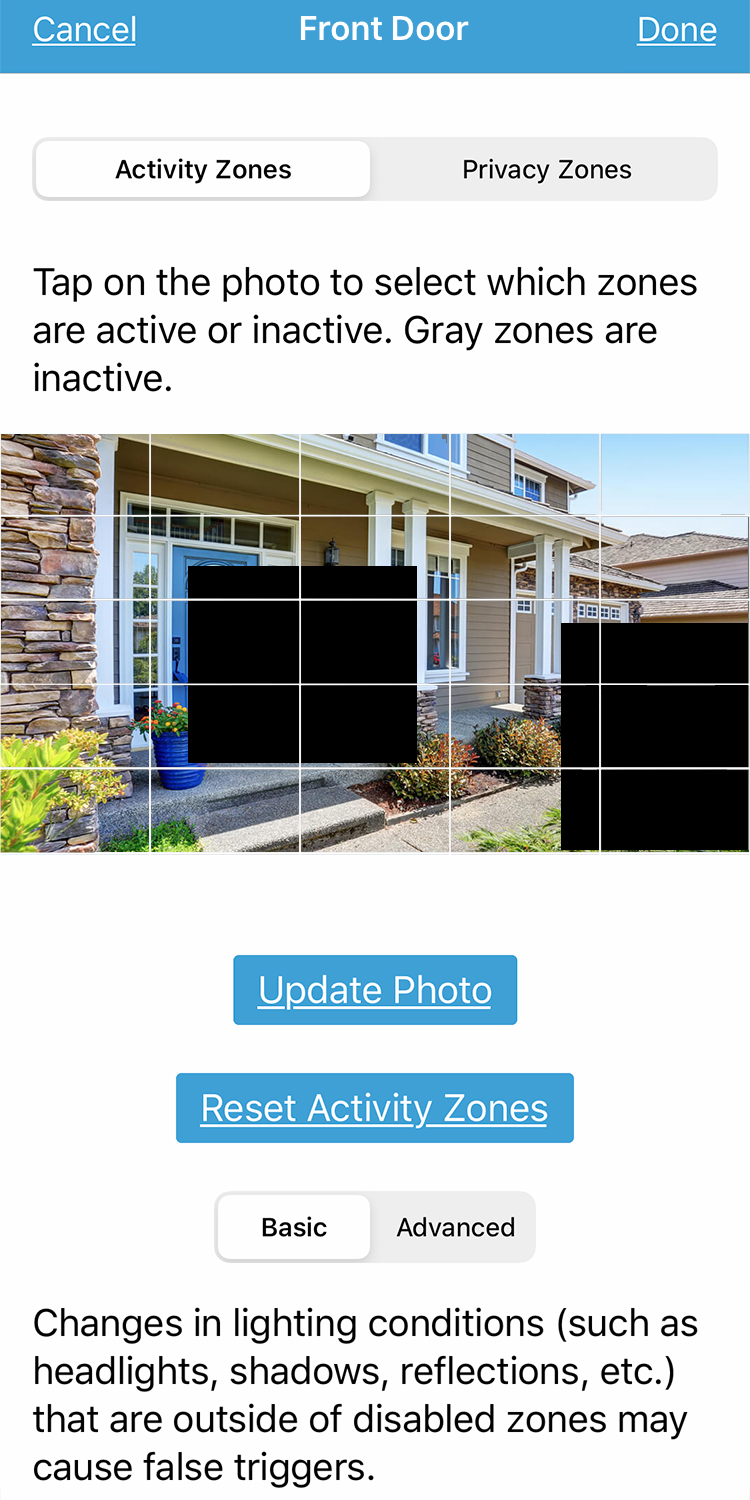
If you tap Zones again, the Zones screen now shows the Privacy Zones in black to help contrast with Motion Zones, which are grey in the Motion Zone view.
How to set Motion Zones
Setting Motion Zones allow you to eliminate areas in your camera’s field of view which may be causing too many motion notifications. Use this article to understand how to set and reset Motion Zones in the Blink app.
Motion Zones allow you to select areas for your camera to ignore. This can help with excessive motion clips or false alerts. For example, if your Outdoor camera view has a tree or bush that is triggering unwanted motion clips, you can adjust your Motion Zones to exclude that area. The camera will ignore the motion occurring in the Motion Zone which prevents sending unwanted motion notifications.
Privacy Zones
Privacy Zones allow you to block off areas in your camera view that will not be recorded. Privacy Zones are only available for the Blink Outdoor 4, Wired Floodlight, Video Doorbell and Indoor and Outdoor (3rd Gen) Camera.
Learn about on-camera Privacy Zones.
Creating a Motion Zone
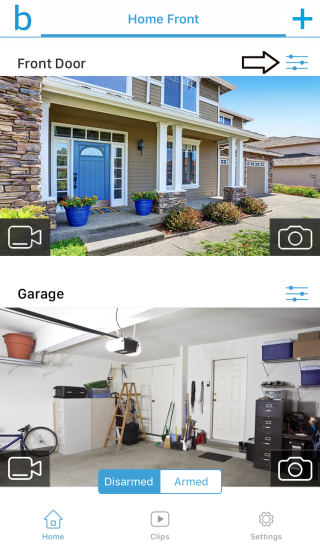
1. To use Motion Zones, tap Camera Settings ![]() above the the camera you want to change.
above the the camera you want to change.
2. From Camera Settings, select Motion Settings and then tap Motion Zones.
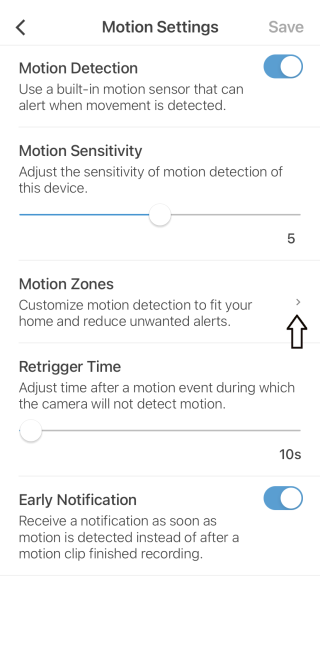
3. On the Motion Zones screen, the most recent thumbnail is shown with a grid pattern.
Tap Update Photo to refresh the thumbnail image so your settings are accurate.
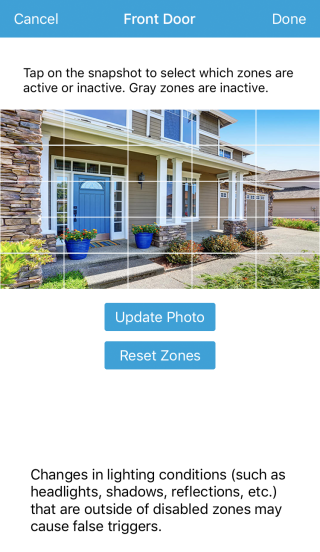
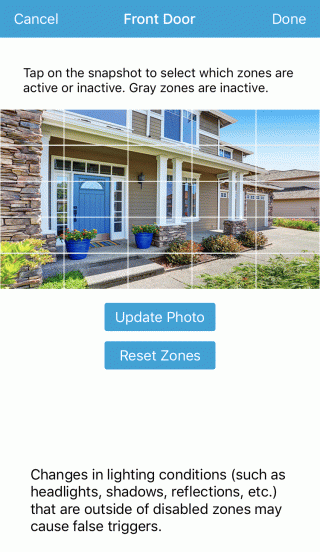
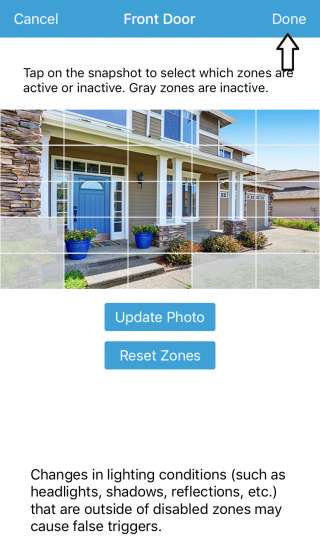
4. Select your desired inactive Motion Zones by tapping on the rectangle you would like to isolate. A selected area will become grayed out. The area within the gray square will not detect motion, even if motion occurs.
In the example below, bushes and plants are chosen as inactive Motion Zones since these outdoor elements may cause unnecessary motion events.
Optional: Basic and Advanced options are included for Outdoor 4, Wired Floodlight, Indoor and Outdoor (3rd Gen), and XT2 cameras.
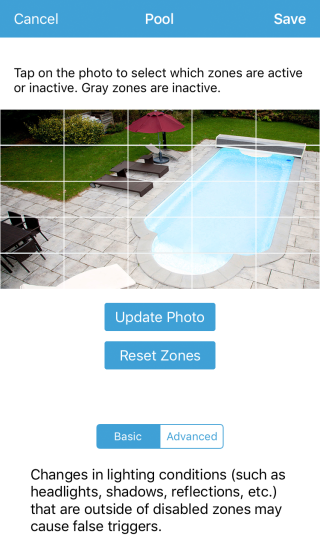
Advanced mode allows you to zoom into the thumbnail for more precise zone selection. Swipe to move the view and tap to select areas that are active or inactive for motion detection. When you’re done, tap Save.
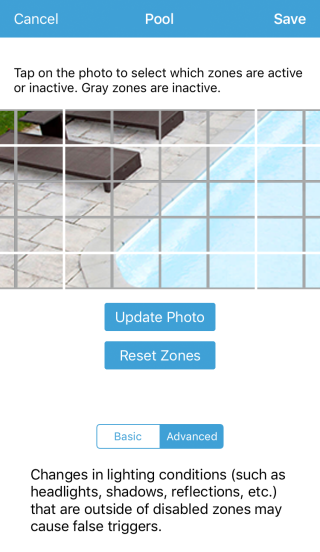
5. After you’ve selected your desired inactive Motion Zones, tap Done. To make all zones active and restart the process, tap Reset Zones.
Troubleshooting
Motion Zones
Doorbell
If you’re experiencing issues with Motion Zones, it’s important to understand how Motion Zones work.
In a typical event without Motion Zones enabled, the camera uses the Passive Infra-Red (PIR) sensor to detect motion. If a person walks past the camera, that person has a different temperature than the background image that the PIR sensor has been looking at and it triggers a motion event.
Motion Zones are active
With Motion Zones, the camera uses the PIR sensor in addition to analyzing the image to look for changes. The camera analyzes the motion event over the course of two seconds and looks for pixels in the images changing.
Considerations
In certain situations, pixels can change outside of your Motion Zones when there technically isn’t motion.
To fix the above scenario, you may need to fine tune the precise positioning and angle of the camera, as well as adjusting Motion Zones so that you can find out what works best in your environment.
If you’re continuing to have difficulty with unwanted notifications, learn more by visiting Troubleshooting Motion Notifications.
How to Adjust the Camera Speaker Volume
To adjust the speaker volume of your camera, tap Settings ![]() above the camera’s thumbnail.
above the camera’s thumbnail.
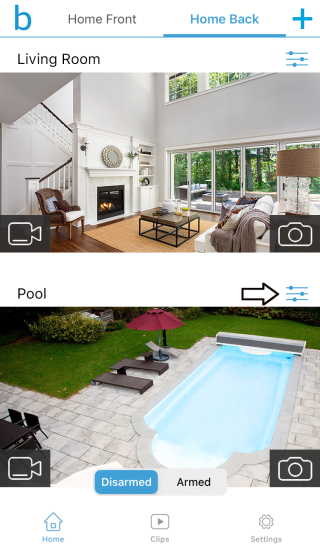
Select Audio Settings and you will now see a slider to raise or lower the volume on the camera side. This will only control the camera’s volume and not the audio level on your phone or tablet.

If you do not see this option in Camera Settings, fully close and then re-open the app. If you still don’t see this option after doing that, feel free to contact support here and we will help troubleshoot with you.
Alexa Setup Guide
Using the Blink SmartHome Alexa skill, you can monitor and control your Blink system with hands-free voice commands through compatible Alexa-enabled products. All you need to do is enable the Blink SmartHome skill in the Alexa app!
Note: You must link your Blink and Alexa accounts in the Blink app before you can enable the Blink SmartHome skill.
Getting Started
To get started, make sure you:
Enable the Blink SmartHome Alexa Skill
Before you enable the Blink SmartHome skill, you must link your Blink and Alexa accounts in the Blink app. Use the following steps to get started.
 .
. .
.Now you’re ready to monitor your Blink system, hands-free, with Alexa voice commands!
How Do I Use IFTTT Applets with Blink?
If you have not yet linked your IFTTT account to your Blink account, be sure to read our Help Article first.
Here is an example of two popular applets. These applets allow IFTTT to use your device’s GPS to arm and disarm your system when your leave or arrive home. Please use these IFTTT services if you are a European Blink customer.
Let’s start by setting up arming when you leave.
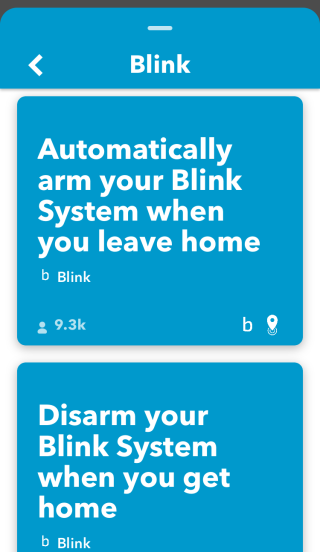
Once you have selected this, you will have the option to connect this applet to your system.
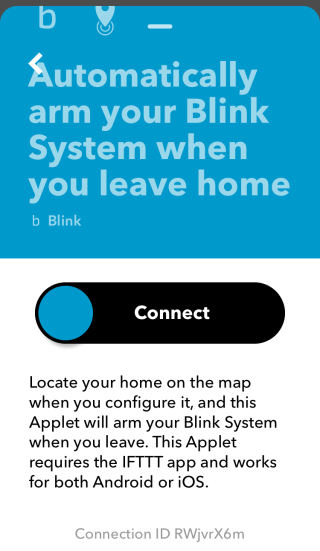
At this point, if you have not yet been asked, IFTTT may prompt you to allow or not allow push notifications. Tap on Allow to make sure that notifications are sent to your device.
Next you will be taken to a screen where you can set the location for this applet to occur and the system you wish to arm.

When the location is being set, you can either manually enter the address or use the current location. You can also pinch in and out to fine tune the radius.
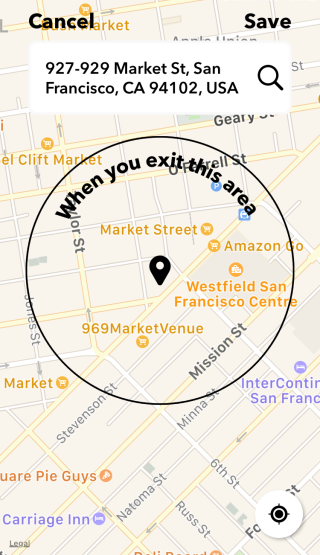
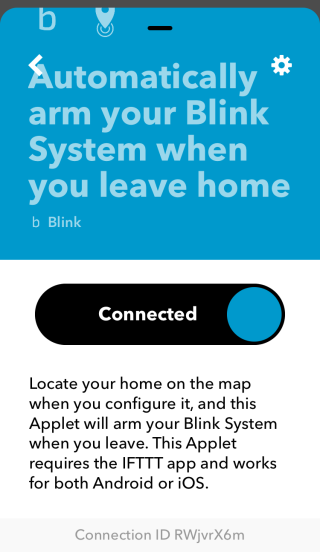
Once done, tap Save. You will then see the applet is connected.
Now lets take a look at disarming when you arrive.
Locate and select the “Disarm your Blink System when you get home” applet.
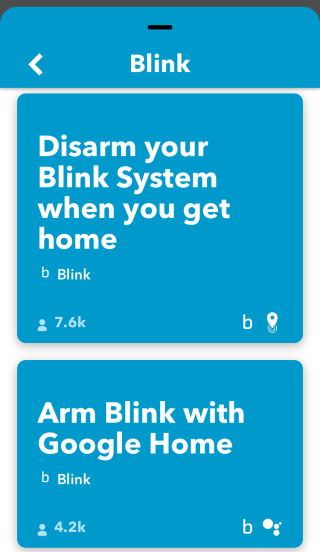
Once selected go ahead and connect it.
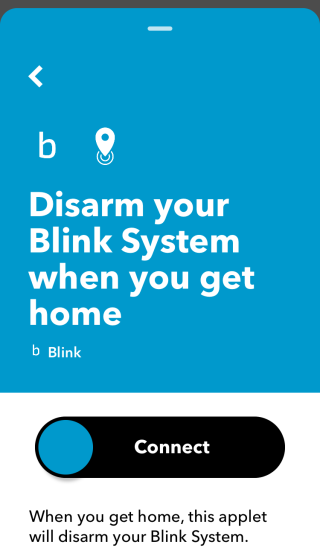
As before, you will be prompted to toggle notifications on or off as well as selecting the location for this applet and the system you wish to disarm.

You will need to set the location you wish enter to disarm the system. Remember you can fine tune this by pinching in or out.
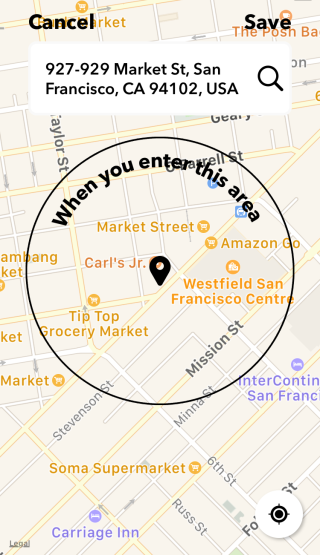
Once all the important information has been set, tap Save.
Now under “My Services” in the IFTTT app you should see these turned on.
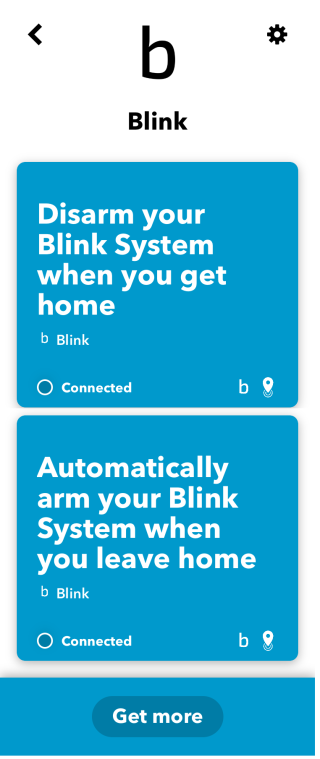
Note: You need to use the Blink applet for geolocation.
Below we have included links to a few other applets you may enjoy.
How to Integrate Blink with IFTTT Services
We are excited to announce that we have now incorporated IFTTT support to Blink! This will allow you to integrate Blink into other services that you may already use and love.
Please note that IFTTT support is currently only available in North America and some European countries.
How do I set this up?
To enable IFTTT support, download the IFTTT app from the Apple App Store or the Google Play Store.
Once the app is installed you will need to create or sign into your IFTTT account.
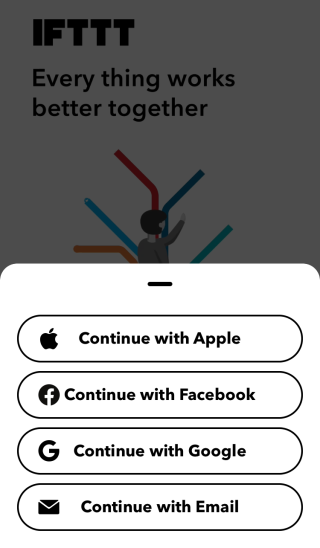
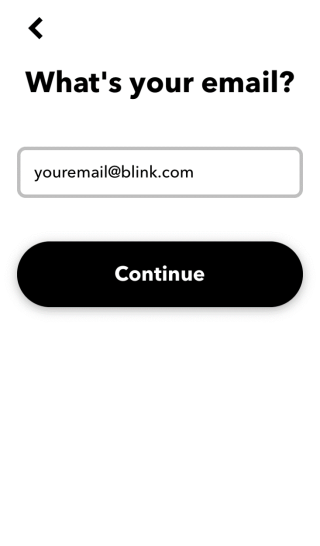
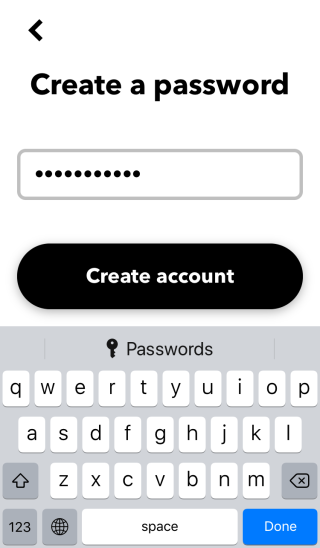
Once you are signed into IFTTT, you will see a Welcome screen where you can personalize your applet recommendations or close. Next, click on the Explore button to access the Search screen.

Then search for Blink and tap on the blue Blink logo.
If you are located in Europe, you will want to search for Blink (Europe).
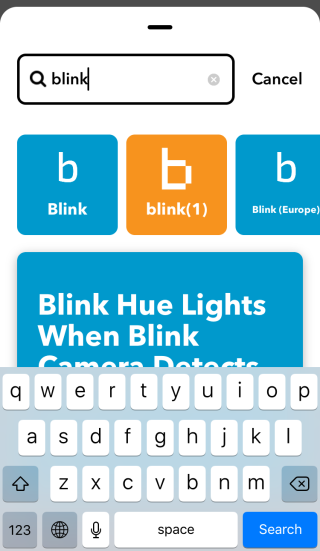
You will then be prompted to connect your Blink account with IFTTT.
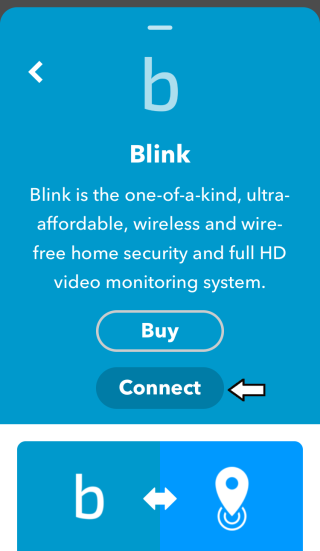
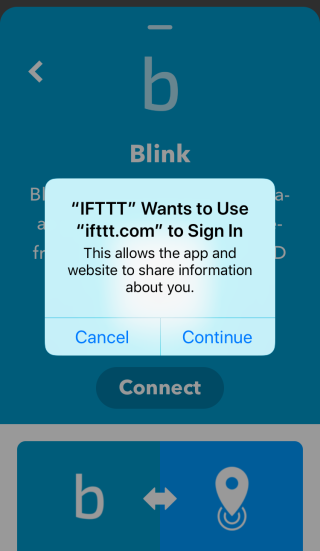
Click Continue to sign into your Blink Account.
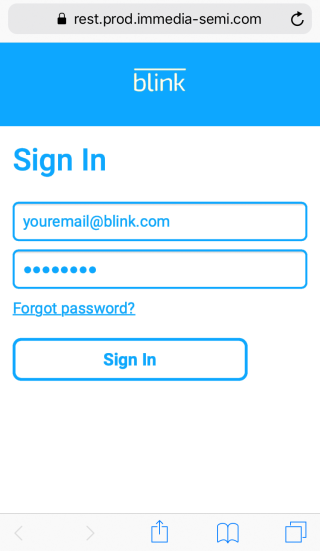
Please sign in using the same email and password as you use for your Blink system.
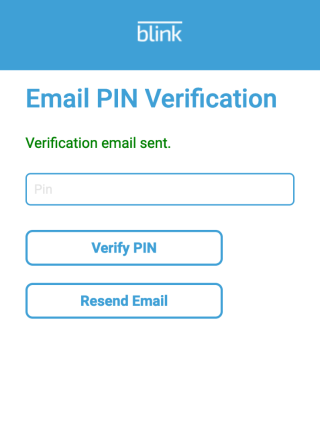
You will then enter the PIN sent to your mobile device or email address.
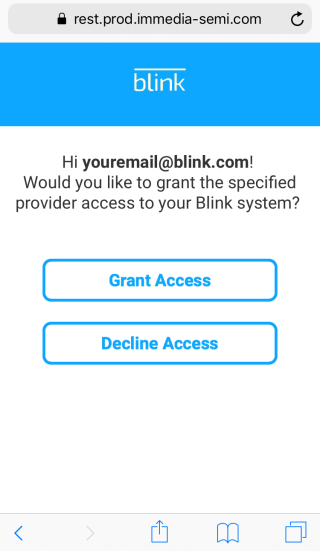
Tap on Grant Access in order to be able to connect to pre-made applets or you can make your own with the service available through IFTTT.
Check out our article on how to setup your first Blink applet here.
Using IFTTT Applets with Multiple Blink Systems
How to Create Custom Applets
The following explains how to create custom IFTTT applets to use with multiple Blink systems. Please refer to How to Integrate Blink with IFTTT Services and How Do I Use IFTTT Applets with Blink? for additional setup information. Please note that IFTTT support is currently only available in North America and some European countries.
An example of when you would create an IFTTT applet would be to arm more than one system at the same time, when you exit a location, under the same Blink account. IFTTT applets only allow the user to select a single Blink system. The way around this is to create additional applets to select additional systems.
Here’s how to create an applet based on the above example.
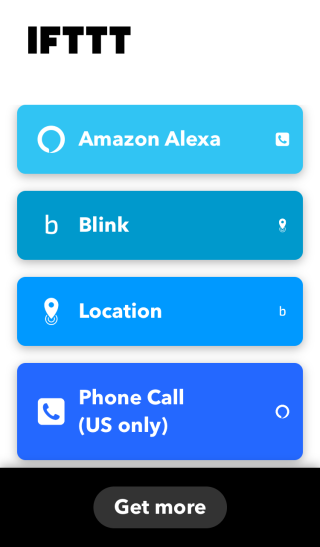
1. On the IFTTT home screen, tap Get More at the bottom.
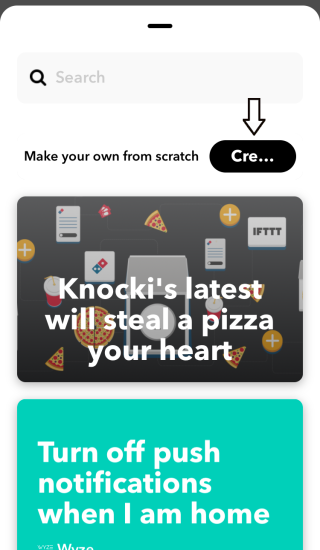
2. Then tap on the Create button.
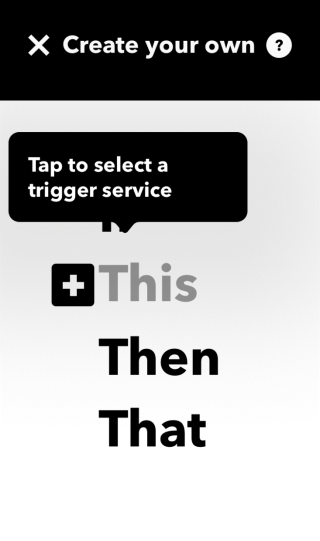
3. Next tap on + to select a trigger service.
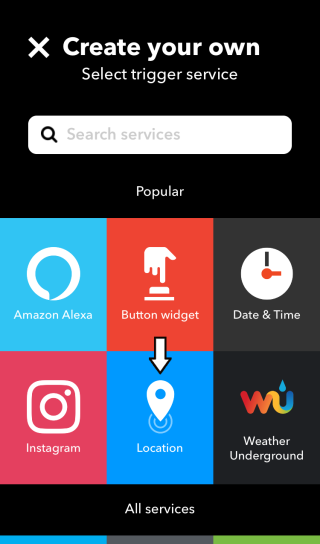
4. Then tap on Location.
5. In this example you’re creating an applet to arm the Blink system when you exit an area, so tap the You exit an area button.

6. Next search for the address you want to use.
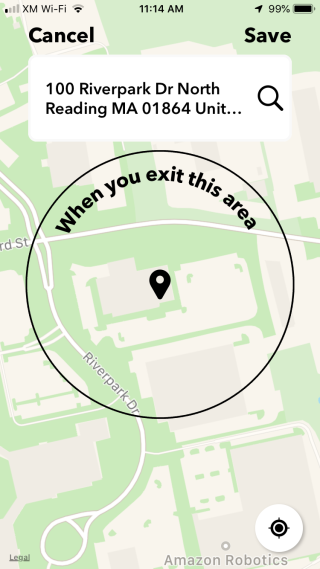
7. After you save the location, tap on + to select an action service.
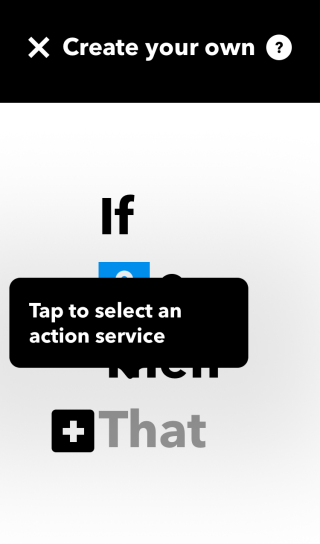
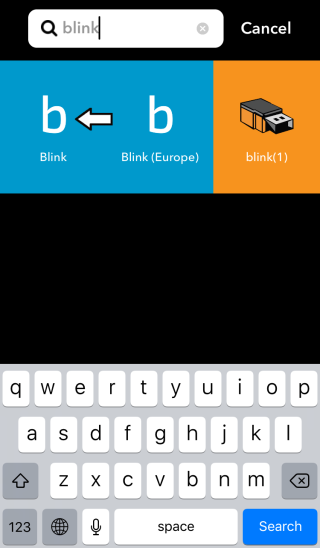
8. Search for “blink” and then tap on the first icon shown.
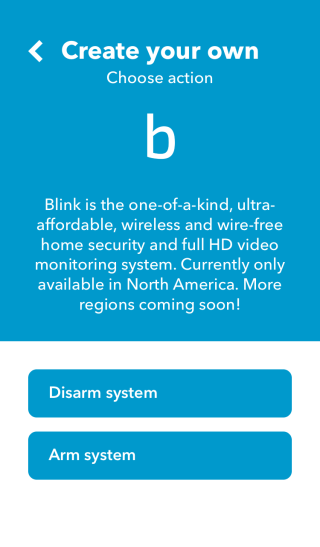
9. Next tap on the Arm system button.
10. Then select the other system you want to use from the menu.
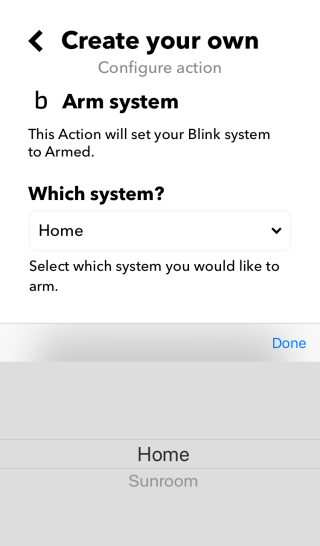
11. At this point all settings are complete for your applet. Tap Create action and Finish.
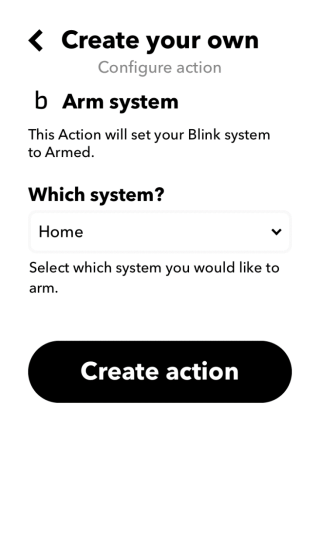
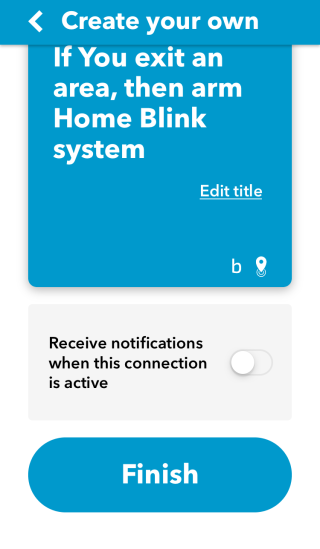
12. The new applet is now created and connected. Tap on Close to view it.
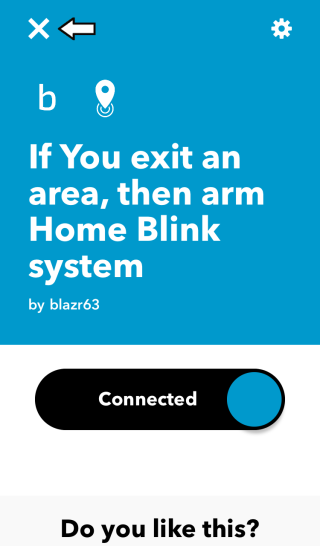
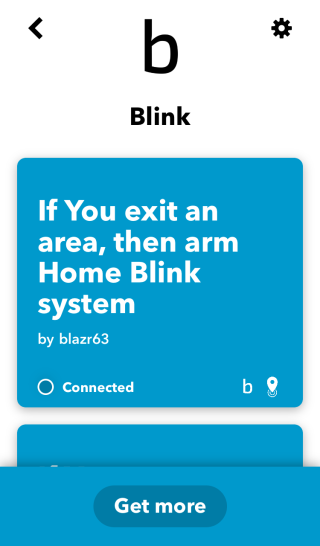
You can use the above steps to create another applet, to disarm your system when you arrive at that location, by choosing Disarm system (step 9).





Add Comment