UNIARCH NVR DVR Full installation user manual To update the firmware of a Uniarch NVR, we must enter the equipment directly or through the web interface with the administrator access data.
How to update a uniarch NVR?
To update the firmware of a Uniarch NVR, we must enter the equipment directly or through the web interface with the administrator access data. Once inside this interface, we click Settings , then Update and finally NVR Update :

Load More :
The update can be done manually, by clicking on Browse and searching for the files for the model and firmware corresponding to the equipment, or through the Cloud, by clicking on Check new version . If there is a recent version, it will be displayed in a window from where we can start this process. If there is no version available, the following message will be displayed:

It is recommended not to interrupt the update process to avoid future problems with the operation of the NVR.
How to delete EZCloud account in uniarch NVRs?
When an NVR is added to an EZCloud account, it can be seen in the list of added devices (within the EZCloud page ) as follows:

To delete this account from the NVR, you have to log in directly or through the device‘s web interface using the administrator user’s access data.
Once entered, click on Configuration , then on Network and finally on Mobile Service or UNIARCH . Within this section, the EZCloud username and its status appear.

When you click Delete, a window will appear with the following message:

By clicking OK , you will start the unlink process with the EZCloud account. When this process is finished, another EZCloud account can be linked.
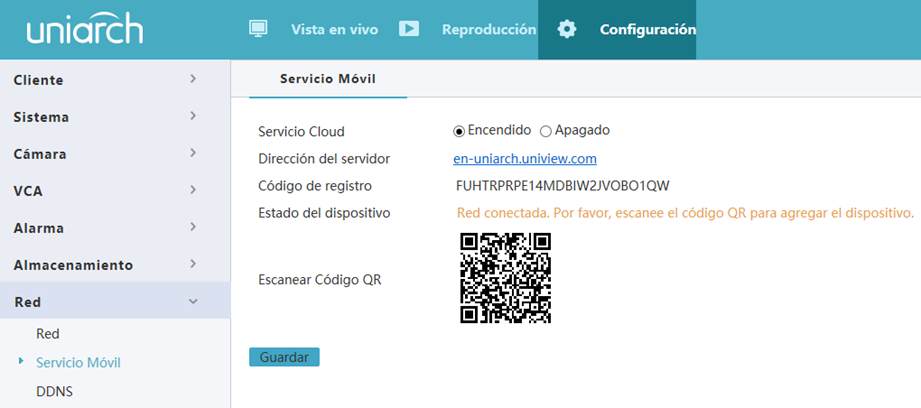
User management in UNIARCH NVRs
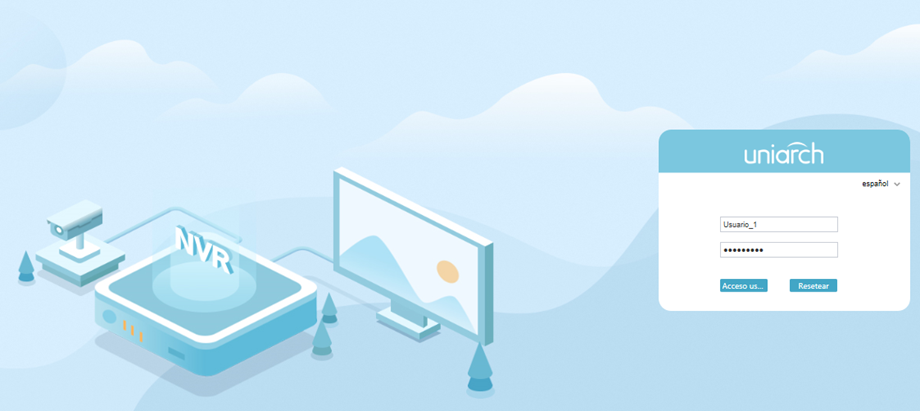
User management in uniarch NVRs allows you to set a limit on the permissions that each of them can access. To manage these functions, you must enter the recorder interface as an administrator, either directly or through the web interface (by typing the IP of the device in the browser) and logging in as shown below.

Once entering the interface of the recorder, go to configuration and then click on User.
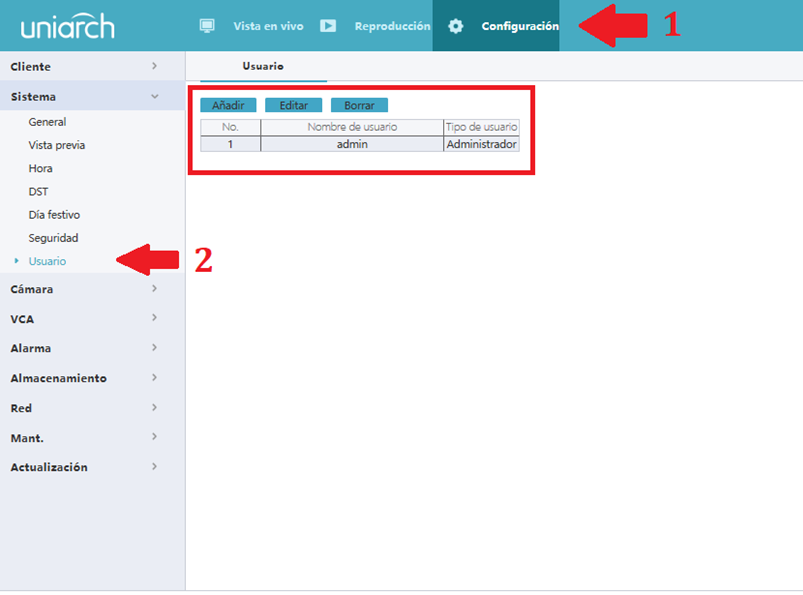
Within this menu, the list of added users appears and above it, three buttons to add, edit or delete users. Clicking on Add appears fields where you have to fill in the access data and permissions for this new user.
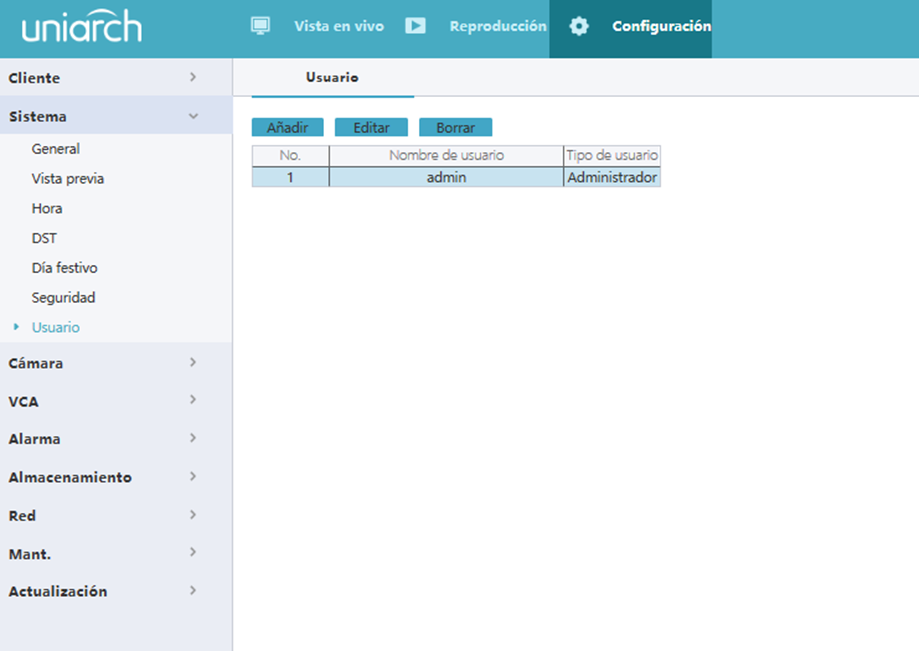
Once the username and password have been entered, clicking on User Type will bring up a drop-down menu with two options: Operator and Guest.

When you select Operator , the four basic permissions boxes are automatically checked. Otherwise, if Guest is selected , these four checkboxes are unchecked, so only the basic permissions needed for the corresponding user should be selected.
Below are the camera permissions. In the permissions of two-way video/audio, PTZ control, playback and local backup, by clicking the downward pointing arrows, you can select the channels that the user in question can access.
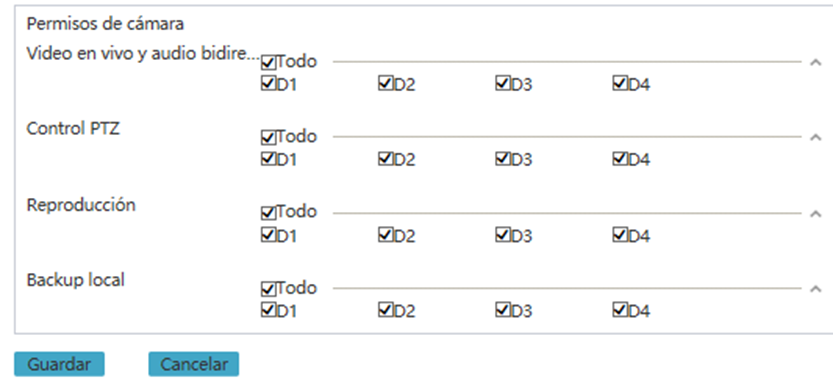
Once we finish configuring these fields, we click on save and a message like the following will appear, redirecting us to the list of added users.

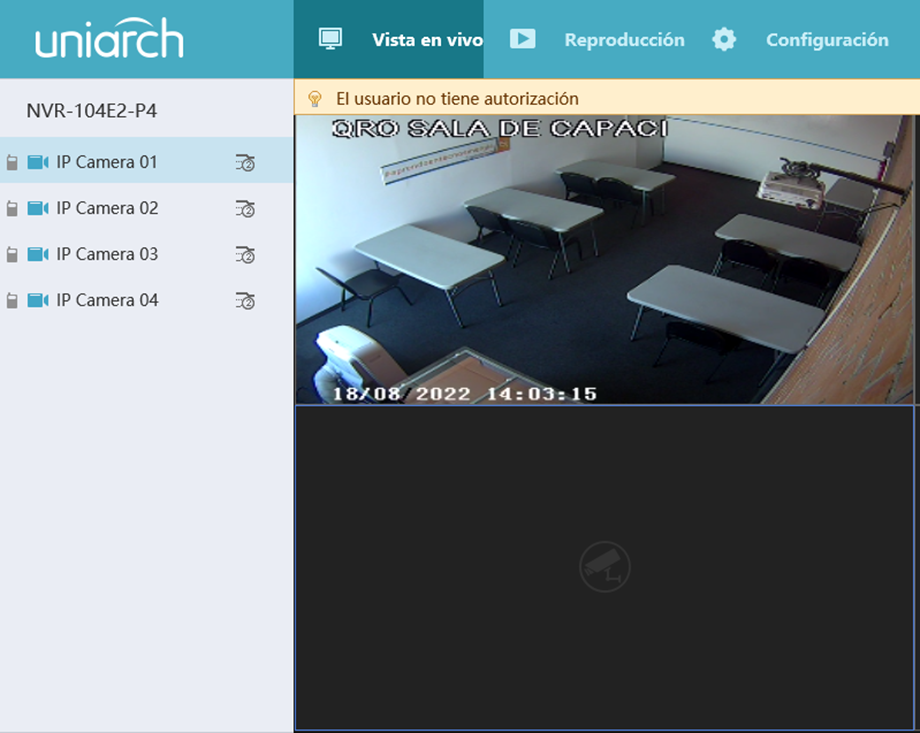
In the example below, it will be logged in as the user who was only given access on channel 1 to live view and two-way audio.
When trying to view video from another camera on any of the remaining channels, the following message will appear:
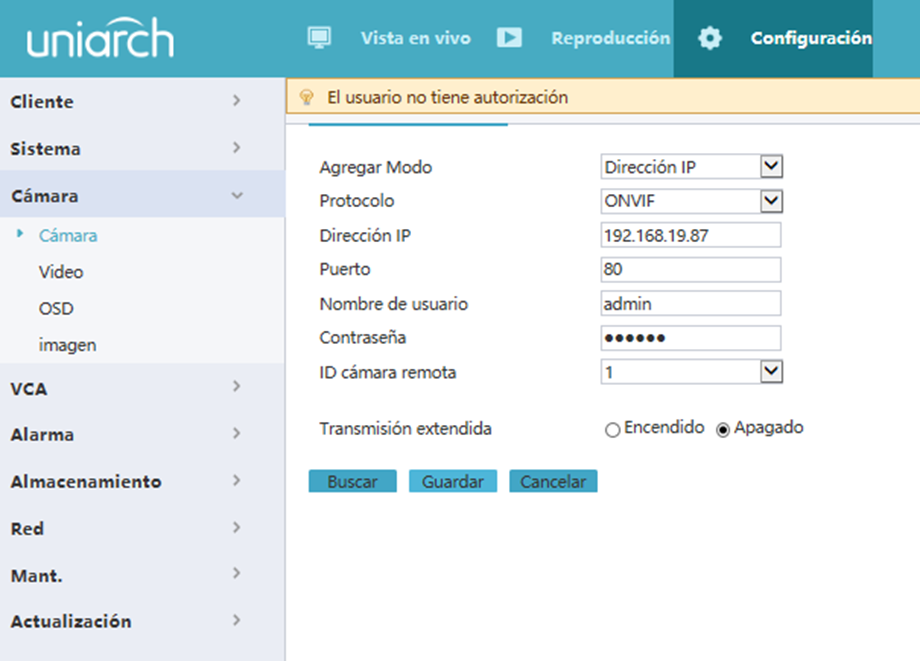
In the same way, if this user tries to modify the settings of the cameras, the recorder, or make reproductions and backups of recordings, the message will appear mentioning that he does not have the permissions to carry out this action.
Finally, if you need to modify or delete a user, first select the corresponding column and then edit or delete.

In this way, access to the functions that users have on our equipment can be limited.
Uniarch camera compatibility chart with XVR Uniarch and UNV
The objective of this article is to show the compatibility of the new analog cameras of the Uniarch brand with the XVRs of UNV and Uniarch.
As is well known, the main points to highlight for the compatibility of a camera with a recorder are:
- Resolution in Megapixels.
- Frames Per Second (FPS).
- Compatible technologies (AHD, TVI, CVI, CVBS).
In this case, due to the resolution and video technologies, there is no major problem, however, in the FPS is where some recorders differ from those of the camera, this can be reflected in the fact that the video is not displayed in live view and recordings .
This only applies to 5MP cameras since they come with 20 FPS by default, and some recorders support these FPS in a single channel or accept 5MP at 12 FPS.
Compatibility Uniarch cameras with XVR Uniarch and UNV |
|||||||||
Model
|
UNIARCH |
A V |
|||||||
XVR-104G2 |
XVR-104G3 |
XVR-108G3 |
XVR-116G2 |
XVR-116G3 |
XVR301-04G |
XVR301-08G |
XVR301-08Q |
XVR301-16G |
|
| Yes (All channels) |
Yes (All channels) |
Yes (All channels) |
Yes (All channels) |
Yes (All channels) |
Yes (All channels) |
Yes (All channels) |
Yes (All channels) |
Yes (All channels) |
|
| Yes (All channels) |
Yes (All channels) |
Yes (All channels) |
Yes (All channels) |
Yes (All channels) |
Yes (All channels) |
Yes (All channels) |
Yes (All channels) |
Yes (All channels) |
|
| Yes (All channels) |
Yes (All channels) |
Yes (All channels) |
Yes (All channels) |
Yes (All channels) |
Yes (All channels) |
Yes (All channels) |
Yes (All channels) |
Yes (All channels) |
|
|
|
YES (Only channel 1 at 20 FPS, all others at 12.5 FPS) |
Yes |
Yes (Only at 12.5 FPS on all AHD and TVI channels) |
Yes (Only at 12.5 FPS on all AHD and TVI channels) |
Yes (Only at 12.5 FPS on all AHD and TVI channels) |
YES (Only channel 1 at 20 FPS, all others at 12.5 FPS) |
Yes (Only at 12.5 FPS on all AHD and TVI channels) |
Yes |
Yes (Only at 12.5 FPS on all AHD and TVI channels) |
|
|
YES (Only channel 1 at 20 FPS, all others at 12.5 FPS) |
Yes |
Yes (Only at 12.5 FPS on all AHD and TVI channels) |
Yes (Only at 12.5 FPS on all AHD and TVI channels) |
Yes (Only at 12.5 FPS on all AHD and TVI channels) |
YES (Only channel 1 at 20 FPS, all others at 12.5 FPS) |
Yes (Only at 12.5 FPS on all AHD and TVI channels) |
Yes |
Yes (Only at 12.5 FPS on all AHD and TVI channels) |
For example , in the Uniarch XVR-104G2 it accepts 5MP cameras in all its channels, only in channel 1 at 20 FPS while in the other channels 5 MP at 12 FPS, for which it is necessary to change the FPS directly in the menu Camera OSD.
Note: The 2 5MP cameras only have 12 FPS in TVI technology so that it is taken into account, therefore we leave the following link where you can find the resolutions, FPS and video technologies of the analog camera models (by coaxial BNC).
How to backup video on a Uniarch NVR?
This article will walk you through the step-by-step process of backing up recordings from cameras added to a Uniarch NVR.
First, we log in through the web interface of the NVR:
Once we have entered, we click on Playback:
Within this section, on the left side there are two drop-down menus, from which you can select the type of recording and the definition configured to search for the respective video clips. Below is the calendar to select the day from which you want to recover the recordings. On the right side of this calendar, there is the time bar, in which the video will be displayed according to the time the recording events occurred.
The Record Type and Record Definition drop-down menus contain the following search options.
Once the type of recording and the definition have been selected, the equipment from which we want to observe the video clips is chosen from the list of cameras. The recording will be displayed in the time bar, indicating with different colors if the video started due to a detected event or if it was carried out normally. If we click Play, the playback of the recording starts. We can advance, delay or modify the speed of video playback.
It is very important to verify that the time on the recorder is in sync with the current time, otherwise the recordings will appear on different dates and times.
To make a backup of these recordings, click on the download icon next to the name of the selected camera.
A window will open in which we can select the camera from which the videos will be downloaded, as well as the time interval for this search. When we click on the Search button, a list of clips will appear showing the time of recording, the duration and the type of file, being able to select several boxes at the same time. Finally, we click on the Download button.
A box will appear at the top indicating the download percentage of each video clip and, later, in a bar above the playback box, the folder path and the name with which said file was saved.
And finally, clicking on the path will open the download folder with the audio clips in mp4 format.
How to configure time and motion recording on Uniarch NVRs?
The following guide shows how to configure time and motion recording on Uniarch recorders.
First, we enter the recorder, either directly or through its web interface.
Then we click on Settings
Once inside the settings, we select the Storage option. Other sections will be displayed, of which we will click on Schedule. Within this window we can select from a drop-down menu the camera for which we want to modify the type of recording and configure the seconds of pre and post recording. We must verify that the recording schedule box is on.
By clicking on Edit, a new window will open, where we will establish the hours and types of recording of the cameras as shown below.
Below, we can copy this setting to the whole week or just check the box for the days these recording times are required. Finally, when we click OK, the calendar is now displayed in different colors according to the type of event configured.
Once these changes are saved, these recording settings will be applied.
How to manage and order IP cameras on a Uniarch NVR?
 to edit the settings, including protocol, IP address, port
 to remove an IP device, or select multiple IP devices and then click Remove . Channels corresponding to PoE ports or switch ports cannot be deleted.
 to change the IP address of an IP camera and door. The IP address of a DVS cannot be edited from the NVR. means this function is not available.
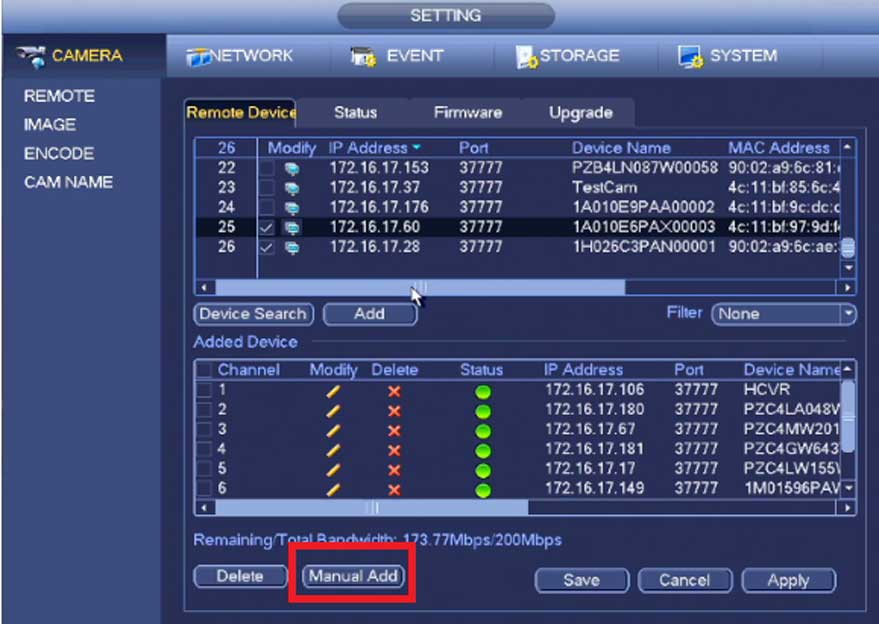
How to add a network IP camera on a Uniarch NVR?

 This Status means that an IP device has been added successfully and that it
 to view live video from the IP device. means the IP
 .
.How to manage users in Uniarch Client software?
Click User Management on the control panel to add, edit, or delete users.
Use the default username/password (admin/123456) to log in. “Admin” is the super admin and cannot be edited or deleted.
1. To add a user, click Add:
Admin: Only admin can add admin. The administrator has all permissions by default.
Operator: The administrator or administrator with user management permissions can add operators. An operator does not have permission by default.
2. To assign permissions, specify the permissions on the left. For some permissions (for example, Live View), you must select the devices on the right.

For example, the user “guard” will only have Live View, PTZ Control, Snapshot, Local Recording, Play Local Recordings and Snapshot, Play Remote Recording, and Download Remote Recording permissions to the two cameras selected on the right.
3. To edit a user (username, password, permissions), double-click the user in the list; To remove users, select and click Remove.
NOTE!
Menus can be grayed out or hidden for lack of permission. Contact the administrator if necessary.
How to add cloud devices to the Uniarch client software?
Note:
The software can manage up to 64 cloud devices simultaneously, including my cloud devices and shared devices from other cloud accounts. If the total number of devices you want to manage exceeds the limit, click Device Details and use the Add, Manage, or Cancel button to adjust the cloud devices.
Click Device Management on the control panel, and then follow the steps.
1. Click Device > Cloud Device.
2. If you already have a cloud account, continue with step 3; otherwise, click Sign Up to register.
3. Enter your username and password for your cloud account, and then click Sign In. Devices under your cloud account are listed, including your cloud devices (under My Cloud Device) and devices
shared from other cloud accounts (under Shared Cloud Device).

Tip:
Use the buttons in Operation to edit the device name, set the image, encoding and OSD settings, open the device web interface or reboot a device.
Click Cancel to cancel managing a device without removing the device from the cloud account.
Click TimeSync to keep a device in sync with your PC’s system time.
Click Device Details to add, edit, remove cloud devices, to share or unshare, to manage or unmanage.

Click Add to add devices to your cloud account (the required registration code is displayed on the device’s web interface, please refer to the device’s user manual for details); Click Remove to remove the devices from your cloud account.
Click Add Manage to add devices to the software; click Cancel to cancel management without removing the device from the cloud account.
Double-click a device or click Edit to rename the device. To sync the new name to the cloud, select Sync to cloud.
Click Share to share devices with another cloud account. Set a sharing period and permissions as needed. Permissions are preconfigured on the device.
Click Share logs to view sharing history or cancel sharing with other cloud accounts.
Click Cancel Sharing to cancel sharing from other cloud accounts.
How to add a Uniarch device to the Uniarch Client Software?
Devices include encryption devices and cloud devices. The software supports up to 64 local devices and 64 cloud devices, up to 512 local channels and 512 cloud channels.
Encryption Device
Add an Encryption Device Encryption devices include IPC (also called IP Camera, Camera, or Video Channel in this manual) and Network Video Recorder (NVR).
NOTE! Managing a device with different management software may cause unexpected problems.
Always add devices as an administrator (enter the username “admin”).
Click Device Management on the control panel, and then follow the steps:
1. Click Device > Encryption Device. The page is divided into two areas with two lists:
Online device list: The software searches for online devices and updates automatically. Note: The discovered devices have not been added yet, and you need to add them manually (see step 2).
Managed Device List – Lists the devices that have been added to the software.

In the list of online devices, select the devices, and then click Add. You can add devices to different groups.
The software uses the default username (admin/123456) to add a device. If a device’s password has been changed and it is not 123456, you must change the password in step 3.
In the list of online devices, you can:
Click Refresh to refresh the list.
Click Search Settings to specify a network segment to search.
Click  to select/deselect all listed devices.




Add Comment