TP-Link VIGI Cameras Ultimate Guide Part 4, The VIGI management system is mainly divided into “Standalone Management Mode” and “VMS Centralized Management Mode”. Standalone Mode connects directly to the devices for management. The VMS Centralized Management System consists of a server and an application. Devices are connected to the server in a unified manner, and users manage the VMS system through applications.
How to reset the password of the VIGI camera?
If you forget the password of the VIGI camera, you can reset the password via VIGI Security Manager or VIGI NVR.
Method 1: Via VIGI Security Manager
Step 1. Click the Forget Password option.
If the camera is not added, go to Settings > Device > Device List > Discovered Devices, select the device and click the Set Password or + Add > Forget Password.
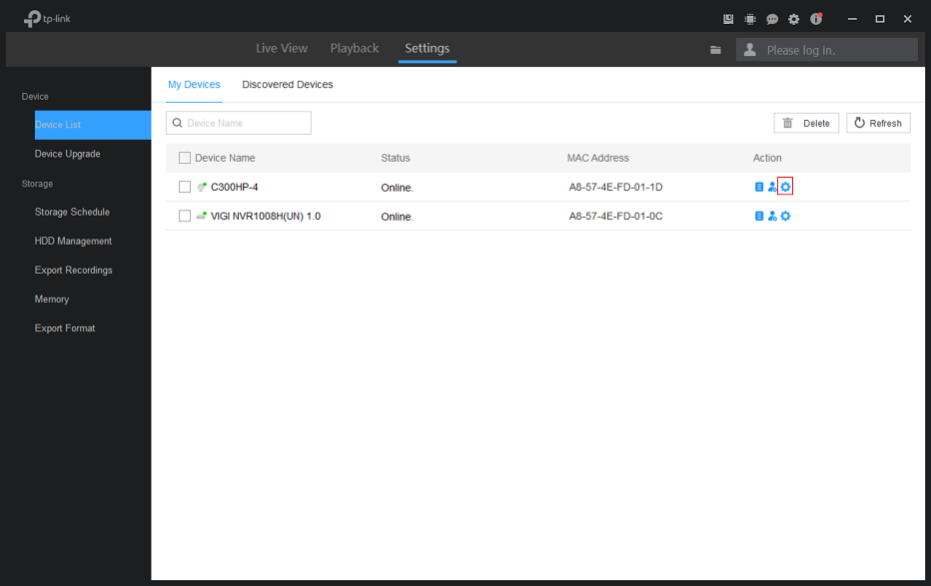
If the camera has been added, go to Settings > Device > Device List > My Devices > Settings icon of the camera > Basic Information > Device Security > Modify > Forget Password.
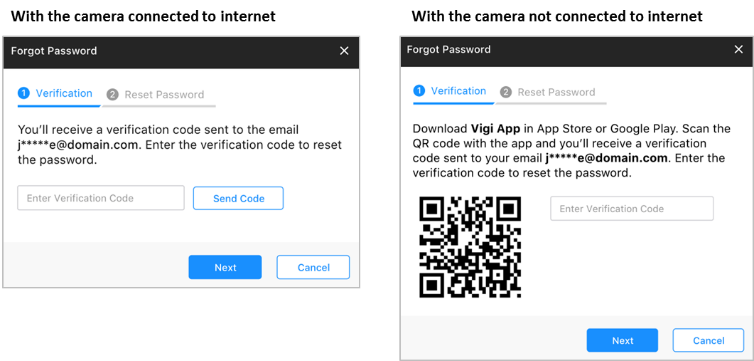
Step 2. Send the Verification Code to your Reset Password Email.
If the camera is connected to the internet, click the Send Code and you’ll receive a verification code sent to your Reset Password Email.
If the camera is not connected to the internet, please Download VIGI App in the App Store or Google Play. Scan the QR code with the app and you’ll receive a verification code sent to your Reset Password Email.
Step 3. Enter the verification code and click Next.
Step 4. Enter the new password.
Method 2: Via VIGI NVR
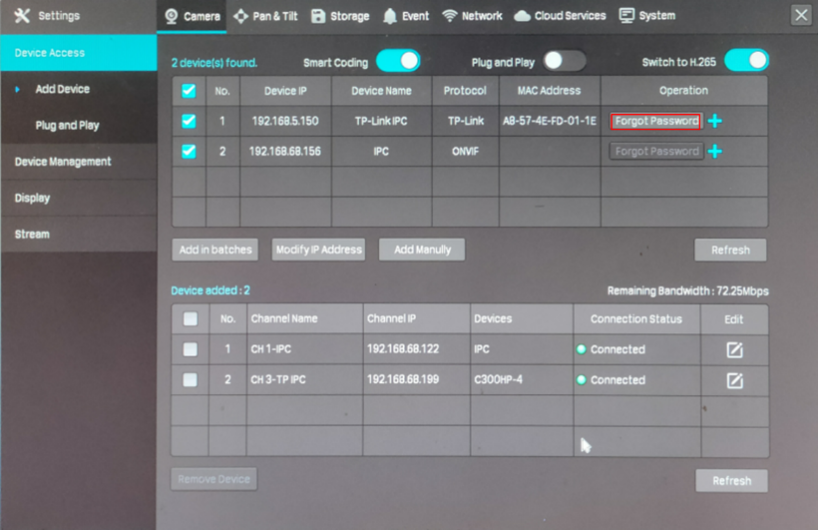
Step 1. Click the Forget Password option.
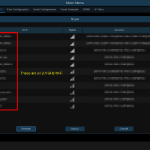
Right click to open Main Menu, go to Settings > Camera > Device Access > Add Device > Discovered Devices and you will see Forget Password option. If the camera has been added and is not certified, you need to remove the camera first.
Step 2. Send Verification Code to your Reset Password Email.

Step 3. Enter the verification code and click Verify.
Step 4. Enter the new password.
Note:
1. What’s the Reset Password Email?
When you first activate camera, it is asked to enter your Reset Password Email. It is only used to receive the verification code when you need to reset the password.
2. What should I do if I don’t receive the verification code?
TP-Link VIGI Cameras Ultimate Guide Part 4
How to modify the IP address of the VIGI camera
You can use the VIGI Security Manager or VIGI NVR to modify the IP address of your VIGI camera.
Via: VIGI Security Manager
If the camera is not added, go to Settings > Device > Device List > Discovered Devices, select the device and click the Set Network.

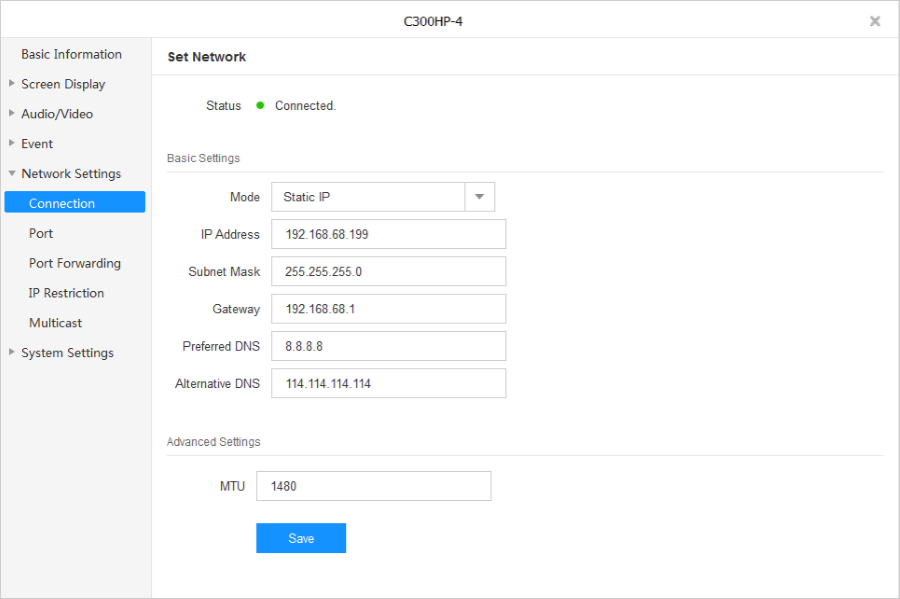
If the camera has been added, go to Settings > Device > Device List > My Devices > Settings icon of the camera > Network Settings > Connection and modify the IP address.
Via: VIGI NVR
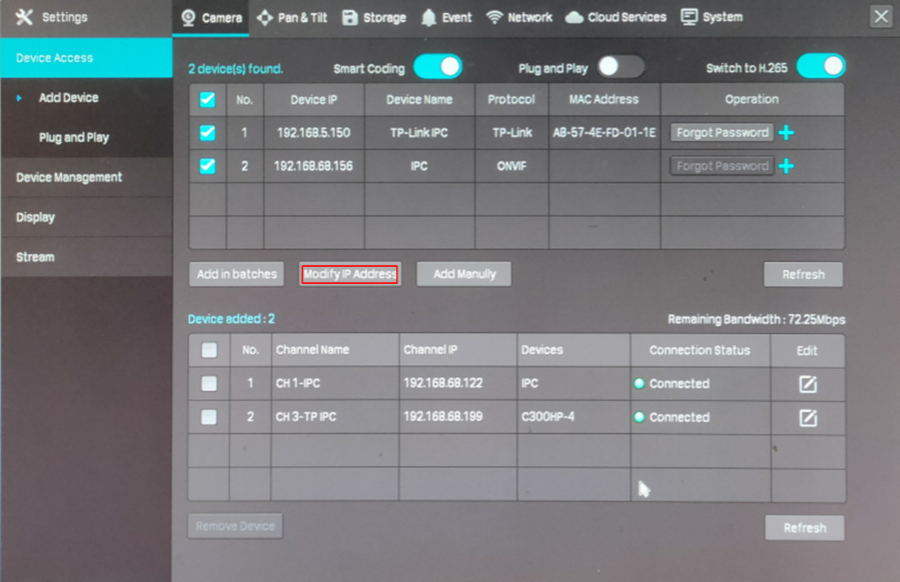
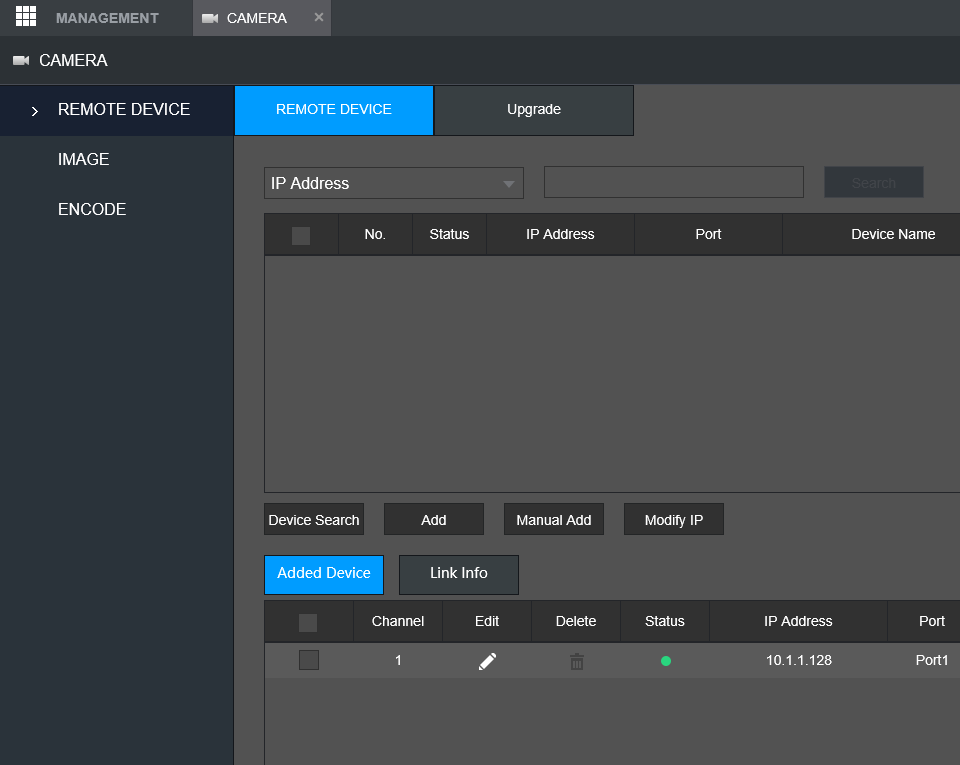
If the camera is not added, go to Settings > Camera > Device Access> Add device, select the device and click the Modify IP address.
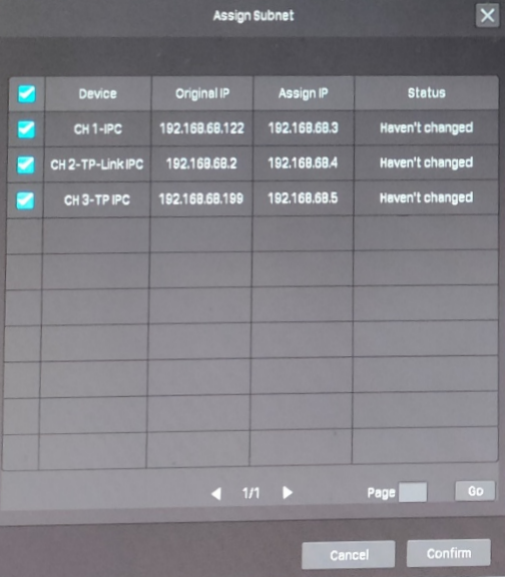
If the camera has been added, you can modify the IP address via one-click networking option. Go to Settings > Network > Connection and click the one-click networking.
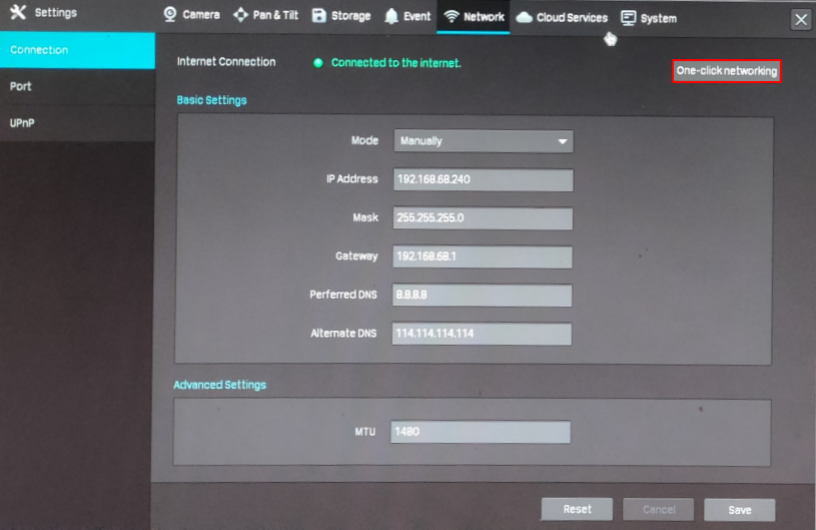
Select the device you want to change and NVR will assign unassigned IP. In this way, you can manually set the IP address. If you want to manually set the IP address, you need to remove the camera and change the IP address before it is added.
How to avoid the overexposure of image
The overexposure of surveillance images can be roughly divided into over-exposure during the day and overexposure at night. The overexposure in the daytime is basically caused by the backlight of the scene, while the overexposure at night is caused by the over-intensity of the infrared reflected light of the object.
Note: Please make sure the lens is clean.
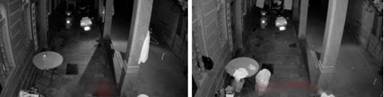
Overexposure in the daytime
The light reflected from the counter is relatively strong, making the counter very bright and unclear
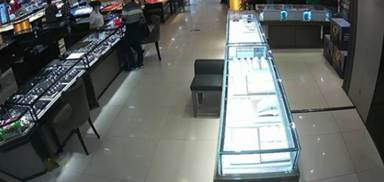
The camera will overexpose in the presence of bright light directed or reflected into the lens. Overexposure will lead to unclear details. During installation, we need to consider scenarios and avoid direct light or strong reflections. If it is unavoidable, we need to adjust the image parameters to alleviate the overexposure.
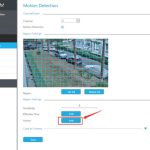
Step 1: We take the overexposure area as the exposure target and do backlight compensation (BLC), so that the IPC takes the overexposure area as the target to reduce the overall light input. The overexposure area in the figure is near the center, and we set BLC area to be center.
Step 2: After we enable BLC, the IPC reduces the overall light input, so the surroundings will become darker. We can increase the brightness of the surroundings by wide dynamic range (WDR).
Step 3: We can fine-tune brightness and contrast to display the best image.
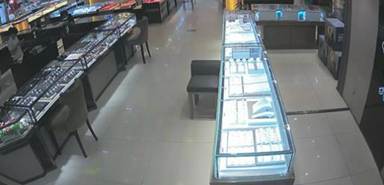
The following picture shows the adjusted result. (BLC area in center + WDR + brightness 60, contrast 40.) As you can see, the area of counter is clearer. You can further adjust the parameters according to your own image quality.
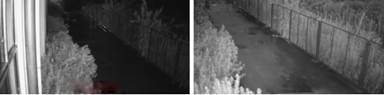
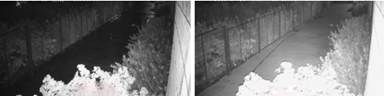
Overexposure at night
Overexposure due to being next to the wall is quite obvious, as shown below.
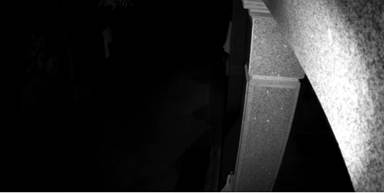
When the camera is installed next to the wall, if the angle is too biased towards the wall, the infrared light reflected back from the wall will be too strong, and the wall will be overexposed. If the wall is overexposed, the camera will reduce the shutter exposure time to maintain the overall average brightness of the screen, so that the other part of the screen will be too dark.
Step 1. Adjust angle to reduce the area of overexposed objects in the picture.
Without affecting the monitoring, make the wall area in the picture as small as possible. Firstly, the effective monitoring area can be increased; secondly, if the overexposure area of the wall is reduced, the exposure time of the camera will be increased, and the monitoring image will be clearer.
Step 2. Set BLC area to make dark areas brighter
You can increase the exposure time of the camera by setting the BLC area of the camera. Although the wall or reflective obstacles may be brighter, the effective monitoring area can be seen more clearly.
Step 3. Enable WDR to balance the brightness
Increase WDR can strengthen the details in the dark, and monitoring effect in night vision is better.
Note: Too high WDR will increase the noise in the night vision picture. WDR should be properly increased.
How to upgrade the firmware of VIGI cameras
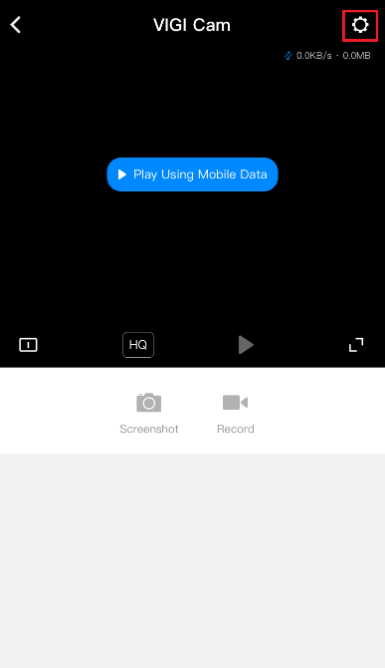
Method 1: Via the VIGI app
1. On the Live View page, tap the gear icon to enter the Device Settings page.
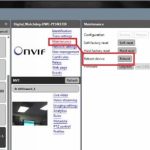
2. On the Device Settings page, tap on the Firmware Upgrade to check for update or update the firmware.

Method 2: Via the VIGI Security Manager (Windows only)
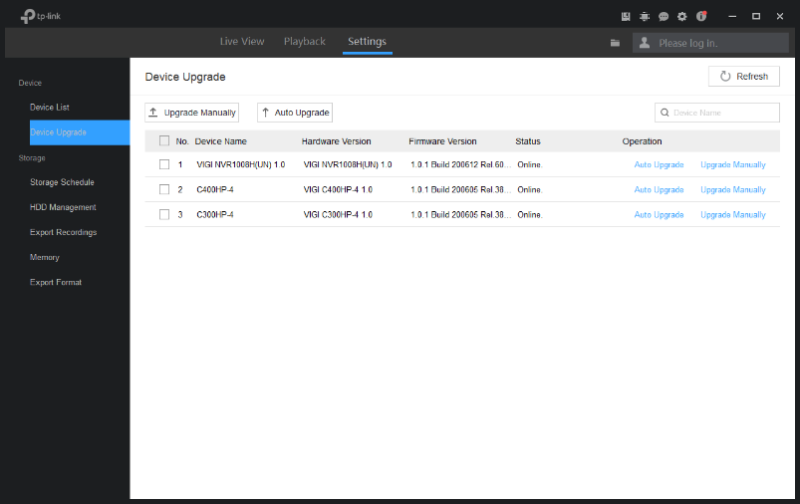
1. Open the VIGI Security Manager.
2. Go to the Settings page and go to Device > Device Upgrade to update the firmware.
What is the difference between 2.8 mm, 4 mm, 6 mm and 8 mm lens?
Lens focal length tells us the angle of view—how much of the scene will be captured—and the magnification—how large individual elements will be. The lager the focal length, the narrower the angle of view and the higher the magnification.
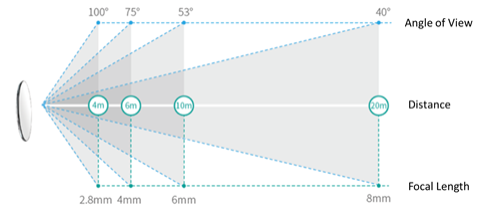
VIGI indoor cameras have a focal length of 2.8/4 mm and VIGI outdoor cameras have a focal length of 4/6 mm. The last digit of the model indicates the focal length of the lens.
For example:
VIGI C400HP-4: The focal length is 4 mm.
VIGI C300HP-6: The focal length is 6 mm.
How to select suitable lens?
The larger the focal length of the lens, the smaller the angle of view, and the farther the monitoring distance. So the camera lens with low focal length is suitable for observing small areas where need a wide angle. If you want to observe the objects closer with a big distance, you’d better select the cameras with a lager focal length lens.
How to rotate the image of my VIGI camera
You can rotate the image via VIGI App, VIGI Security Manager or VIGI NVR. VIGI Security Manager and VIGI NVR has more mirror option than VIGI App.
Here we take VIGI C400HP-4 as an example.
Method 1: Via VIGI App
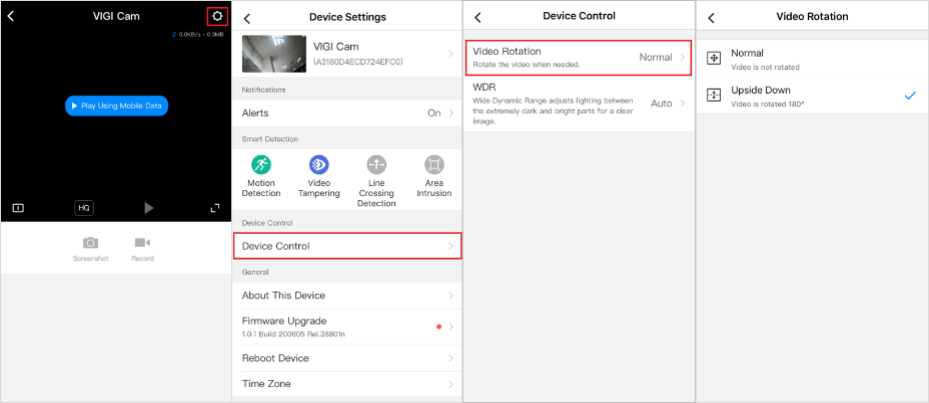
1. On the Live View page, tap the gear icon to enter the Device Settings page.
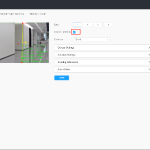
2. On the Device Settings page, go to Device Control > Video Rotation.
3. On the Video Rotation page, you can select Upside Down to rotate the video image 180°.
Method 2: Via VIGI Security Manager
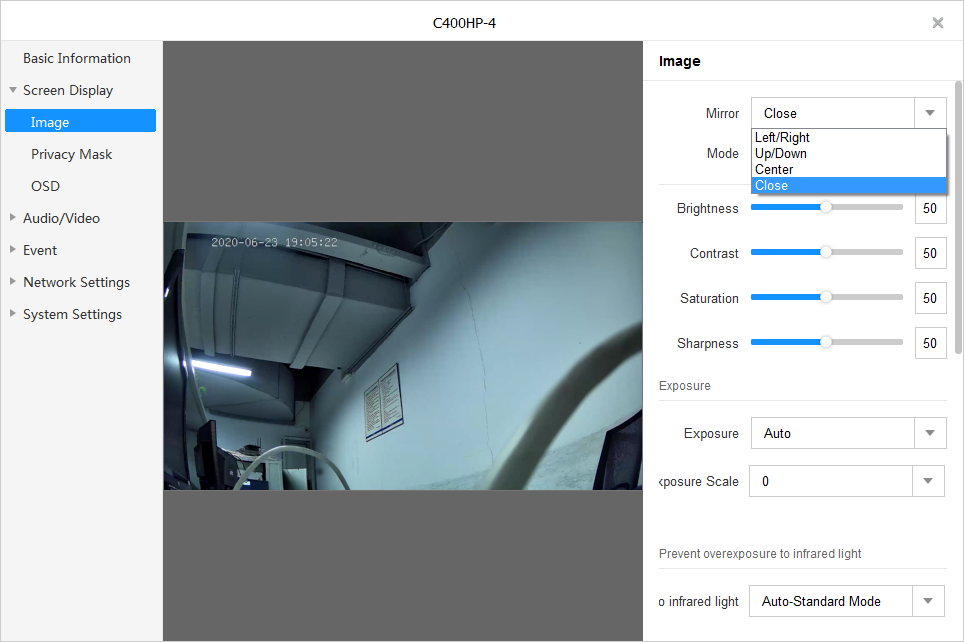
1. Go to Settings > Device > Device List > My Devices and click the settings icon of the camera.
2. Go to Image > Mirror and select Mirror option you want.
Method 3: Via VIGI NVR
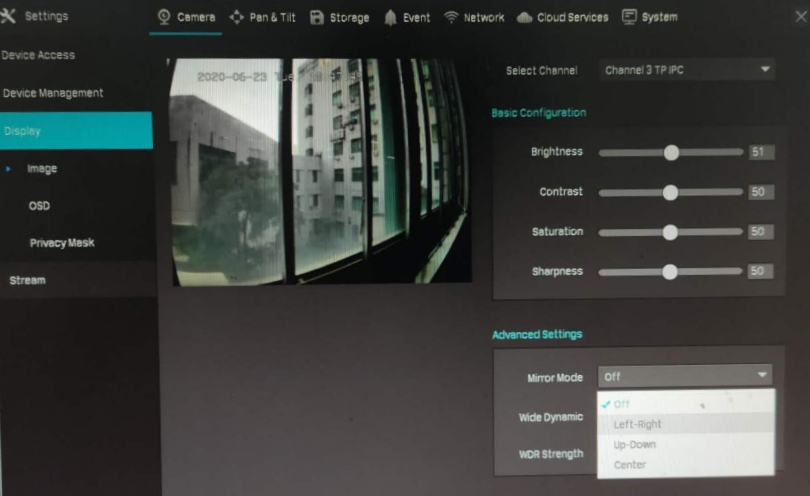
Right click to open Main Menu, go to Settings > Camera > Display > Image > Advanced Settings, select Mirror option you want.
How to change the password and Reset Password Email of the VIGI camera
You can change the password and Reset Password Email of the VIGI camera via VIGI Security Manager or VIGI NVR. Reset Password Email is used to receive the verification code when you need to reset the password.
Method 1: Via VIGI Security Manager
Step 1. Go to Settings > Device > Device List > My Devices and click the settings icon of the camera.
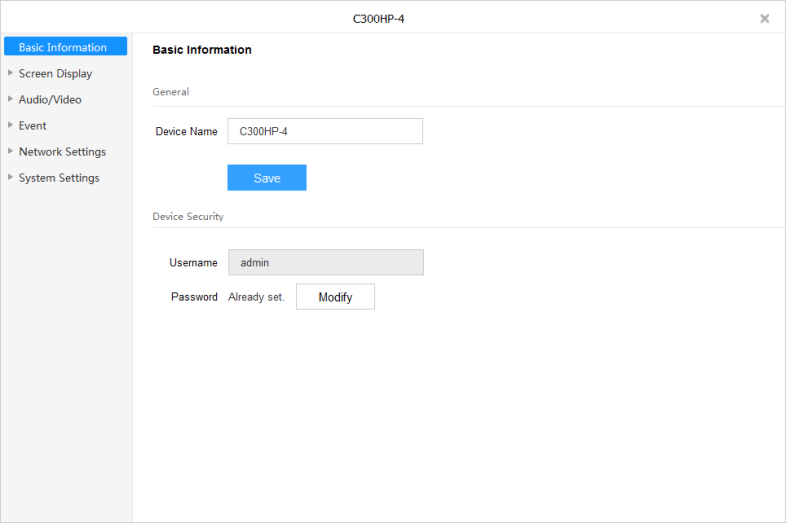
Step 2. Go to Basic Information > Device Security and click Modify to change the password and Reset Password Email.
Note: If you forget the old password, please refer to the link to reset the password.
Method 2: Via VIGI NVR
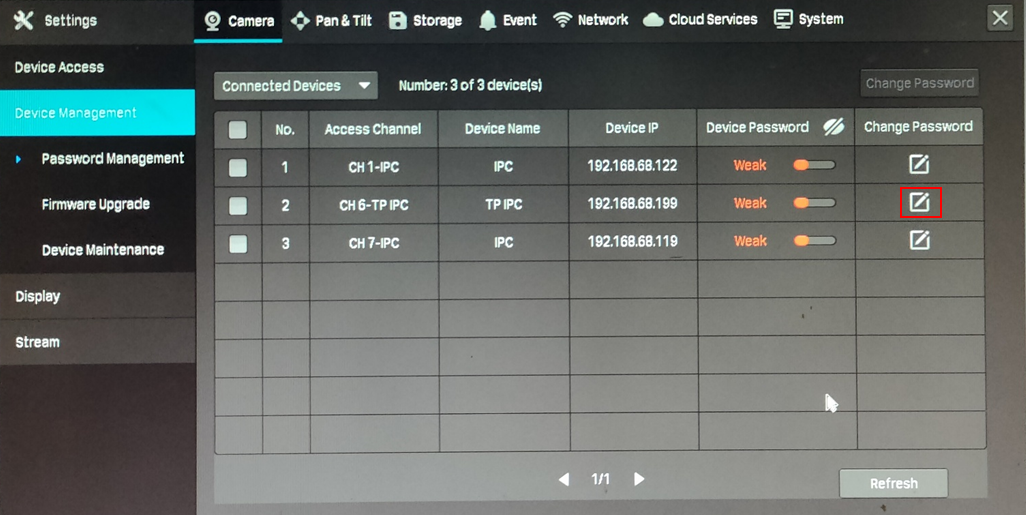
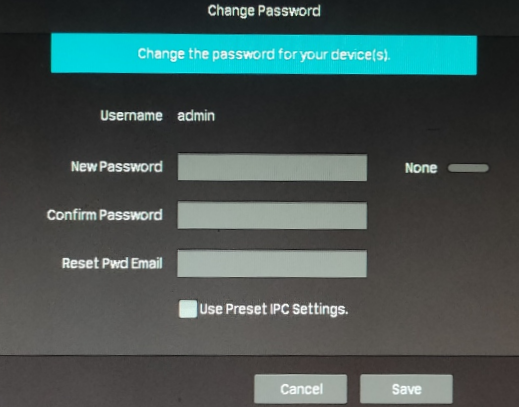
Step 1. Right click to open Main Menu, go to Settings > Camera > Device Management > Password Management, select the camera and click edit icon.
Step 2. Enter your new password and Reset Password Email, click Save. You can also use Preset IPC Settings which you set on the VIGI NVR. If you want to change the preset IPC settings, you can refer to the link.
.

Add Comment