
TP-Link VIGI Cameras Ultimate Guide Part 2, The VIGI management system is mainly divided into “Standalone Management Mode” and “VMS Centralized Management Mode”. Standalone Mode connects directly to the devices for management. The VMS Centralized Management System consists of a server and an application. Devices are connected to the server in a unified manner, and users manage the VMS system through applications.
How Can I View 24-hour Recordings of VIGI Cameras?
Note: A microSD card is needed for 24-hour recording. Insert the microSD card and initiate it using the VIGI App. Only for certain models.
Here we take VIGI C540W as an example.
On your VIGI App:
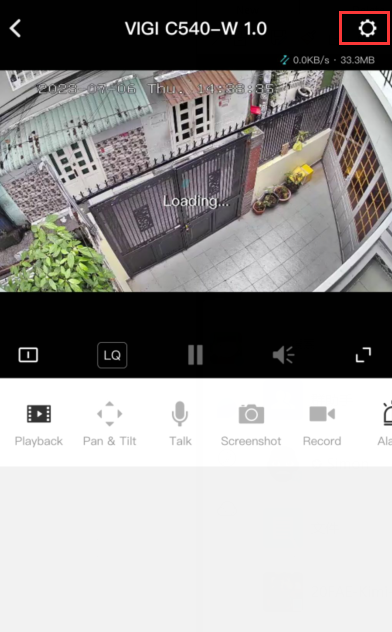
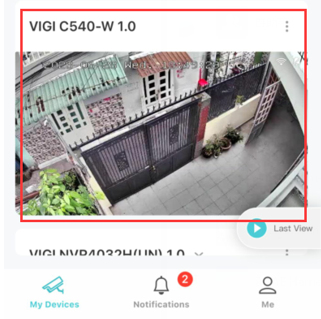
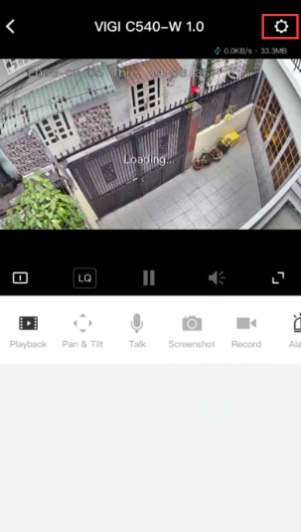
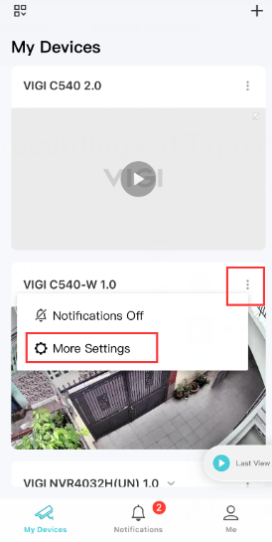
Step 1. On the home page, tap on your camera model to go to Live View page. Click More Settings.
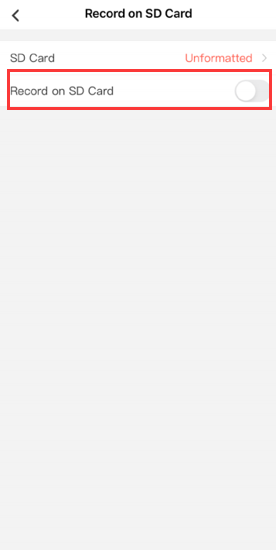
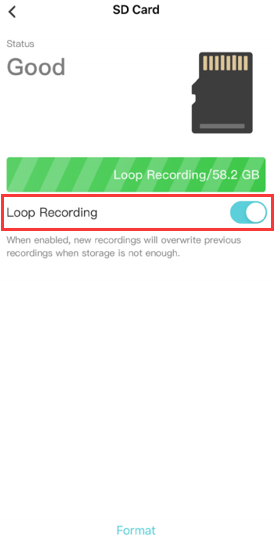
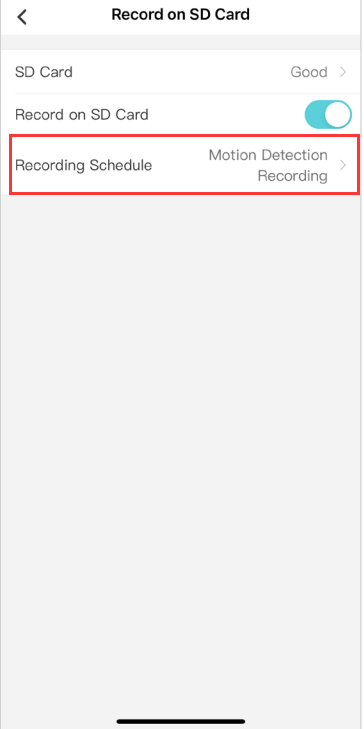
Step 2. Tap on Record on SD Card and toggle Record on SD Card on. Then tap on SD card to format your microSD card and toggle Loop Recording on.

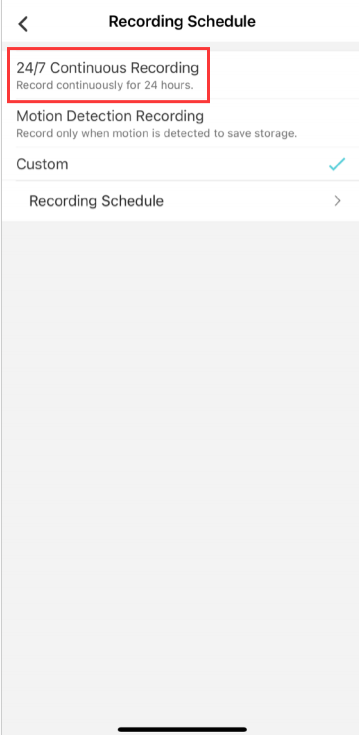
Step 3. After your enable Record on SD Card, you can see the option Recording Schedule now and tap on it. Set the recording as 24/7 Continuous Recording. Now your camera is set to recording 24-hour.
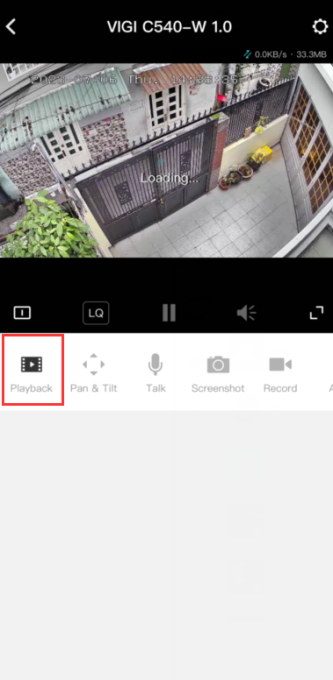
Step 4. Now you can go back to Live View page and check the recordings.
On your NVR/Security Manager:
Step 1. Click Playback on your VIGI interface.
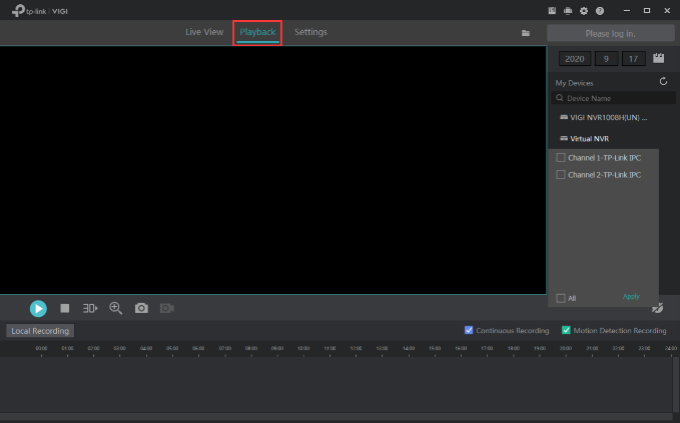
Step 2. Choose the day and view the recordings of that day.
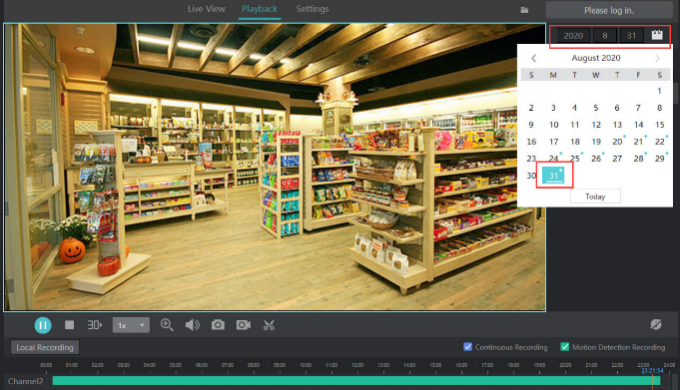
Step 3. Use your mouse and drag it for recordings you have.

TP-Link VIGI Cameras Ultimate Guide Part 2
How Can I Connect My VIGI Camera to a NAS?
Note: Your Username and Password may be changed when you first set up the camera. Default Username and Password are admin/admin.
The VIGI camera supports the standard ONVIF protocol (Profile S) as well as RTSP protocol, so it can work with third-party NVR or NAS devices that also support the standard ONVIF protocol.
If you want to manage and view the camera on a third-party NVR or NAS device, you are suggested to contact the NVR or NAS support or visit their official website to find the instructions to add the camera on your NVR or NAS devices (different NVR or NAS devices may have different configuration methods). This article will show you some basic parameters that it may require to connect the VIGI camera to your NVR or NAS device.
Step 1. The IP address of the camera.
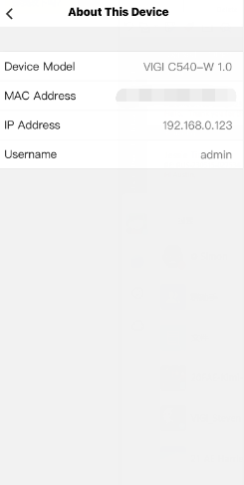
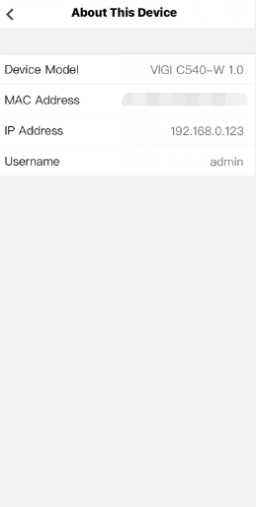
The IP address of the camera is assigned by your host router and you can find it on your host router’s DHCP list or on the VIGI app (Tap your camera to go to Live View > More Settings (top right corner) > About This Device > IP Address). For detailed instructions, please refer to: How Can I Find the IP Address of My VIGI Camera?
Step 2. The ports for standard ONVIF and RTSP protocols.
ONVIF Service Port: 2020
RTSP Service Port: 554
How Can I Find the IP Address of My VIGI Camera?
There are two methods to find the IP address of the camera. Here we take VIGI C540W as an example.
Method 1: Via VIGI app
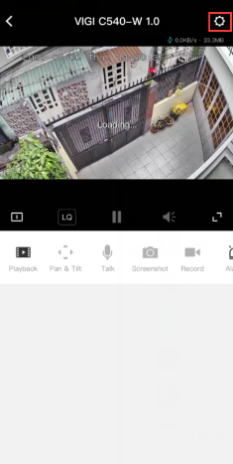
Step 1. On My Devices page, tap on your camera which you want to find its IP address.
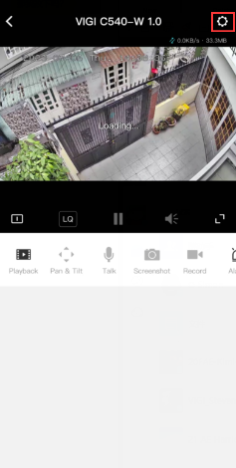
Step 2. On the Live View page, tap the gear icon to enter the More Settings page.
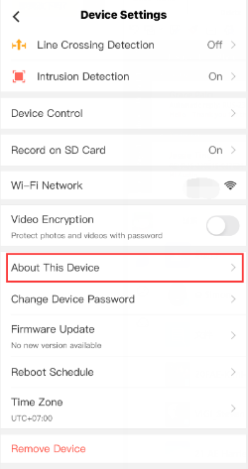
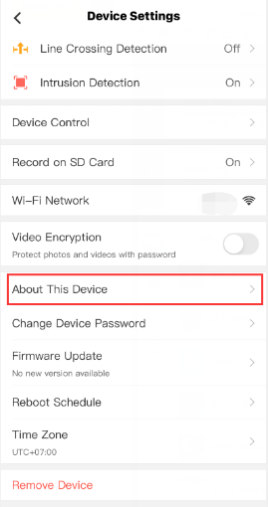
Step 3. Tap About This Device and you can find your camera IP Address there.
Method 2: Via the web management page of your router
Here we take TP-Link router Archer C7 as an example. If you have a different brand router, please contact the manufacturer support for help.
1. Log in to the management page of your main router.
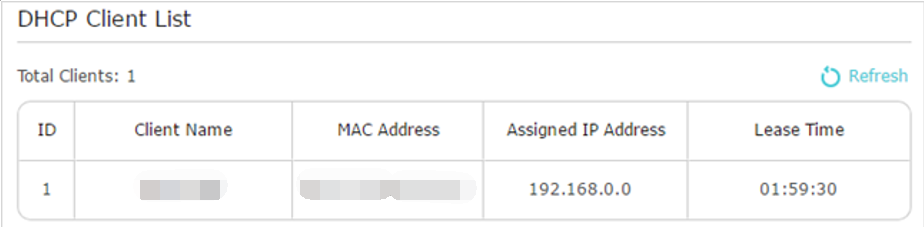
2. Go to Advanced > Network > DHCP Server and locate the DHCP Client List section to find the IP address of your camera.
Why Can’t I View the Live stream of the VIGI Camera Continuously?
Note: Always ensure the camera firmware is up-to-date and you are running the latest VIGI app on your phone.
In certain business scenarios, there may arise a need for customers to consistently access the live stream functionality of the VIGI camera. For instance, it could be crucial for business owners to monitor their parking lot or their shop while simultaneously attending to other responsibilities, such as checking the warehouse and inventory. However, it is imperative to ensure that both your monitoring device and the camera are connected to the same wireless network, while also verifying the strength and stability of the signal on both devices.
However, some customers may realize that they cannot watch the camera live stream continuously and they were prompted to continue the viewing after several minutes. Try to troubleshoot by following these steps:
Step 1. Confirm and ensure both your monitoring phone and the camera are connected to your home Wi-Fi. You can disable cellular data on the phone if necessary.
Step 2. Ensure there is no special setting on your routers, access point, or CPE, try to turn off 802.1Q VLAN (or Guest Network) and Access Control List (ACL) on the router that may block the local communication between the camera and your phone.
Step3. For IOS 14 devices, allow ‘Local Network’ permission for the VIGI app on IOS devices.
Why do I need to give local access permission to TP-Link apps in IOS 14?
Step 4. If your monitoring phone and the camera are connected to different Wi-Fi networks, which means you are viewing the camera remotely. In this circumstance, the camera live stream needs to be uploaded to the TP-Link Cloud server first and your phone then downloads and plays it as a live stream. Upon this point, continuous live streaming strains your network bandwidth, and it might cause data allowance overages, which is also inconsistent with the advocacy of energy conservation. And there will be a time limitation for the live streaming and you will be prompted to continue the viewing. To continue the stream, simply press YES/CONTINUE to continue the stream.
(As a product family of professional networking and business security camera, VIGI cameras do not support smart home assistants like Google Alexa to view live pictures or play back videos)
VIGI cameras don’t miss any action, even when you aren’t there to view the stream. Features like local recording with a microSD card or VIGI NVR, motion detection notifications, and alarms that all the action in your camera’s field of view is recorded. (Some features may vary depending on the model you have. Refer to the specs of your model.)
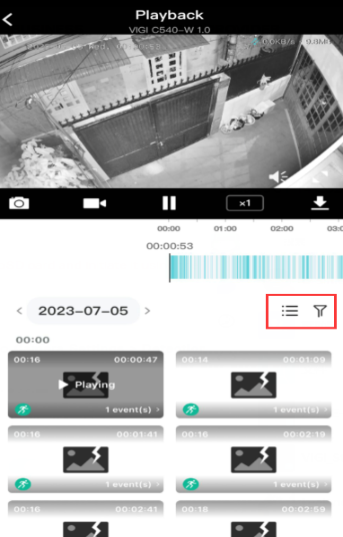
Where Can I Find Detection Recordings of VIGI Cameras?
Note:
Here we take VIGI C540W as an example.
1. Make sure the Motion Detection function is enabled. If not, tap on the camera Live View. On the top right corner, tap the Wheel icon. Make sure you enable corresponding detection.
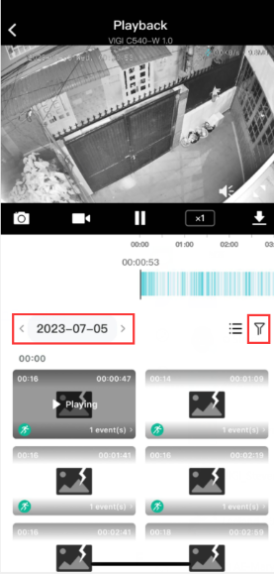
2. Back to previous Live View page. Tap on Playback to view all the date and recordings. You can select the day and use the Filter to view the recordings you want.
What to Do If Firmware Update of My VIGI Camera Failed
Normally, the new firmware will include more features or improve the performance of the VIGI devices. Here are some suggestions to troubleshoot if you fail to update the firmware.
Step 1. Reboot the VIGI device.
Step 2. Move the VIGI device closer to the router to make sure it gets a good network connection.
Step 3. Disable the firewall or antivirus setting on the router if there is one.
Then you can try to update the firmware again.
In addition, if you are using VIGI Security Manager, you can also try to update your firmware with VIGI Security Manager.
(Note: It is required to log out your TL-LINK ID and add your device in your local network. And upgrade your device.)
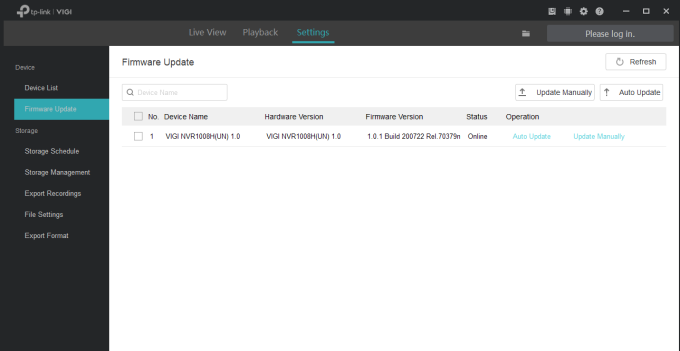
Step 1. Access your VIGI Security Manager on your computer by launching it on the computer you have installed it.
Step 2. Go to Settings > Device > Firmware Update, and on this page, you can batch-update them with Auto Update. Or you can update your device individually.
(Optional) Step 3. If you have trouble updating automatically, you can try to upload the firmware to your camera manually.
Search and download the corresponding firmware from Download Center.
Note:

How to Use Motion Detection Function of My VIGI Camera in VIGI App
Note:
Here we take VIGI C540W as an example.
1. On the default page – My Devices, tap on three dots and click More Settings.
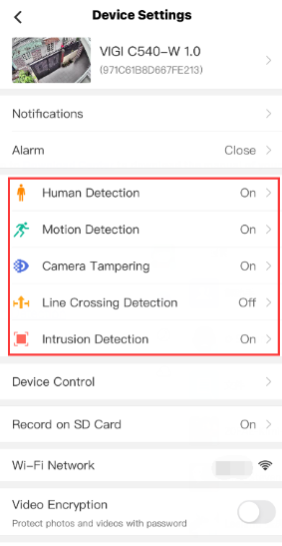
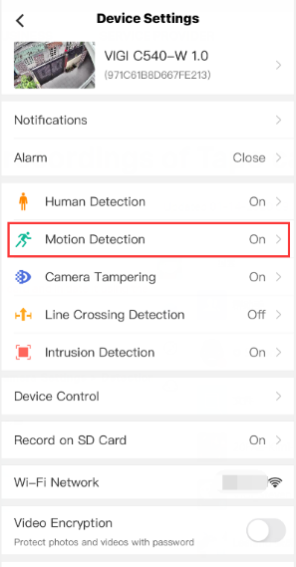
2. On the Device Settings page, you can see several options. (Note: Features may vary because of models you have). To enable Motion Detection, tap on this option.
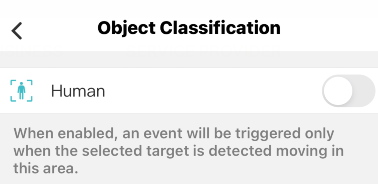
3. On this page, you can set your parameters and features with Motion Detection. Toggle it and enable it. In Object Classification, you can enable Human to detect if any human is moving in the activity zone.
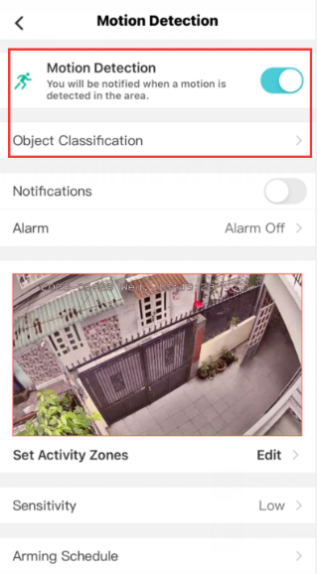
4. After enabling Motion Detection function, you can toggle on to turn on the Notifications function if needed.
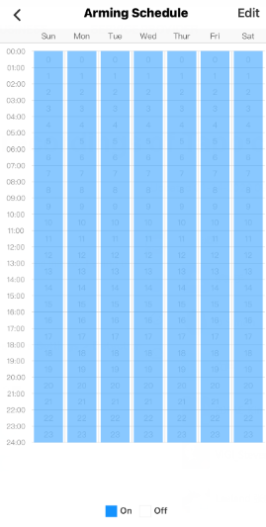
You can also set Alarm to sound an alarm or flash light to warn the intruder. Meanwhile, you can set the Alarming Schedule.

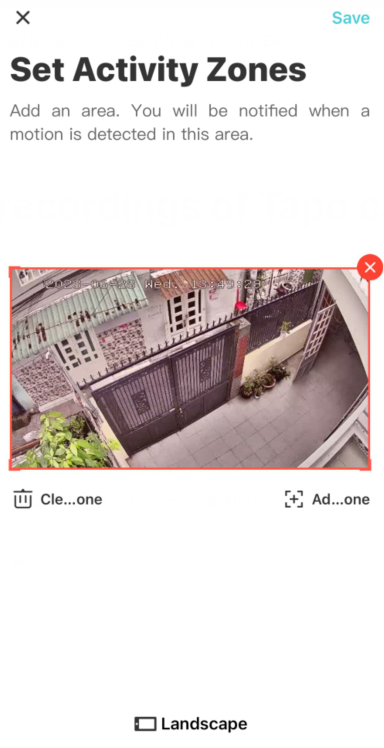
5. Set Activity Zones and the camera will only detect motion in custom zones. Entire view is covered by default.
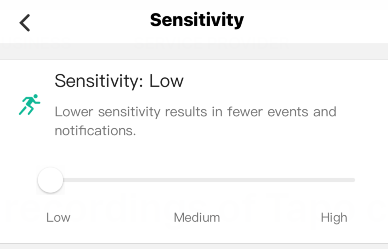
6. Adjust Sensitivity (Low/Medium/High) as needed. Increased sensitivity results in more recordings and notifications.
7. On the Live View page, tap Playback to view detection recordings if detected. Drag the time line and locate the orange sections. You can also use Filter function to find recordings that contain movement.
.
Add Comment