Step-by-Step Guide to Wireless Setup, “Hello, in this article, we will explain how to wirelessly connect security recorders to your network. We have used Swann devices as an example. However, devices from many manufacturers are compatible with wifi dongles.”
Swann is constantly coming up with new ways to keep your house or place of business safe because we understand how much you value peace of mind. In this article, you will:
Here are some key information about SWACC-USBWIFI – USB Wi-Fi Antenna for DVR or NVR
Step-by-Step Guide to Wireless Setup
Wireless vs. Wired: Selecting the Ideal Link
You can use either the cordless SWACC-USBWIFI or the traditional ethernet connection to connect your recorder. Which is the best for you, let’s see?
| Connection | Good Stuff | Downside |
|---|---|---|
| Connection via Wire | Extremely dependable and quick connection that is unlikely to be lost | There are a lot of wires to manage and space for your recorder is limited |
| SWACC-USBWIFI Wireless Connection | No more tangled cables—you can put your recorder anywhere! | Other devices may have an impact on the signal and it may occasionally hiccup |
Check the recorder’s firmware
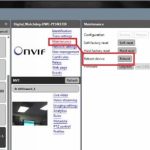
To check what is the recorder’s current Software and Agent version:
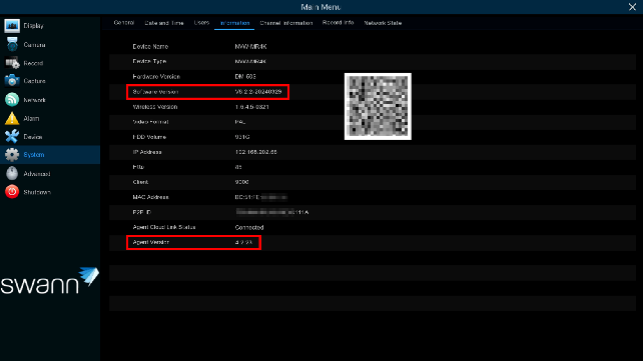
The USB Wi-Fi Antenna works with recorders compatible with Swann Security platform and must have Software version V8 or above.
Disconnect the Ethernet cable
The recorder, just like computers, will prioritize hard-wired connection if available. Disconnect the Ethernet cable to make the recorder use the USB Wi-Fi antenna for network connection.

Configuring Your SWACC-USBWIFI Is Simple
We’ll walk you through the setup process, making it a breeze; just follow these steps:
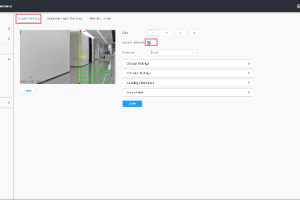
Choose your Wi-Fi
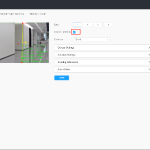
Access the Menu and go to Network then select Wi-Fi.
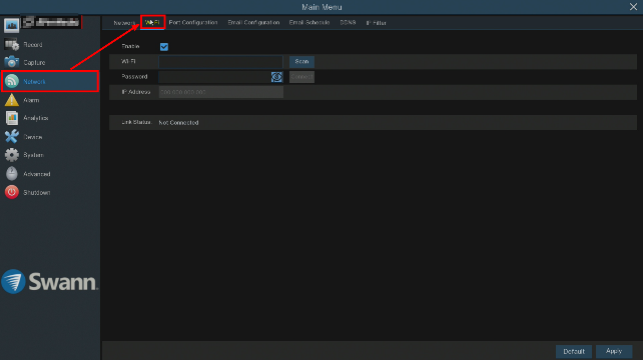
Tip: If you can’t see the Wi-Fi tab, unplug the antenna and try a different port and/or reboot the recorder while the USB Wi-Fi antenna is still connected. If none of the USB port works after rebooting and your recorder is compatible, has software version V8 and above, and the mouse works on those ports, then the USB Wi-Fi antenna could be faulty.
Please note that non-Swann Wi-Fi dongle is not supported!
Click Scan to see a list of available Wi-Fi network. Select your Wi-Fi and click Save.
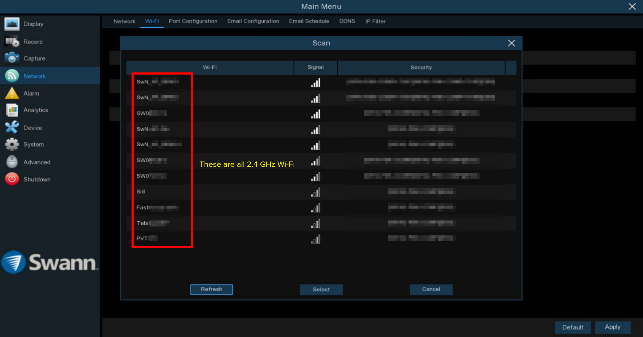
Pro Tip: Can’t seem to find the name of your router when setting it up? The SWACC-USBWIFI only supports 2.4 GHz, hence your phone might be detecting a 5 GHz network. Also consider that your Wi-Fi could be set to ‘hidden’ in its Settings; please check you modem or router’s settings.
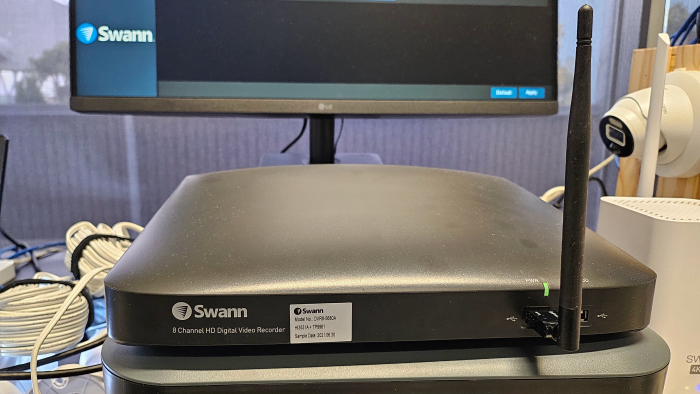
Connect the USB Wi-Fi antenna
Connect the USB Wi-Fi antenna to any of the USB ports available and wait for a few seconds for the system to properly recognize the dongle. Both front and back USB port can be used.
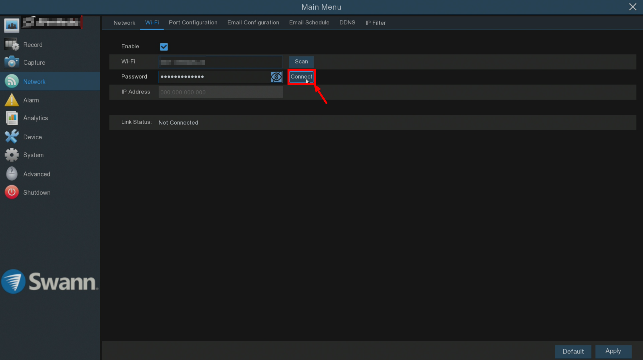
Enter your Wi-Fi Password
Enter the password of your Wi-Fi then click Connect.
Click the ‘Eye’ icon opposite the ‘Password’ to see the characters you have selected.
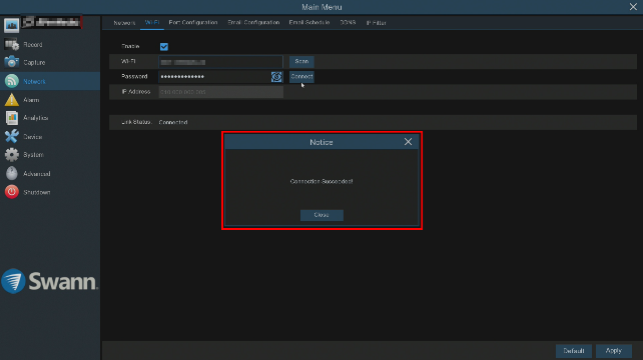
If successful, the recorder will be connected to your Wi-Fi. Click OK and Apply.
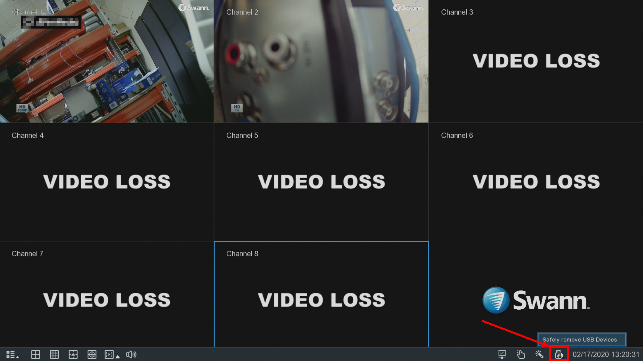
Tip:If the Wi-Fi dongle needs to be removed, click the “USB Wi-Fi” button on the Menu Bar (next to the date & time), then click “Safely remove USB Devices”. Remove the Wi-Fi dongle then click “OK”.
Security and Freedom Combined
Swann gives you the flexibility to place your recorder wherever without sacrificing a reliable connection with the SWACC-USBWIFI. This provides you with the newest security options whether you choose to use wireless technology or the tried-and-true wired connection.
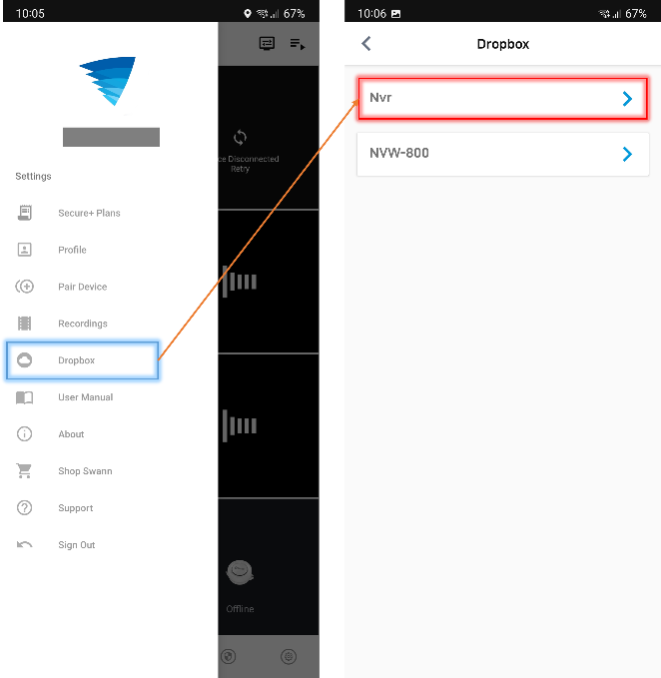
How to Setup Cloud Storage on a Wireless Recorder
Swann’s V8 recorders now has the feature to save images or recordings through Cloud which might be more accessible to you without being on the unit itself. This can serve as another way to get notified when there’s a movement detected on one of your cameras.
NOTE: A recorder with Agent version 4.2 and above that is paired to a Swann Security account with paid subscription will not have the Dropbox option as it will now use Swann’s Cloud server. Visit Why Is Dropbox No Longer Available in the Swann Security App to learn why.
Couple of things to prepare:
Setup

In case it repeats step 3, just cancel it or go back, then you’ll see this message (image at the right).
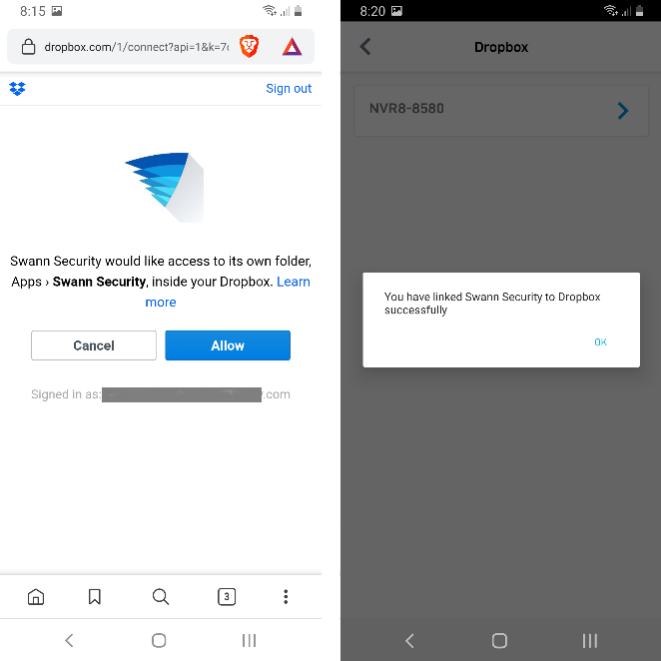
Enable Cloud Notification
…and you’re DONE! Now every time the recorder detects movement, it will then send it to your Dropbox.
Be aware of the following:
How to Factory Reset Your Recorder
Default Settings VS Factory Reset
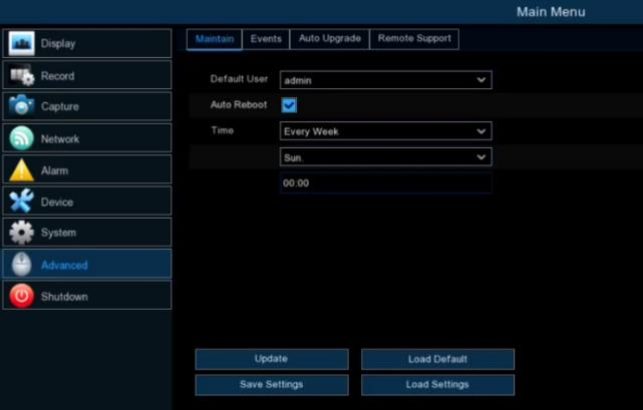
To load settings to default in recorder models, you must be logged into the recorder via TV and mouse or computer software.
How to restore settings to factory default via TV and mouse
You must know the user name and password of your recorder in order to do this method. If you do not know the password, you need to perform a password reset instead. See How to Reset the Password or Get the Recovery Code of Your Recorder
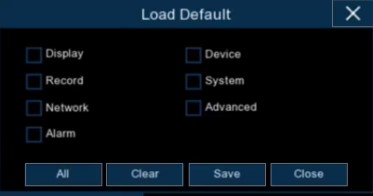
If you selected All, you will be taken to the Startup Wizard to set up a new password and email for recovery. See the following on how you want to proceed:
How to restore to factory default via PC
The DVR or NVR must already be added in the software beforehand and is online in order to do this method. If your DVR or NVR has not been added, you need to perform a password reset instead. See How to Reset the Password or Get the Recovery Code of Your Recorder
Via HomeSafe View software:
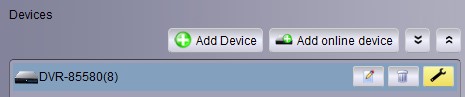
Go to Control Panel > Group Device Management > Devices: hover over Device > click on Remote Config (wrench icon) > Advanced > Load Default > Check the appropriate box > Save.
Via Swann Security software:
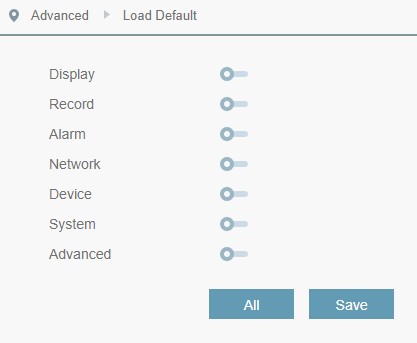
Go to Device Management > Advanced > Load Default > Toggle the appropriate options > Save.

Warning: Once you have restored the recorder’s settings to default via software, you are required to set a new password via TV and mouse hardwired to the recorder. If you are unable to login to the Main Menu nor access your recorder via software, you need to do this: How to Reset the Password or Get the Recovery Code of Your Recorder
How to Reset the Password or Get the Recovery Code of Your Recorder
SwannView Plus Password Reset
Connect the DVR/NVR to a router or modem
.
Installing SwannView Plus or iVMS to your computer
Getting the MAC Address
Resetting the password
.
e.g. bc51fe810d61
.
step-by-step guide to wireless setup for security recorders, how to set up wireless NVR system step by step, wireless DVR setup instructions for beginners, step-by-step wireless configuration for surveillance recorders, how to install wireless security camera recorder system, wireless security recorder setup tutorial for home users, step-by-step guide to connecting wireless cameras to NVR, how to configure wireless DVR for home security system,
wireless NVR installation guide with step-by-step instructions, step-by-step process to set up wireless CCTV recorder, how to pair wireless cameras with DVR step by step, wireless security recorder network setup instructions, step-by-step guide to wireless DVR connectivity, how to set up wireless recording system for security cameras, wireless NVR system installation step-by-step tutorial, step-by-step instructions for configuring wireless DVR, how to connect wireless IP cameras to NVR step by step, wireless surveillance recorder setup guide for beginners, step-by-step guide to installing wireless security recorders, how to set up wireless video recorder for home surveillance

Add Comment