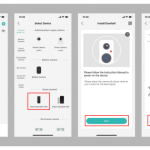


Below is an explanation of the fields on this screen:
•Camera No: This dropdown box allows the user to choose the camera/channel to edit. The Camera No. is the same as the number written on the rear panel next to the Ethernet port used to connect the camera.
•Enable: This checkbox allows the user to enable scheduled recording for the specified channel.
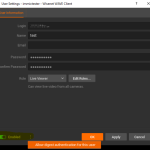
•Schedule Grid: This grid allows the user to select what times of the week scheduled recording should occur.
Click either Normal, Motion, or None and then click and drag the squares on the grid to configure which times to make active for that recording type.
•Normal/Motion/None: These buttons allow the user to select which type of recording to configure.


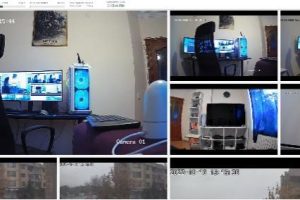
•Channel Status: This set of checkboxes allows the user to choose the camera/channel to playback. The
channel number is the same as the number written on the rear panel next to the Ethernet port used to connect the camera.
•Video Type: This dropdown box allows the user to select which type of video to playback.
•Detail: This button opens the detail screen which shows a grid with playback types, for each channel, for each
day. See the below screenshot for details.

Add Comment