IP Camera Streaming Troubleshooting Guide, IP cameras, unless added by RTSP, will typically communicate with the DW Spectrum® Server through their ONVIF streams. If there is an interruption in this stream related to camera issues, network issues, or software issues, the ONVIF video stream may experience video loss, duplicated streams, or various communication problems.
ONVIF Camera Issues
DW Spectrum® Servers operate with standard ONVIF Profile S API, which is commonly used by most IP cameras, creating an easier setup process when adding cameras to a Server and for video stream communication.
IP cameras, unless added by RTSP, will typically communicate with the DW Spectrum® Server through their ONVIF streams. If there is an interruption in this stream related to camera issues, network issues, or software issues, the ONVIF video stream may experience video loss, duplicated streams, or various communication problems.
In most cases, these issues can be resolved by rebooting the camera itself. However, it is otherwise recommended to troubleshoot these types of issues either directly at the Server or from a workstation on the same network as the camera.
This article will outline some troubleshooting that can be performed to resolve most camera display issues.
IP Camera Streaming Troubleshooting Guide
**NOTE: If you are using a third-party camera and are experiencing video issues, please use the following articles.
If this is related to the first-time setup of a third-party camera, please consult with the third-party camera manufacturer for assistance.
Supported/Affected Devices
Definitions
Streaming Issues
If your camera is not streaming video, and this is a first-time setup, check the physical camera connections and that all assigned IP addresses are configured for the correct network.
If the camera is experiencing streaming issues, but was working previously, possible issues may include:
ONVIF Device Manager
When troubleshooting streaming issues, it is recommended to download and install ONVIF Device Manager (ODM) to the DW Spectrum® Server or to a workstation computer that shares the same LAN as the Server.
The application is compatible for Windows OS only, but is a great tool for troubleshooting camera issues. ODM scans the network for ONVIF compliant devices that are produced by both Digital Watchdog and by other manufacturers. Most importantly, it can be used to test ONVIF video streams.
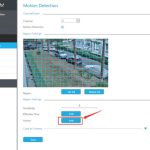
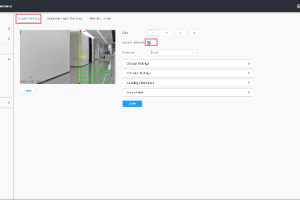
Testing the ONVIF Stream
To test camera ONVIF streams:
Enter the User ID and Password of the camera’s ONVIF profile.
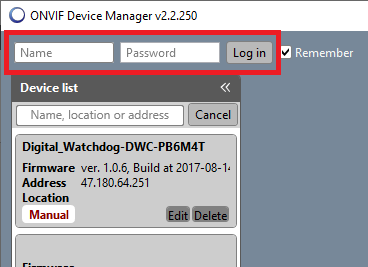
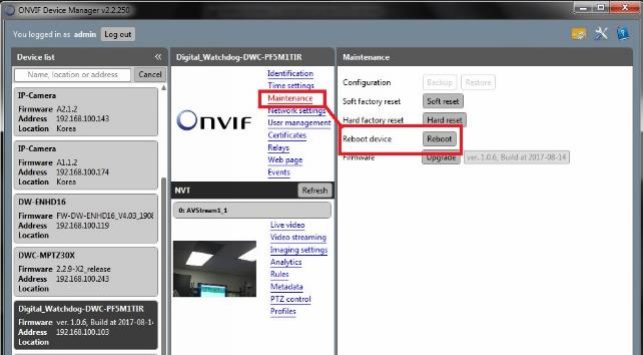
Live camera video should begin to display in ODM. If video does not display and the camera’s login is entered correctly, then the camera is likely experiencing an ONVIF communication issue.
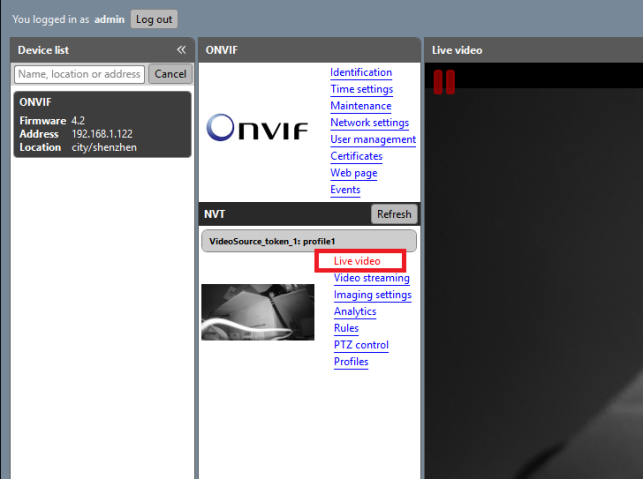
If the camera does not display video in ODM, proceed to the next troubleshooting step.
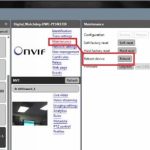
The camera can be rebooted through the Maintenance section of ODM.
Alternatively, the camera can be rebooted from its web client or by disconnecting and reconnecting the camera power.
Test the camera stream again after completing the reboot. If the issue persists, proceed to the next troubleshooting method.
Testing the Web Client
To connect with the web client, enter the camera’s IP address into the address bar of the web browser. If the camera has been assigned to a port value of anything other than 80, you will need to specify the port value in the address bar.
For Example:
Camera IP: 192.168.1.90
Port: 8245
Example URL: http://192.168.1.90:8245

If you have not set up a new Username and Password for the camera yet, use:
**NOTE: DW cameras now require a password assignment when initially connecting. Please read Assigning Passwords to IP Cameras for more information.
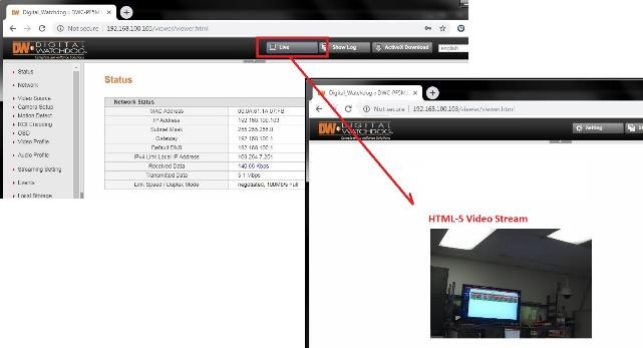
If the camera displays video in the web client, but not in DW Spectrum® IPVMS or in ODM, please check the camera’s streaming settings and test the camera using an H.264 codec instead of an H.265 codec.
If the camera does not display its HTML5 video stream in the web client, there is likely an issue occurring locally within the camera.
Troubleshooting the Camera
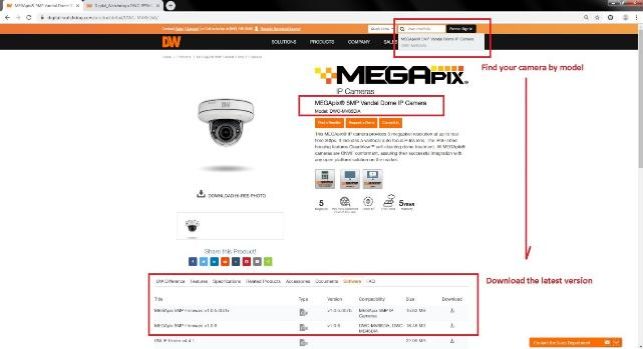
To obtain the latest firmware for your DW camera, open a browser and visit http://digital-watchdog.com.
Enter the camera model into the search bar and download the latest firmware version from the camera’s product page. The file can be located under the Software tab of the camera’s product page.
**NOTE: Flashing or re-applying the same camera firmware, if the camera is up-to-date, is an acceptable troubleshooting action.
Log in as the Administrator, then select the camera’s Settings menu.
You may be required to update the camera’s password if this is the first time that the camera is being logged into.
Otherwise, locate the camera’s Firmware Update section of the web client (location varies depending on camera model) and upload the firmware to the camera.

If the issue persists, proceed to the next troubleshooting step.
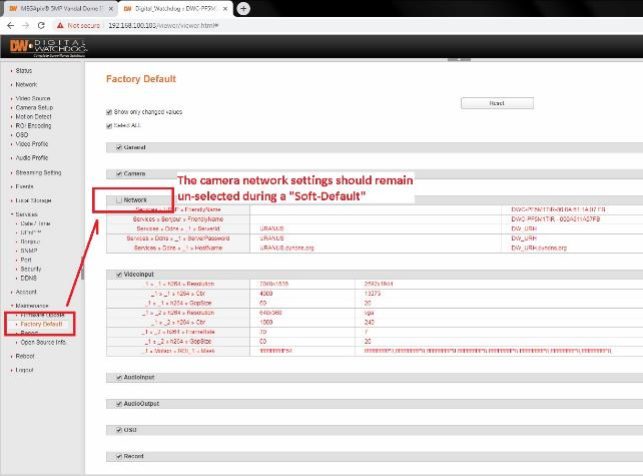
If the camera is not streaming video, is up to date with its firmware, and is not experiencing an IP address conflict or other network issue, defaulting the camera will likely resolve the issue.
**NOTE: Most camera models will feature an option for Soft-Default or to exclude the camera’s network settings from being defaulted as well. Some camera models will have a specific toggle for this, while others may require you to select specific areas to be defaulted.
Completely resetting the camera will revert it back to the factory default settings and will require setting up the camera again, including the network settings. Use the following resources if needed:
Further troubleshooting may require that you physically uninstall the camera from its mounted position and bench test the camera to remove the cable-run (or PoE switch setup) as a possible cause of the issue.
Use of a PoE injector during the bench test will remove power consumption issues from the PoE switch as a possible cause as well.
.
Assigning Passwords to MEGApix Cameras
Password Requirement
As of August 13, 2019, in compliance with the National Defense Authorization Act (NDAA), Digital Watchdog now requires the assignment of a custom password to new DW MEGApix IP cameras.
Upon initially accessing a MEGApix camera for the first time, the administrator will request that a password be created for the camera. The camera password can be set using either the MEGApix camera’s web interface or by using the DW IP Finder application.
This article will outline how to use the MEGApix camera’s web interface to set an administrator password for the first time, as well as how to use the DW IP Finder application to change the passwords of multiple MEGApix cameras simultaneously (bulk password).
**NOTE: The camera login credentials and the user’s DW Spectrum IPVMS login are two separate instances. What is used to log in to a DW Spectrum System is a different set of credentials entirely.
Supported/Affected Devices:
Before Beginning
After initially connecting a MEGApix IP camera to the local network, the camera will use a DHCP protocol and can be assigned an IP address by DHCP devices (router, smart switch, etc.) to match the connected subnet. However, in the case that a DHCP network device is not present or if the camera must otherwise have an IP address assigned manually, you can use the DW IP Finder desktop application.
For more information, check out the article Using DW IP Finder for Bulk IP Assignment to DW MEGApix IP Cameras.
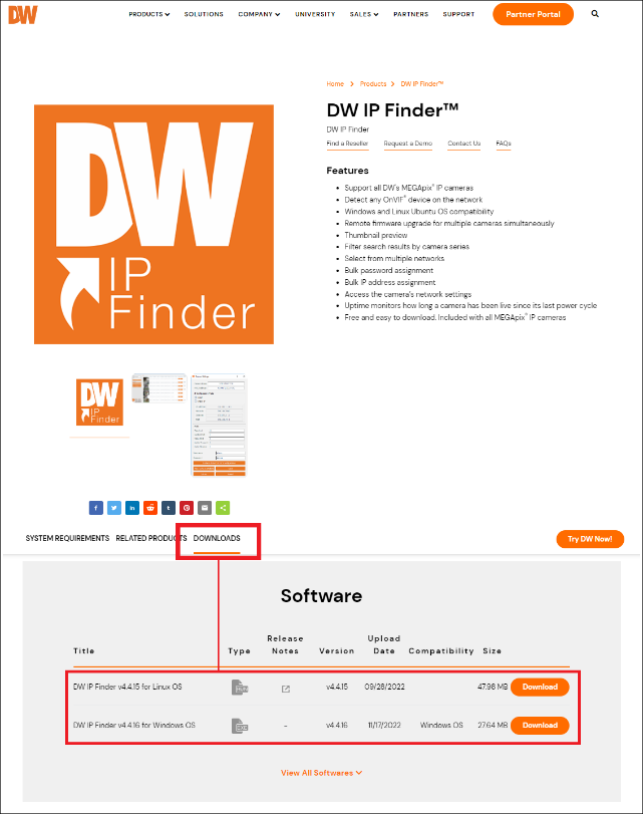
Downloading DW IP Finder
DW IP Finder features a Bulk Password Assignment feature that allows users to assign an administrator password to multiple MEGApix cameras simultaneously.
Pre-built DW Blackjack Servers will ship with DW IP Finder already installed. However, if you need to install or update DW IP Finder (v4.4.16 or higher), you may acquire the latest version from the DW IP Finder product page.
Bulk Password Assignment with DW IP Finder
When setting up new cameras, it is at the installer’s discretion to either apply a different password to each camera individually or to use the same login credentials for all cameras. However, it may be best to have all cameras use the same login credentials for the purposes of easy camera management and use of the DW Spectrum IPVMS management software.
To apply a bulk password assignment for multiple MEGApix IP cameras using DW IP Finder:
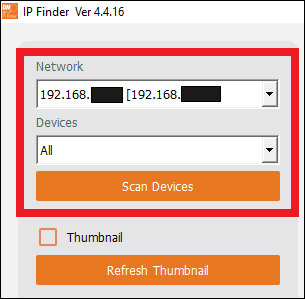
The computer must be connected to the same local network as the cameras for the software to detect MEGApix cameras.
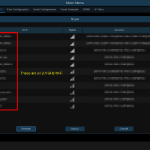
Click the Scan Devices button to detect connected MEGApix IP cameras.
**NOTE: By deselecting the Thumbnail checkbox in DW IP Finder before scanning, wait time will be reduced. The wait time between network scans vary depending on the number of devices connected to the network.
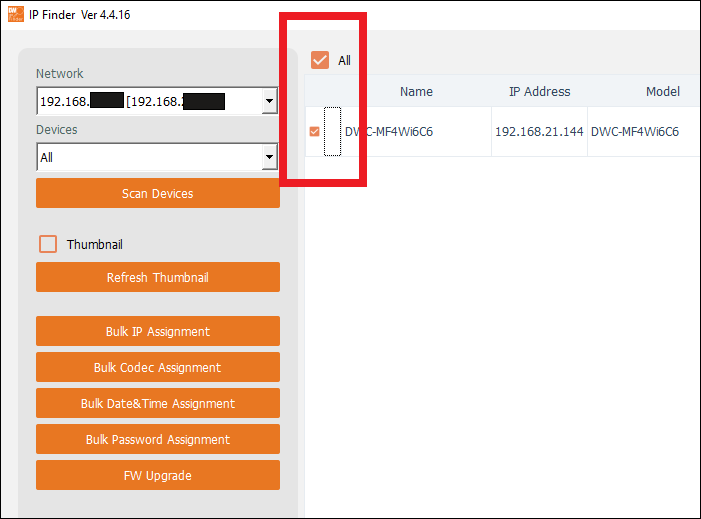
If multiple cameras are selected at the same time, they will all be assigned the same login credentials. You can check the All box to select all the detected cameras.
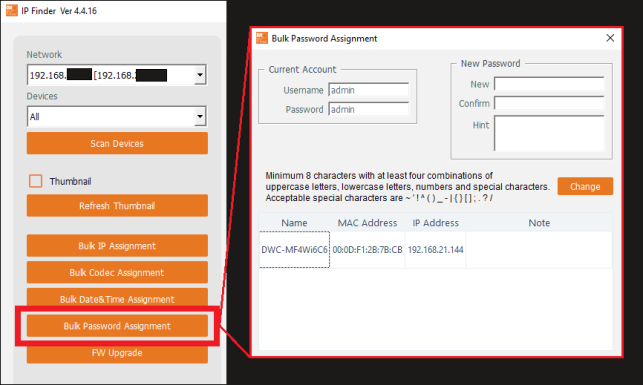
Under Current Account, enter the current Username and Password of the camera(s).
Under New Password, enter the new Administrator password for the camera(s) in the “New” field and reenter the new password in the “Confirm” field. It is optional to include a password reminder in the Hint field.
**NOTE: Passwords are required to use a minimum of eight (8) characters with at least four (4) combinations of uppercase letters (ABC), lowercase letters (abc), numbers (123), and special characters (!?$).

Individual Camera Password Assignment with Web Interface
When initially accessing a MEGApix IP camera, you must set an administrator password for the camera.
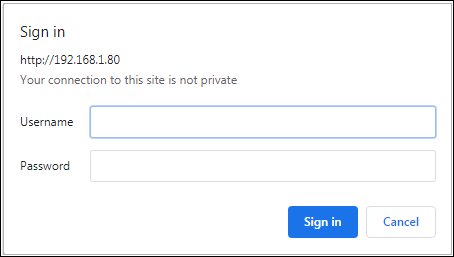
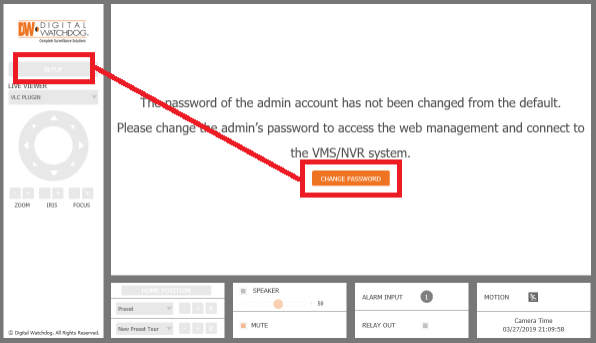
Using a web browser, the administrator can adjust camera settings by connecting to a camera’s web interface. After logging into the camera’s web interface for the first time, the camera will request the password change.
**NOTE: Camera login credentials can only be adjusted one camera at a time when using a browser.
To change a camera’s password using the web interface:
http://<IP_address>:<TCP/IP_port>
Example:
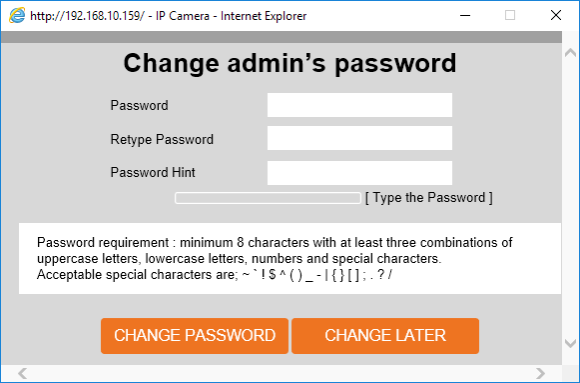
Click the Change Password button if the camera is using the default login credentials. If the login has already been customized, click the Setup button.
It is optional to create a Password Hint for the camera password.
**NOTE: Passwords are required to use a minimum of eight (8) characters with at least three (3) combinations of uppercase letters (ABC), lowercase letters (abc), numbers (123), and special characters (!?$).
Adjusting Camera Access in DW Spectrum IPVMS
If you are using DW Spectrum IPVMS to view and manage your security cameras, authentication for access to the camera must be configured for DW Spectrum after changing the login credentials of the MEGApix IP camera(s).
To learn how to edit device authentication credentials using the DW Spectrum IPVMS Client, check out Configuring Device Authentication in DW Spectrum IPVMS.
This completes the setup process for assigning passwords to a DW MEGApix IP Camera.

Add Comment