How to Use Motion Detection on NVRs, Motion Detection is commonly used in unmanned surveillance video and automatic alarm. It is the process of detecting a change in the position of an object relative to its surroundings or a change in the surroundings relative to an object.
How to Set Motion Detection
1. Introduction
Motion Detection is commonly used in unmanned surveillance video and automatic alarm. It is the process of detecting a change in the position of an object relative to its surroundings or a change in the surroundings relative to an object. When a moving object is detected, the motion detection can be used by network cameras and video encoders, and by third-party software, too, for example, recording video or sending a notification.
2. How to Set Motion Detection ?
Totally, this event has two detection modes.
2.1 Normal Mode
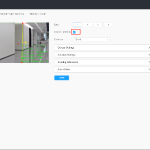
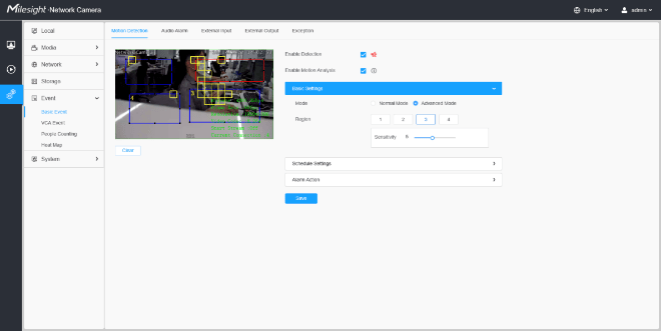
Step 1: Select“Event”-> Click“Basic Event”-> Click“Motion Detection”->Set“Motion Detection”as enable
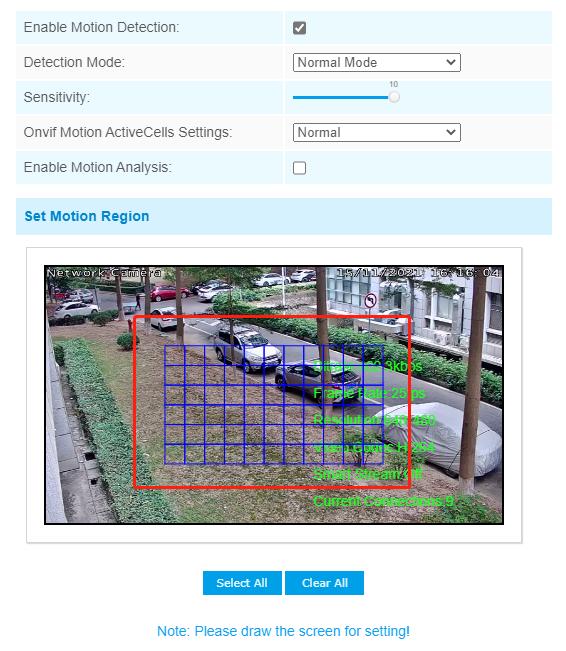
-> Choose“Detection mode”
Note: There are two modes can be chosen.
(1) Normal Mode
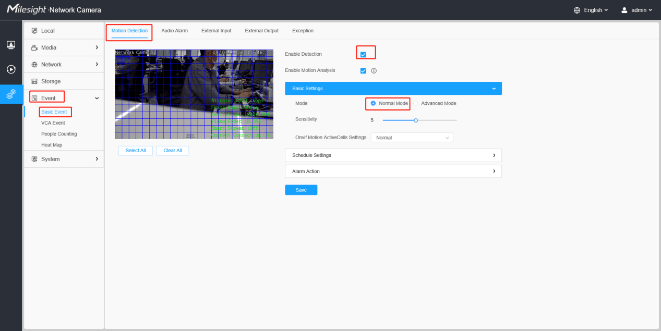
(2) Advance Mode

Note: There are four motion regions can be configured, each area can set different sensitivities and grids.
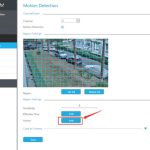
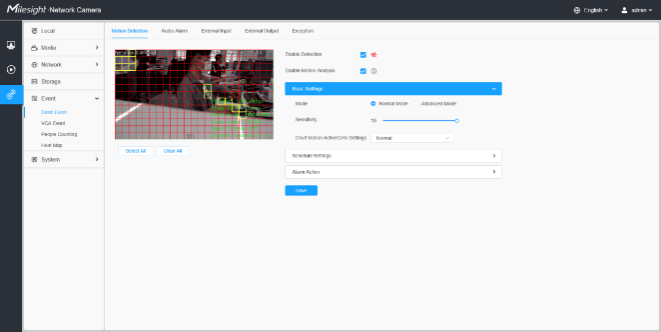
Step 2: Set“Motion Region”and“Sensitivity”, the area will display in“red”when the motion is triggered.


Note:
(1) In advance mode, there are four motion regions can be configured, each area can set different sensitivities and grids.
(2) After enable“Motion Analysis”, the motion area will display in“yellow”when the motion detection is triggered.
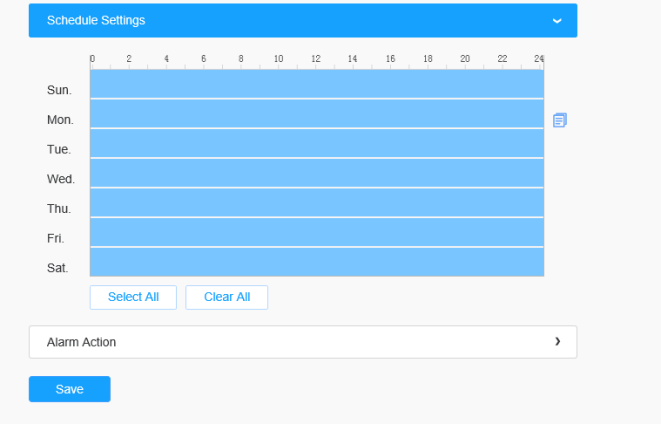
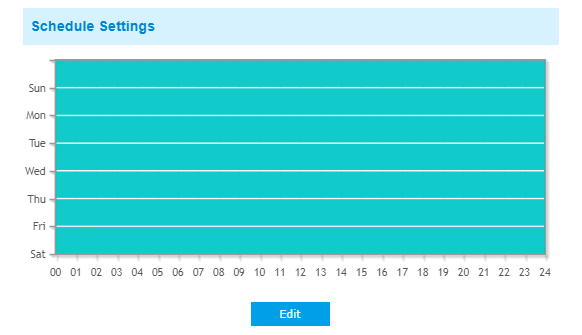
Step 3: Set the schedule for motion detection.
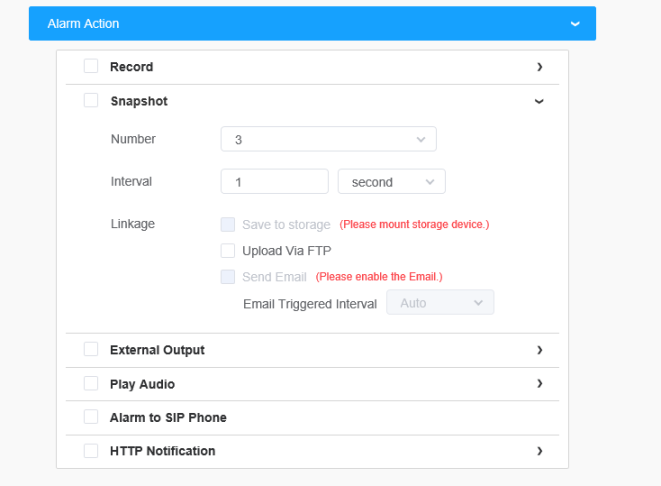
Step 4: Set the“Alarm Action”and“Alarm Setting”for motion detection.
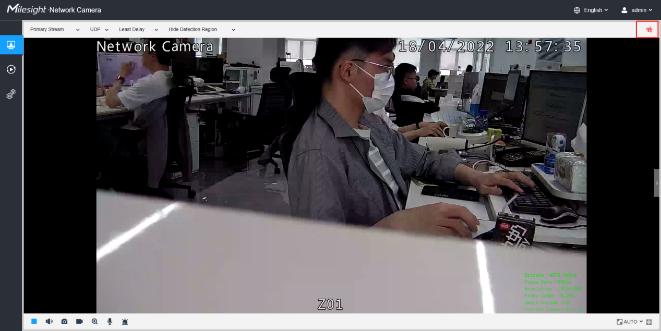
Step5: After setting motion detection successfully, if the motion detection is triggering , you will see the red warning icon showed on the live video page;
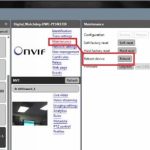
3. How to be compatible with the back-end ?
The back-end needs to add camera by ONVIF or MSSP.
① If the“Detection Mode”of camera is“Normal Mode”, the back-end will synchronize the detection region and sensitivity with the camera.
② If the“Detection Mode”of camera is“Advanced Mode”, all detection regions will become one grid region in back-end. (The sensitivity will not synchronous)
③ If the back-end changes the any setting of the“Detection Mode”and saved, the camera’s“Advanced Mode”will change to“Normal Mode”and synchronize the detection region and sensitivity with the camera.
To help you to get the points you want, please read the lead-in first.
Lead-in
This document is organized by the order below:
1. How to Enable the Motion Detection
1) Way one–enable the motion detection via NVR
Local monitor setting
Web interface setting
2) Way two–enable the motion detection via IP cameras
2. Recording Setting for Motion Detection
1) Local monitor setting of recording
2) Web interface setting of recording
3. Other Alarm Actions for Motion Detection
1) Local monitor setting of other alarm actions
2) Web interface setting of other alarm actions
Note:
The 1. is the first step and the basic of 2. and 3.. If you want to record video when motion detection is triggered, please refer to 1. and 2.. If you want to hear audio alarm or set other alarm actions when something moves in the detected region, please refer to 1 and 3..
Please attach importance to where the mark ***** appears, because it may removes your confusions or give a quick guide when you operate the motion detection of NVR.
1. How to Enable the Motion Detection
Milesight’s NVR and IP cameras are data synchronization in the terms of motion detection; hence you can just choose one of two ways below, via NVR or via IP cameras, to enable it.
1) Way one–enable the motion detection via NVR
Local monitor setting
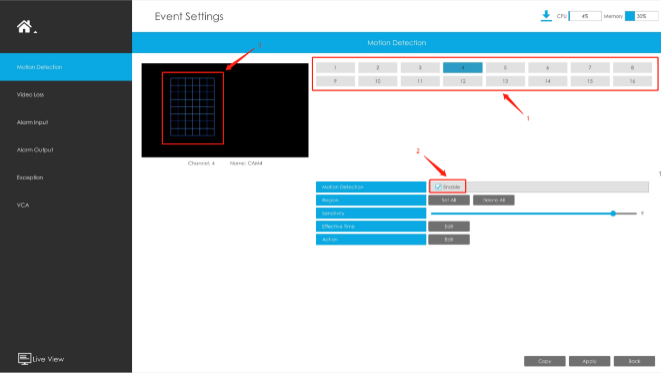
Step1: Log in the local monitor, and go to “Event”→“Motion Detection”
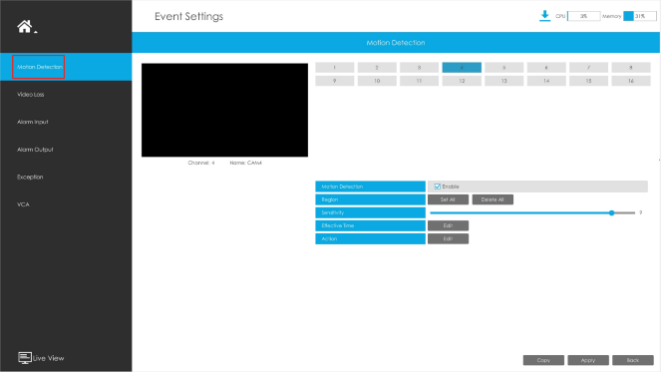
Step2: Choose the corresponding channel, set the motion region and motion sensitivity.
Step3: Set Effective Time of motion detection by clicking  .
.
It will be more convenient by clicking  or
or  to set or clear
all time settings.

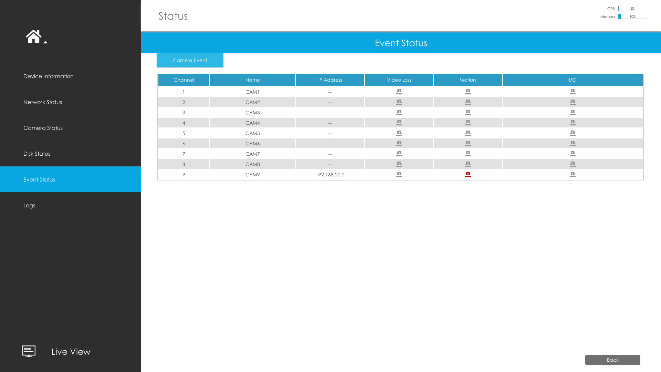
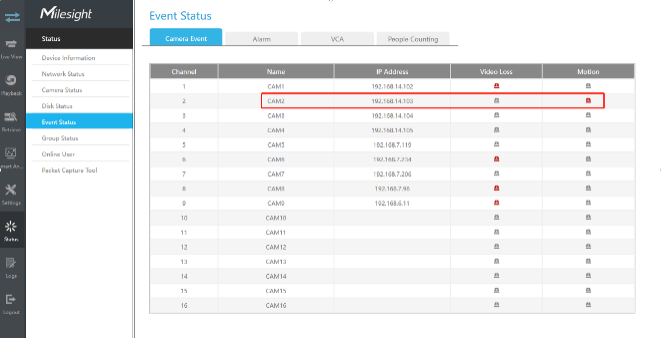
Step4: Check settings. Log in “Status”→“Event Status”, when something moves in the detected region, we will see the icon changed, besides there is a motion indication in local monitor live view.
Web interface setting
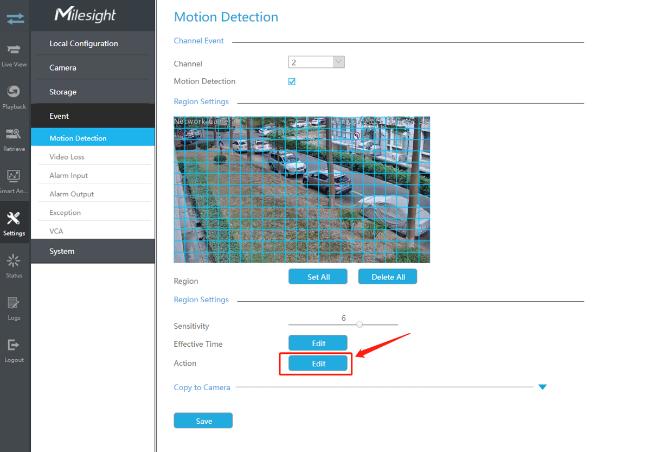
Step1: Log in NVR Web, click “Settings”→“Event”→“Motion Detection”.
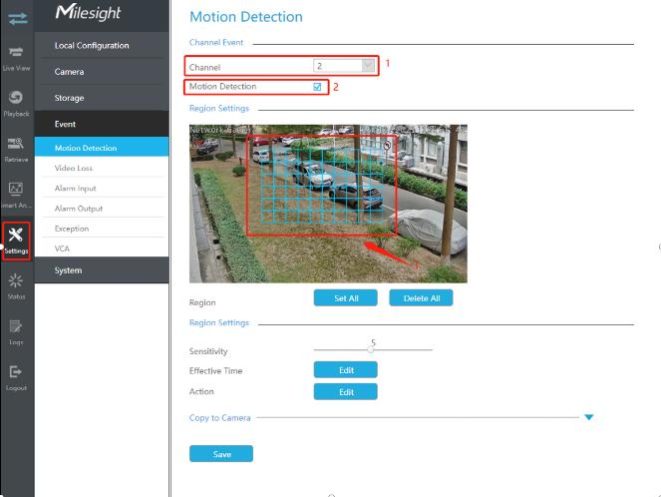
Step2: Choose the corresponding channel, set the motion region and motion sensitivity.
Step3: Set Effective Time of motion detection by clicking  .
.
It will be more convenient by clicking

or

to set or clear all time settings.

.
Step4: Check settings. Log in “Status”→“Event Status”, when something moves in the detected region, we will see the “ ” changing to “
 ”.
”.
2) Way two–enable the motion detection via IP cameras
Step1: Log in web, and go to “Advanced Settings”→“Alarm”. Tick “Enable Motion Detection”.
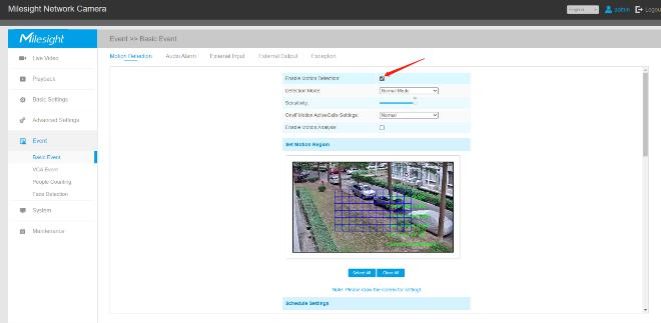
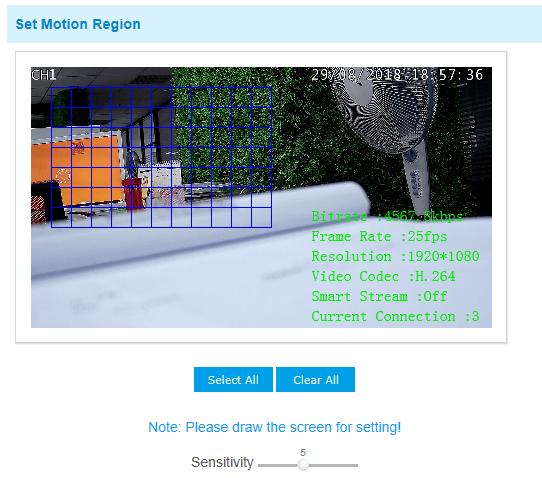
Step2: Set the Motion Region and choose the sensitivity.
.
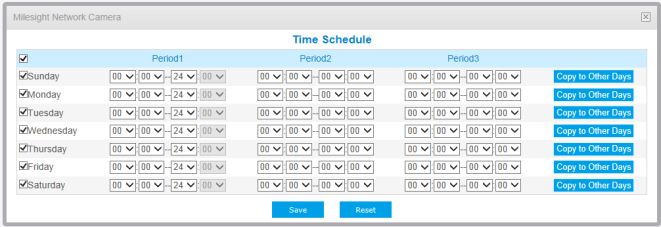
Step3: Set the schedule for motion detection.
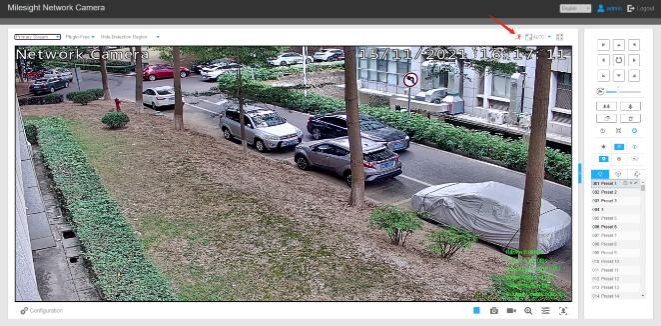
Step4: Check settings. After setting motion detection successfully, you will see the warming red spot on the live video page. And when you log into NVR, you will see that the NVR updates its parameters with IP cameras automatically.
2. Recording Setting for Motion Detection (based on 1.)
After finishing 1., you can set recording for motion detection.
1) Local monitor setting of recording
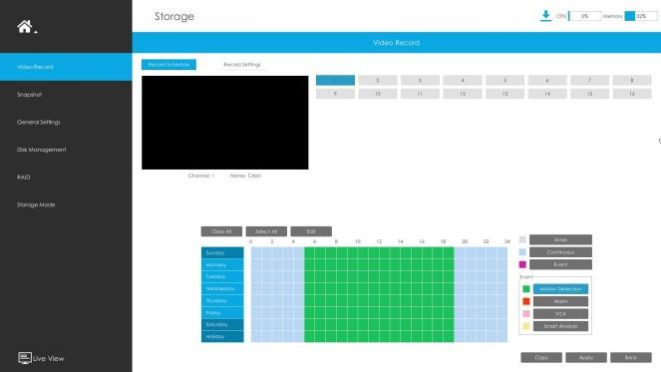
Step2: Go to “Main Menu”→“Record”→“Record Schedule”, draw the time table to set the record schedule for motion detection, like the picture shown below.
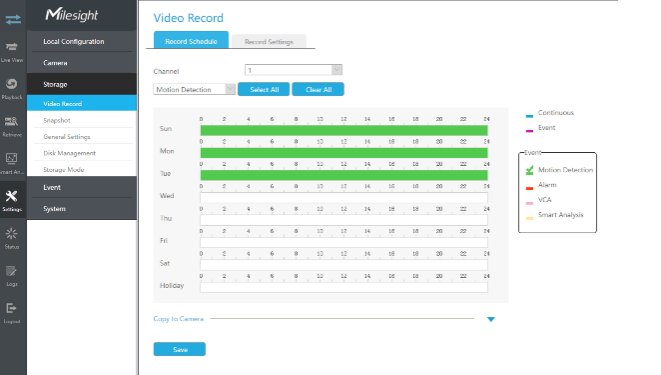
2) Web interface setting of recording
Go to Settings → Video Record → Record Schedule, edit the time table to set the record schedule for motion detection, like the picture shown below. Click Motion Detection within the Event table, and the cursor will move to Motion detection. Then you can select a desired time slot to enable recording when motion detection is triggered. It is worth mentioning that the color of time bar is based on the event you set. As for the other event settings for record schedule, please refer to Milesight_NVR_User_Manual.
3. Other Alarm Actions for Motion Detection (based on 1.)
After finishing 1., besides recording, there are other alarm actions for motion detection, like E-mail Linkage, Audible Warming and Alarm Output.
1) Local monitor setting of other alarm actions
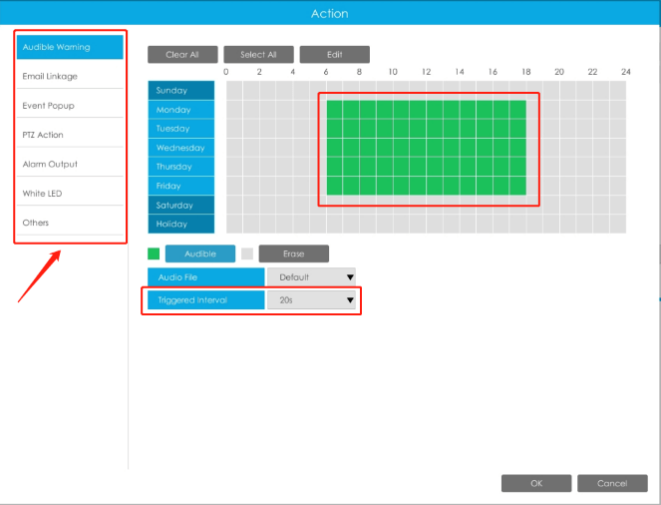
Step1: Log in NVR local monitor, click “Event”→“Motion Detection”→“Edit”
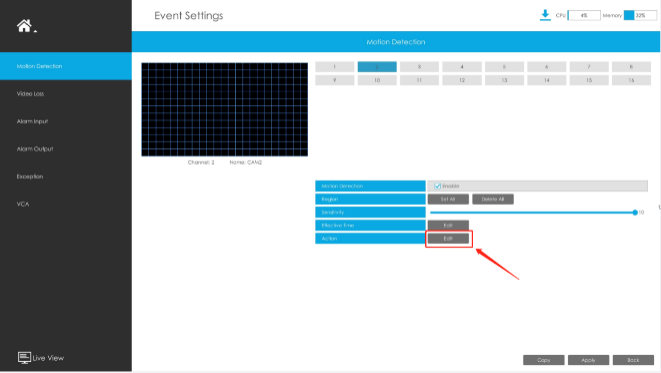
Step2: Choose the effective time or draw the time table, select the alarm action and trigger interval.
2) Web interface setting of other alarm actions
Step1: Log in NVR Web, click “Settings”→“Event”→“Motion Detection”, click “Action”, edit the schedule time.(This time table is used for setting the work time of other alarm action, not for recording, do not mix them up)
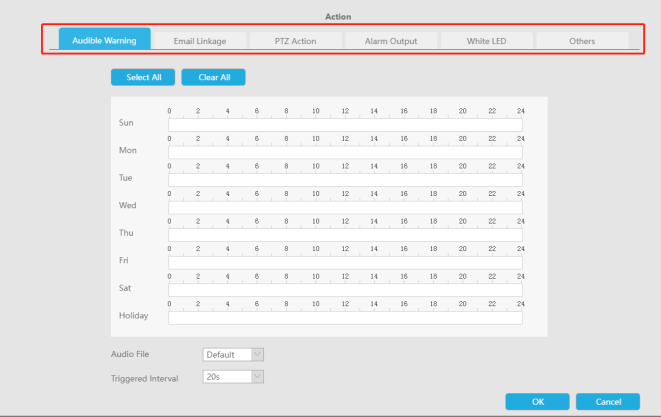
Step2: Select other alarm actions and trigger interval.

How to Use Motion Detection on Hikvision NVR
IP Cameras of Milesight are compatible with Network Video Recorders of Hikvision. By following the sequence of enabling IP Cameras’ motion detection function first, setting detection region and detection schedule next, and choosing alarm actions on the NVR last, you can have a better experience on security surveillance. The following are the detailed steps.
Note:
Please make sure the camera version is **.6.0.44 or above.
If your camera version is lower then version 44, please contact us (support@milesight.com) to get the latest firmware.
Step1: Log in web, and go to “Advanced Settings”→“Alarm”. Tick “Enable Motion Detection”;
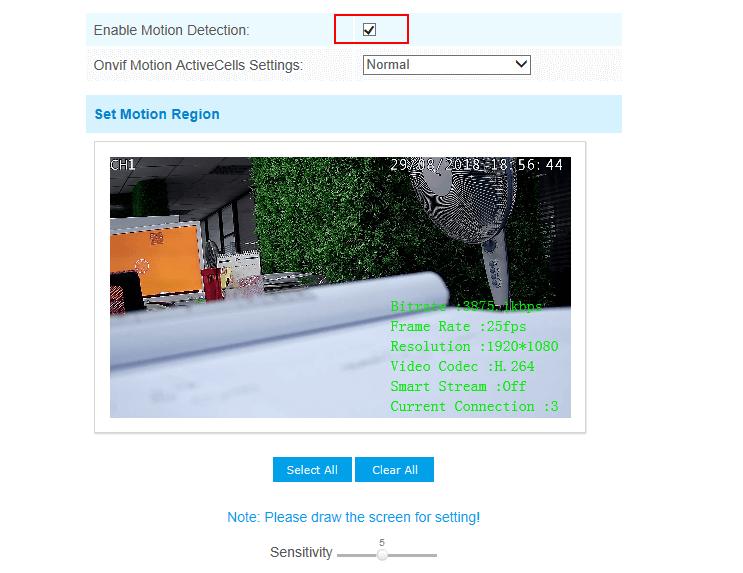
Step2: Set motion region and choose the sensitivity;

Step3: Set the schedule for motion detection;

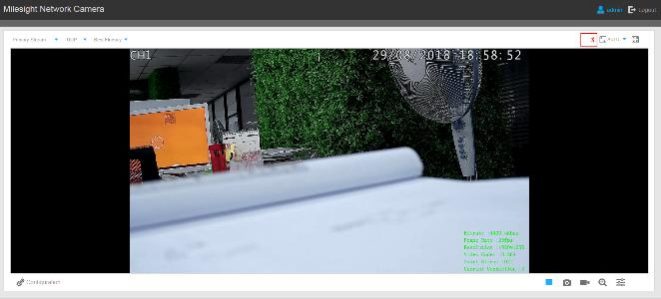
Step4: Check settings of IP cameras. After setting motion detection successfully, you will see a red warning spot on the live video page;
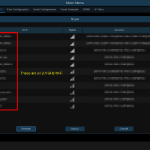
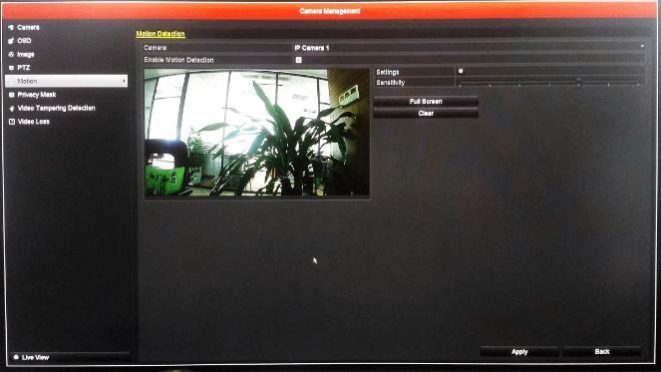
Step5: Log in the NVR, and then go to “Menu”→“Camera Management”→“Motion”. Choose the channel and tick “Enable Motion Detection”;
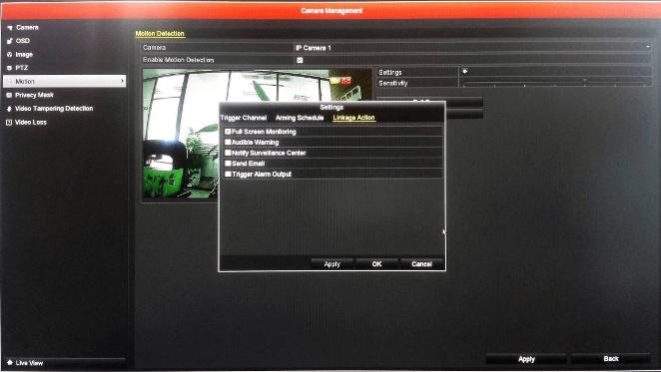
Step6: You do not need to set region and sensitivity on the NVR. Choose the “Alarm Schedule” and “Linkage Actions” you want as pictures shown below;

Step7: Go to “Menu”→“Record”, select recording type as “Motion” and draw the timetable according to your need. After that, the device will record automatically if alarm is triggered;

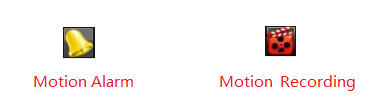
Step8: Check. If the motion detection is set successfully, you will see icon for alarming and icon for motion recording on the live view when the alarm is triggered.
How to Use Motion Detection on Dahua NVR
IP Cameras of Milesight are compatible with Network Video Recorders of Dahua. By following the sequence of enabling IP Cameras’ motion detection function first, setting detection region and detection schedule next, and choosing alarm actions on the NVR last, you can have a better experience on security surveillance. The following are the detailed steps.
Note:
Please make sure the camera version is **.6.0.44 or above.
If your camera version is lower then version 44, please contact us (support@milesight.com) to get the latest firmware.
Step1: Log in web, and go to “Advanced Settings”→“Alarm”. Tick “Enable Motion Detection”;

Step2: Set motion region and choose the sensitivity;
Step3: Set the schedule for motion detection;
Step4: Check settings of IP cameras. After setting motion detection successfully, you will see a red warning spot on the live video page;

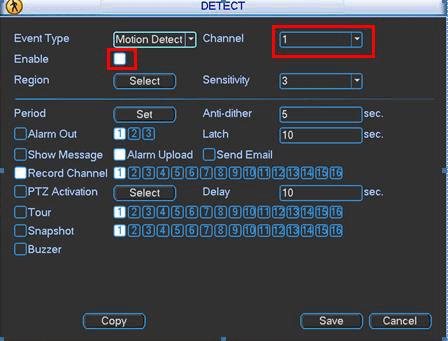
Step5: Log in the NVR, and then go to “Main menu”-> “Setting”-> “Detect”. Select a channel from the drop-down list and then check the “Enable” button to enable motion detect function.
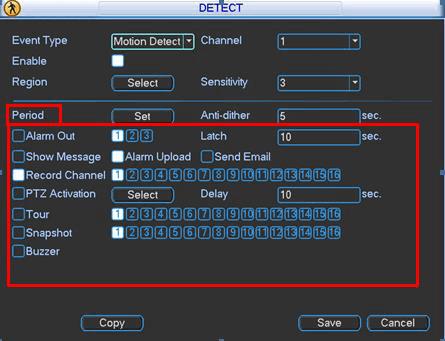
Step6: You do not need to set region and sensitivity on the NVR, just choose the alarm actions and the corresponding periods you want. Do remember to click “Save” button to complete motion detect setup;
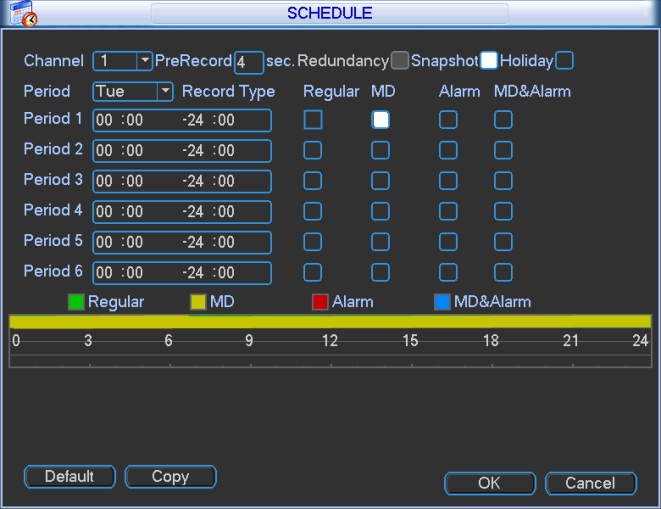
Step7: Go to “Menu”→ “Setting”→ “Schedule”, select a channel from the drop-down list and highlight the recording type as “Motion” and edit the timetable according to your need. After that, device will record automatically if alarm is triggered;
Step8: Check. If motion detection is set successfully, you will see icon for alarming and icon for motion recording on the live view when the alarm is triggered;


Add Comment