Using FFmpeg as an encoder for YouTube Live has fewer requirements on the hardware. While you may need some basic knowledge about FFmpeg.
Contents:
1. How it works?
2. How to achieve it?
3. Installing FFmpeg
4. Set a Static IP Address for your device
5. Set up DDNS for your device
6. Get the RTSP address
1. How it works?
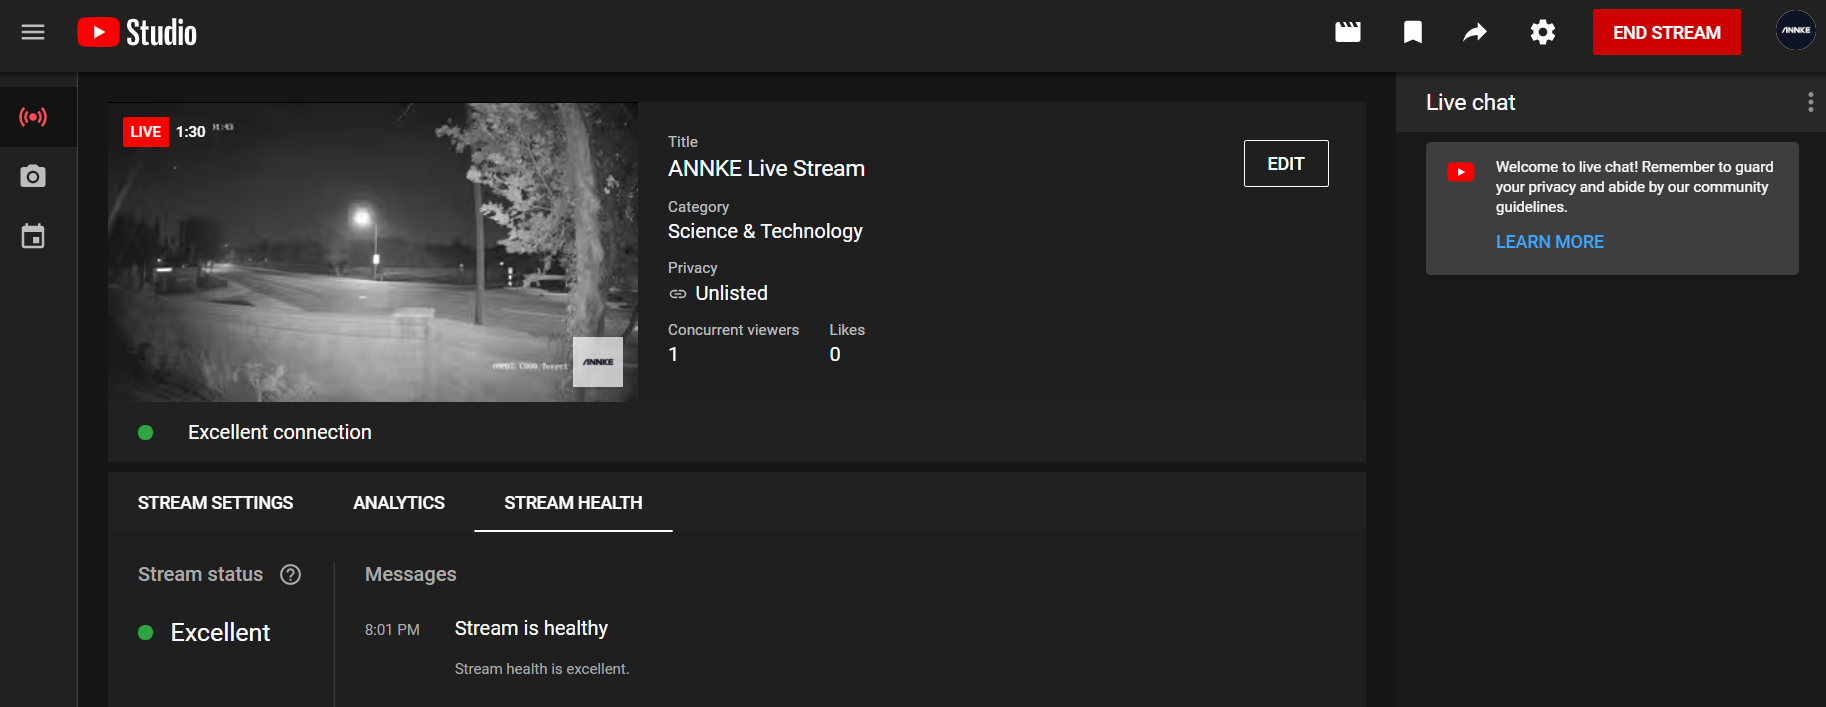
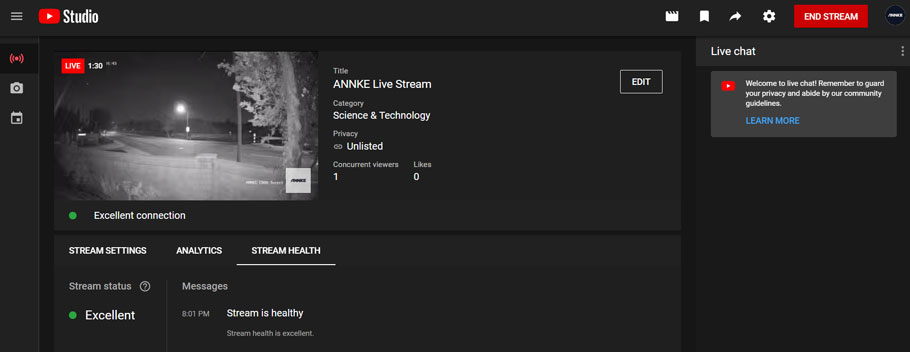
With the RTSP address from your ANNKE device, and FFmpeg installed on your Windows computer, you can use the below command line in the CMD software to begin a live stream. The live stream will be uploaded to your YouTube channel automatically.
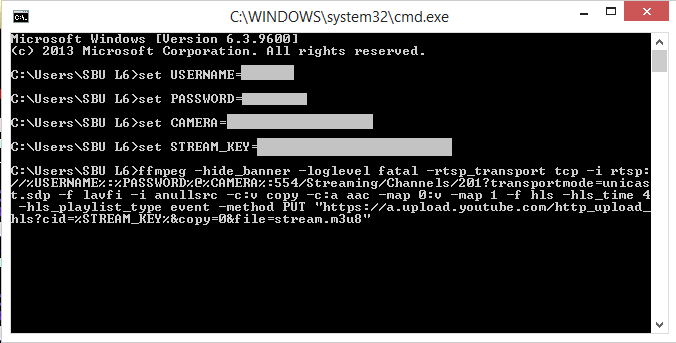
set USERNAME=device login username
set PASSWORD=device login password
set CAMERA=device IP
set STREAM_KEY=xxxx-xxxx-xxxx-xxxx from YouTube Live dashboard
Example:
ffmpeg -hide_banner -loglevel fatal -rtsp_transport tcp -i rtsp://%USERNAME%:%PASSWORD%@%CAMERA%:554/ Streaming/Channes/ID/?transportmode=unicast.sdp -f lavfi -i anullsrc -c:v copy -c:a aac -map 0:v -map 1 -f hls -hls_time 4 -hls_playlist_type event -method PUT “https://a.upload.youtube.com /http_upload_hls?cid=%STREAM_KEY%©=0&file=stream.m3u8”
2. How to achieve it?
To achieve the above, we will need to:
1). Install FFmpeg on your Windows computer.
2). Get the RTSP address. For a stable RTSP address, we will need to set a Static IP and set up DDNS for your ANNKE device.
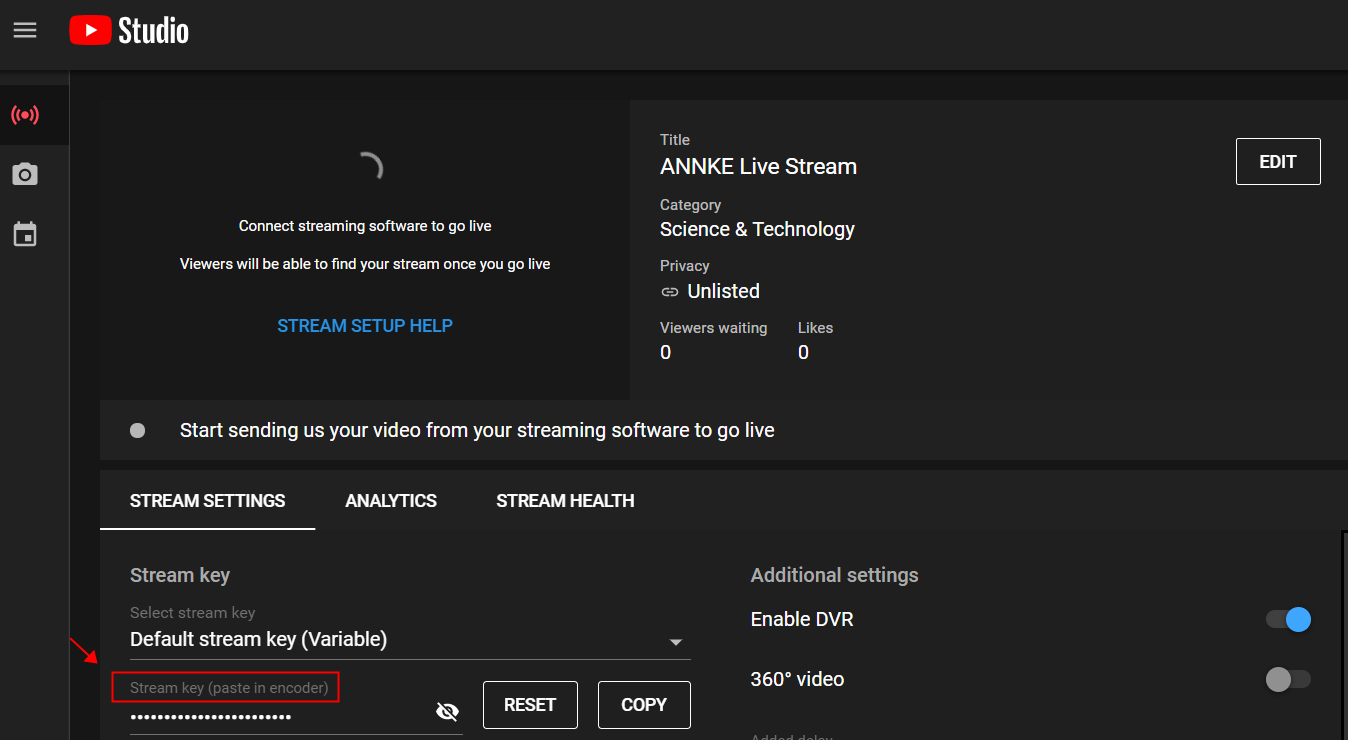
3). Get the YouTube stream key: Once your YouTube account has access to YouTube Live, you can find the stream key as the below picture shows.
3. Installing FFmpeg
Here is the instruction: https://www.wikihow.com/Install-FFmpeg-on-Windows#
4. Set a Static IP Address for your ANNKE device
Propose: An ANNKE Device with a static IP address can still be accessed by the same IP after reboot.
Step:
1) Disable DHCP
2) Make sure the device is online
1) Disable DHCP
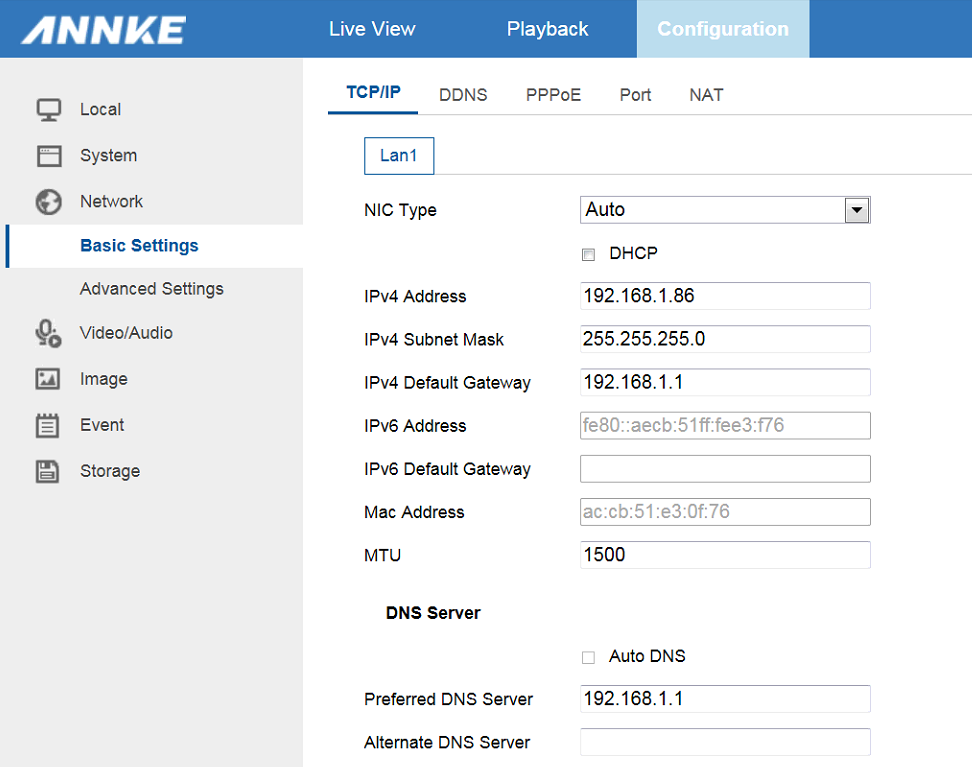
Log in to your ANNKE Device. Below is the Web interface of the ANNKE device:
Go to Configuration-Network-Basic Settings-TCP/IP, Uncheck DHCP, fill in the below box per your computer in the same network.
Note: You can check DHCP and click Save at first, this will fill in the below box automatically. Then uncheck DHCP and leave the below box as they are.
2) Make sure the device is online
After the above, go to Configuration-Network-Advance Settings-Platform Access, make sure the option Enable is checked and Register Status shows Online as below picture.
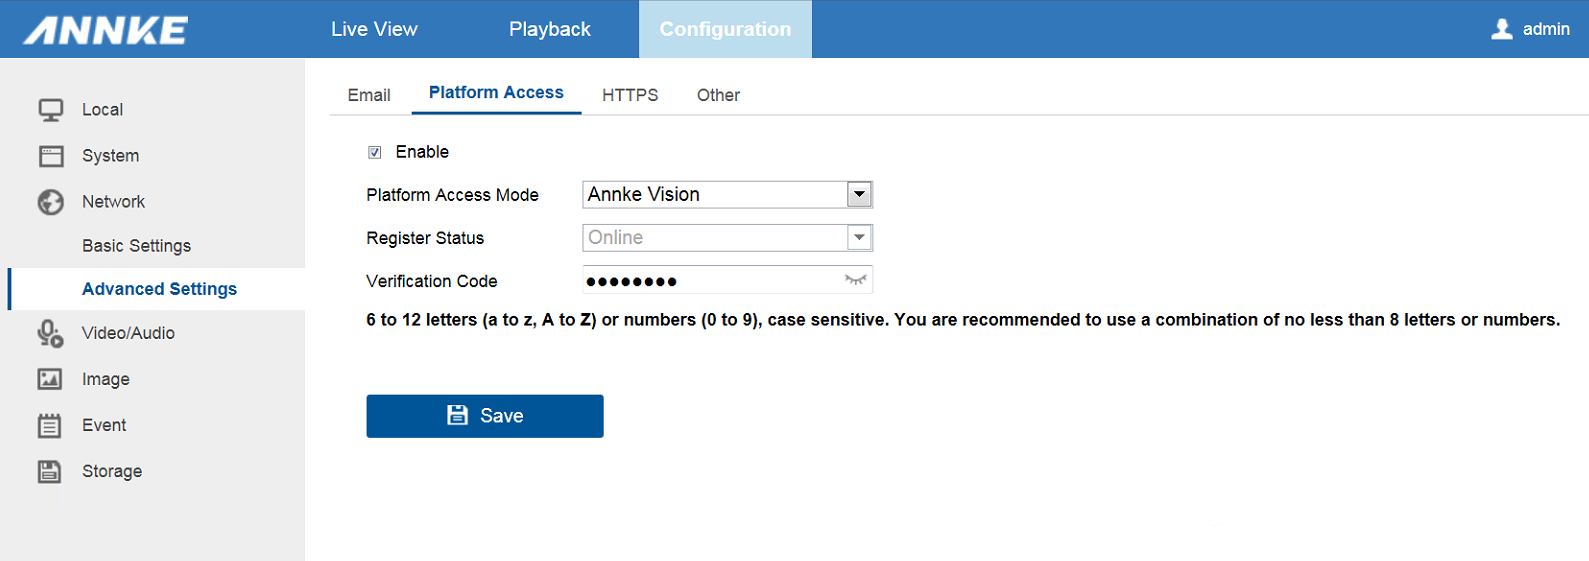
If it shows Offline, refer to this instruction to make it online at first: https://help.annke.com/hc/en-us/articles/360000648061
5. Set up DDNS for your ANNKE device
Propose: An ANNKE device with DDNS service will have a static IP/hostname on the Internet. This allow you to visit the ANNKE device by a static URL. To achieve this, Port Forwarding on your router is also required.
Steps:
1) Setup your DDNS account
2) Enable DDNS on your ANNKE device
3) Port Forwarding
1) Setup your DDNS account
There are some free DDNS service providers. In this article, we will take NO-IP for example.
After you created an account on the NO-IP website, Click your name at the top right corner, go to Account, then Dynamic DNS
Click Create Hostname
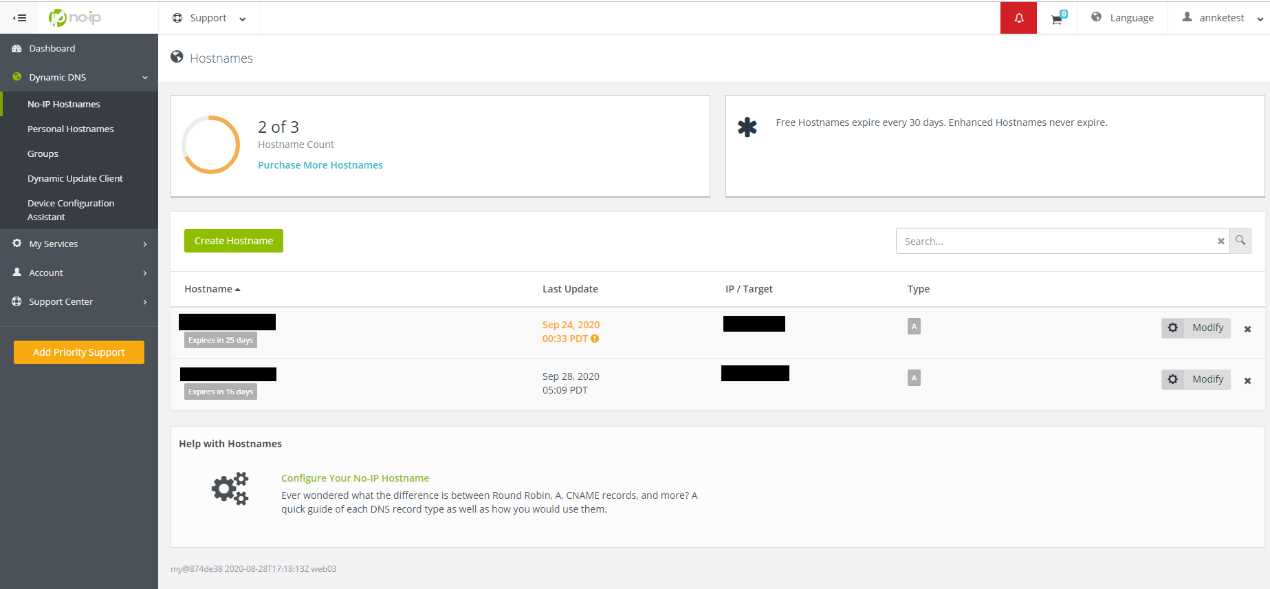
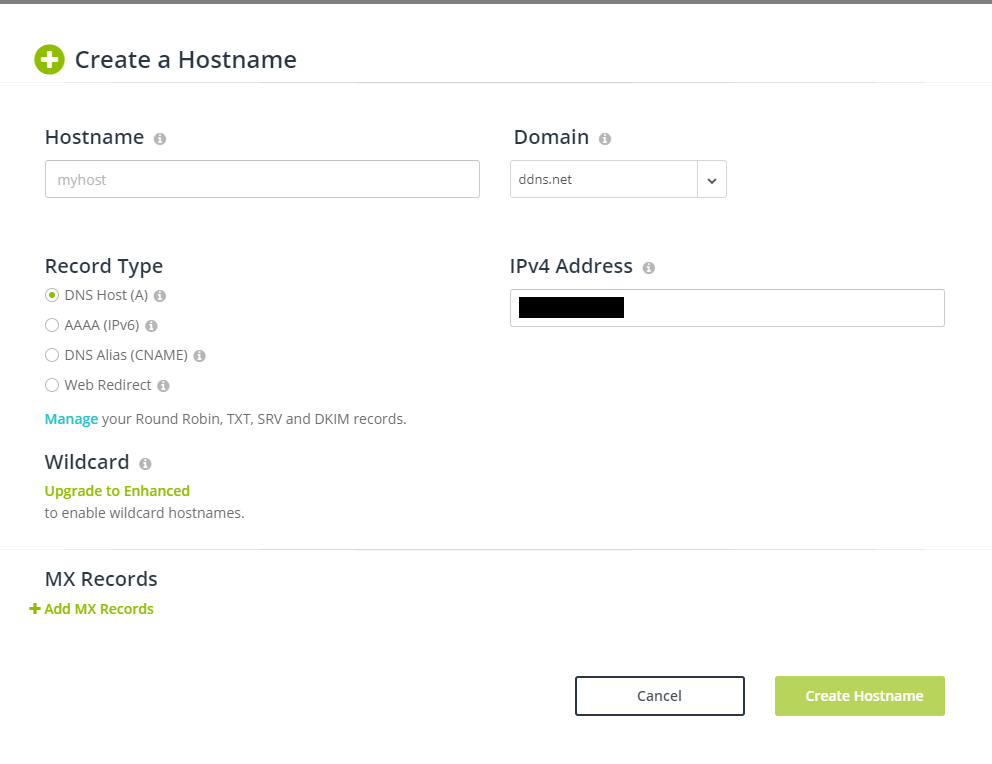
Create your hostname in the box. Leave other parameters as default, click Create Hostname
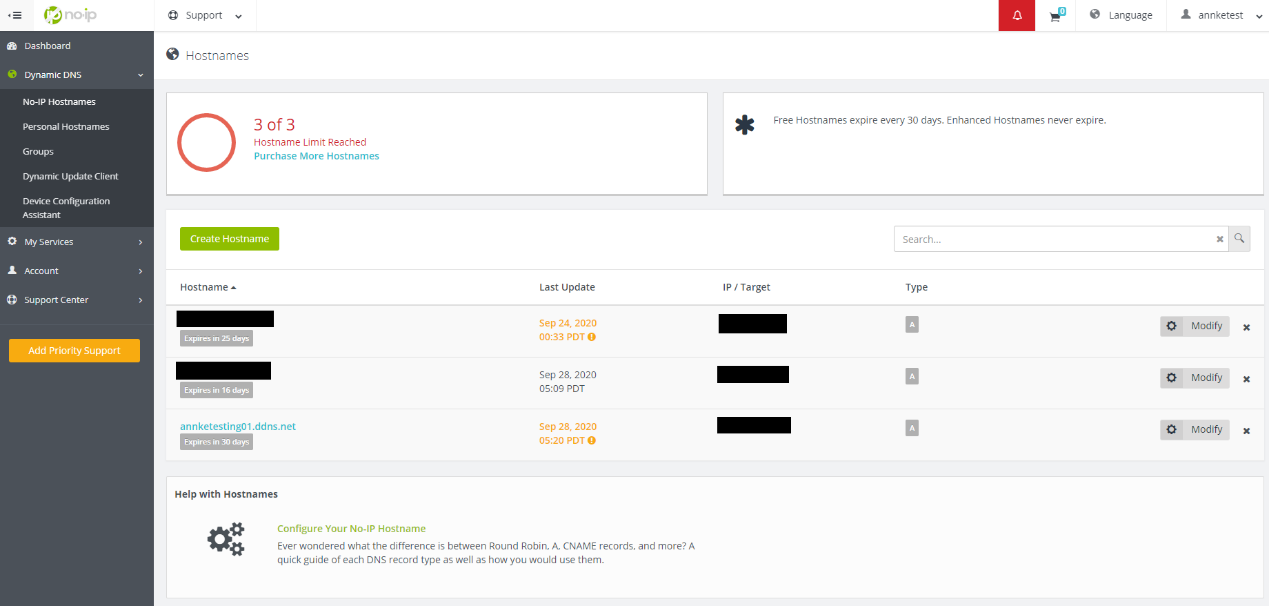
You will see the hostname in the list.
2) Enable DDNS on your ANNKE device
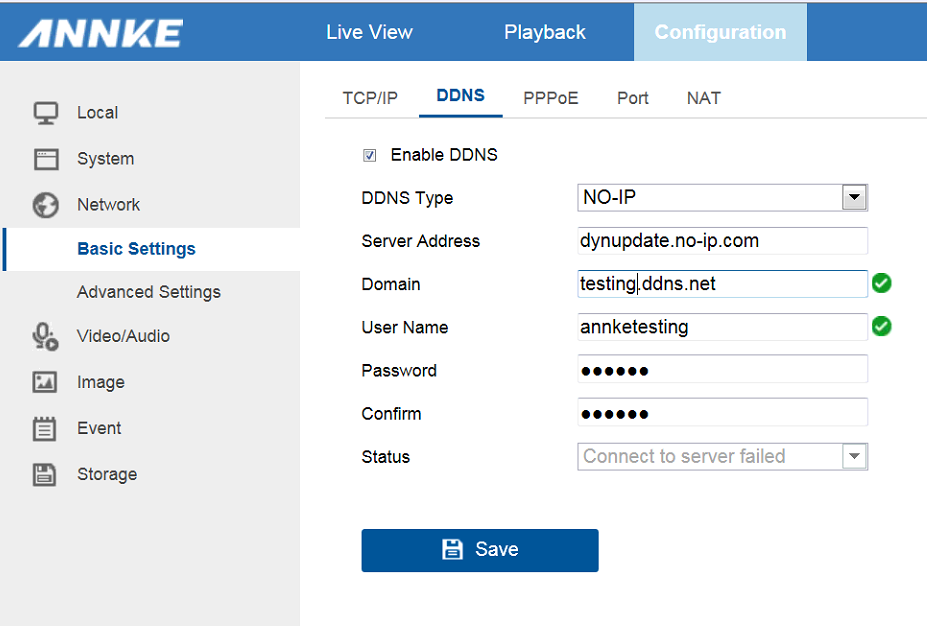
Log in to your device, go to Configuration-Network-Basic Settings-DDNS, tick on Enable DDNS, fill in the boxes as below:
DDNS Type: NO-IP
Server Address: dynupdate.no-ip.com
Domain: your hostname on no-ip.com
User Name: your user name on no-ip.com
Password & Confirm: your account password on no-ip.com
Then click Save to apply the change.
3) Port Forwarding
Purpose: Port forwarding allows other devices to visit a device in your local network.
Steps:
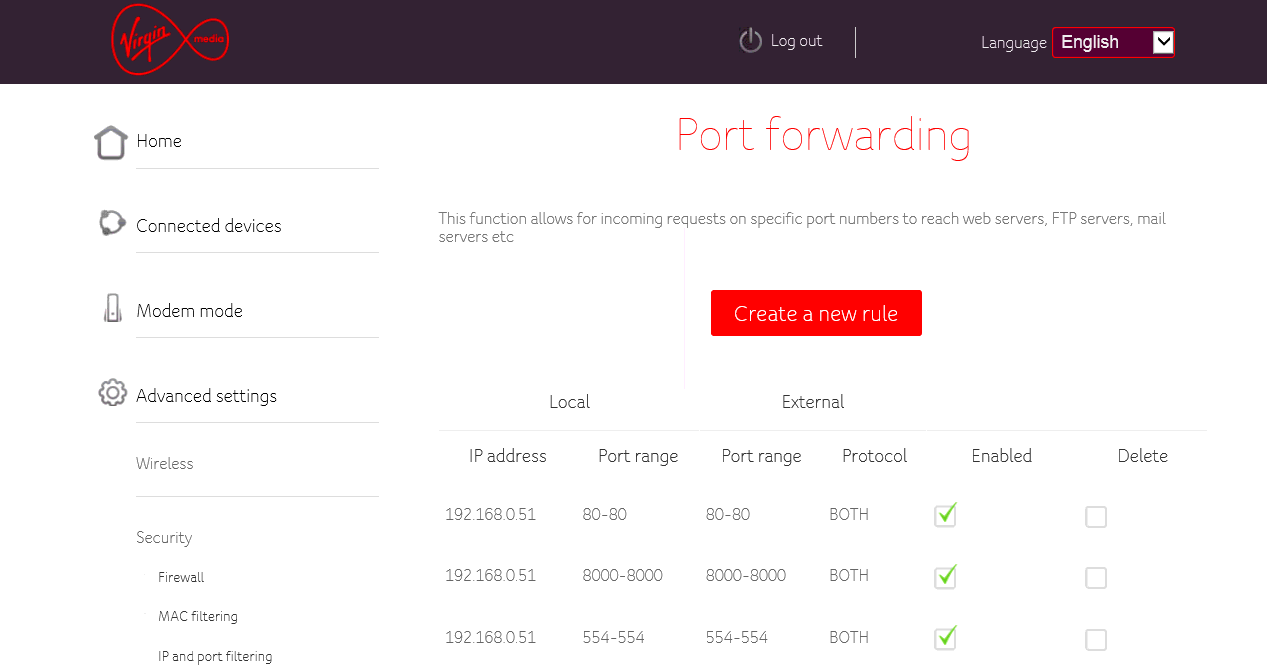
The steps may vary according to different routers. Below steps are based on the router Virgin Media Hub 3.0:
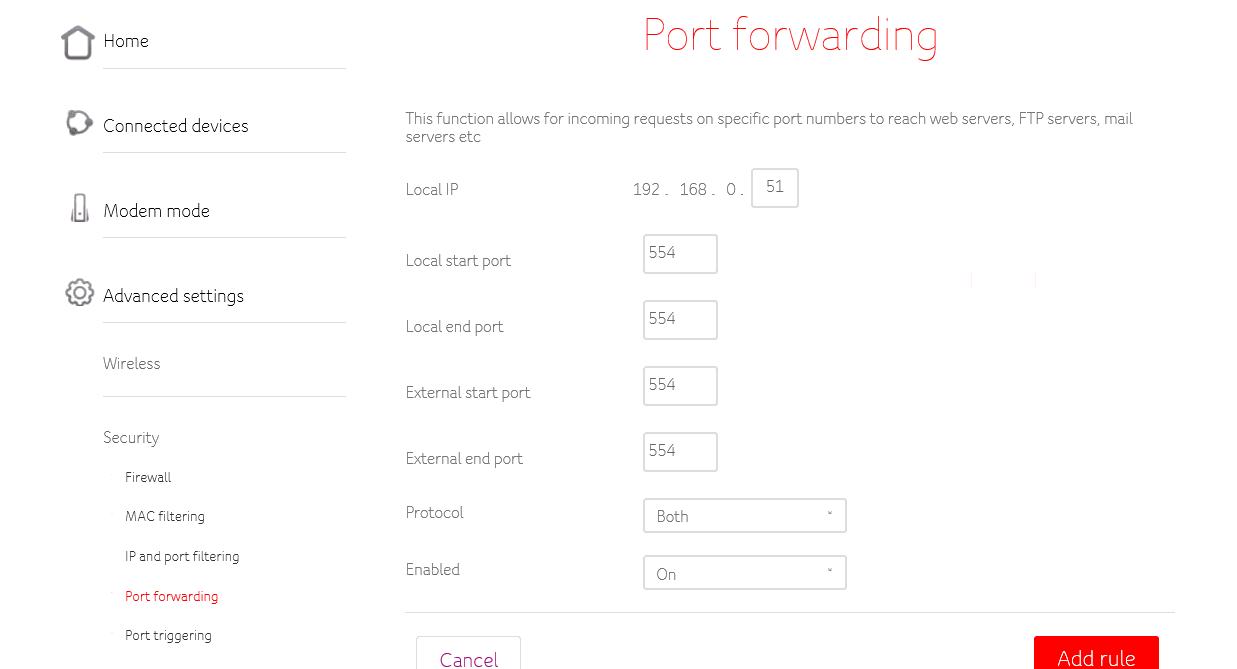
Click Create a new rule, then fill the boxes as below:
Local IP: your device’s IP.
Local start port: 554
Local end port: 554
External start port: 554
External end port: 554
After that, click Add rule to apply the change.
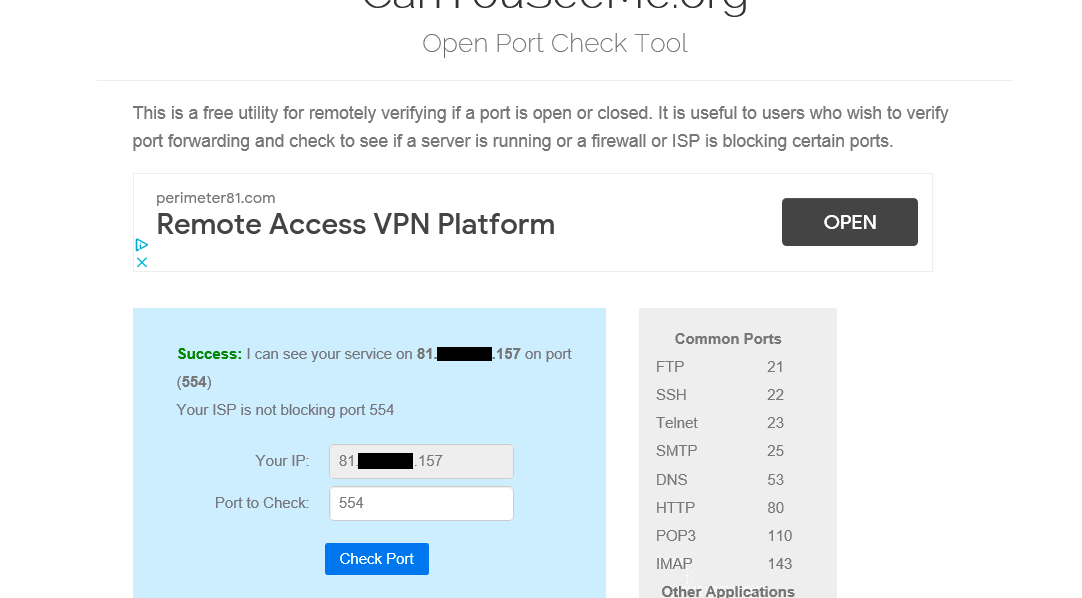
Now, you can go to canyouseeme.org, input your port number in the Port to Check box, and click Check Port. If you can see the message ‘Success, I can see your service on [your WAN IP] on port (554)‘, then the port forwarding has finished.
6. Get the RTSP address
Steps:
1) RTSP address format
2) Test your RTSP address
1) RTSP address format
rtsp://IP:RTSPPort/Streaming/Channes/ID/?transportmode=unicast.sdp
Explanation
ID means mainstream or sub-stream and channel number. If the ID is 102, we will get
a sub-stream of the first channel. If the ID is 101, we will get mainstream.
RTSP URL supports to add username and password:
rtsp://admin:12345@IP:Port/Streaming/Channels/ID/?transportmode=unicast.sdp
The type of authorization supports BASIC and DIGEST.
Examples
Get sub-stream from IP camera on channel 1
rtsp://172.28.1.52:554/Streaming/Channels/102/?transportmode=unicast.sdp
2) Test your RTSP address
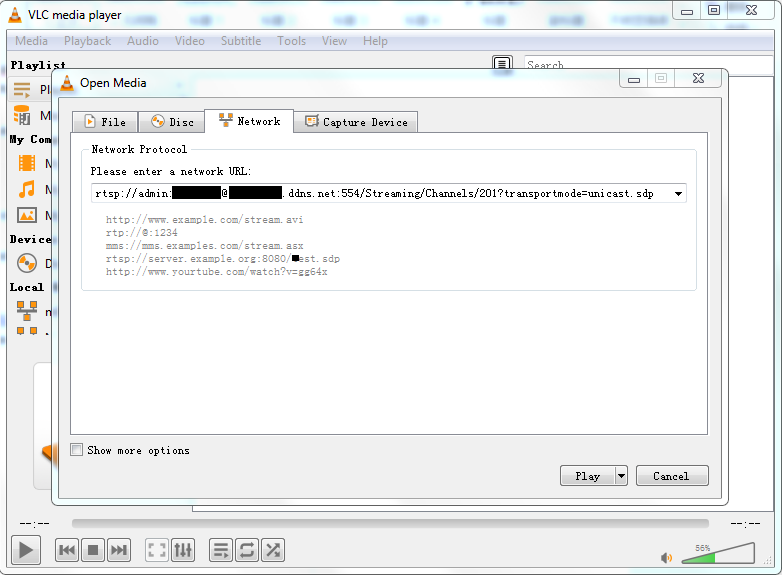
Once you finish getting the RSTP address, try it on the VLC player to make sure it’s working.
In VLC player, use the shortcut Ctrl+N or navigate to Media-Open Network Stream. Input your RTSP address in the box, click Play.
When the RTSP address is correct, you will see the live stream from your camera in about 5 seconds.




I can’t upload
I sent an e-mail from the communication channel. Can you help?
I am having trouble with the installation
I really love you
can you help me please
please provide support for me i leave my email address
I sent an e-mail from the communication channel. Can you help?