How to install Bosch IP Camera How to find the IP address of your Bosch IP camera, The IP camera address is always the key if you would like to monitor or remote viewing it. Like any network device, the camera is assigned an IP address when it is connected to the router with Internet access and powered on.
The steps below assume you already have the MAC address of your camera installed and connected to a router with Internet access.
Cameras need physical network cable connection for the initial setup in order to get the IP camera address while connected to the router.
Here we will introduce 3 ways to find the network camera IP address quickly and easily.
Article requirements:
How to install Bosch IP Camera
Step-by-step guide
Option 1
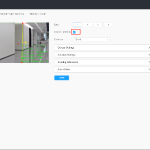
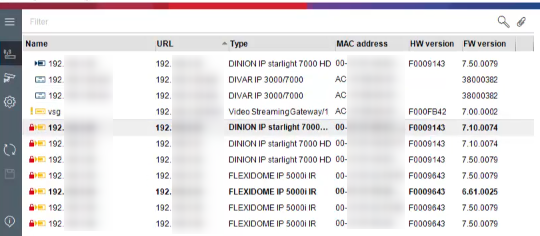
1. Open Configuration Manager
2. Under My Devicestab > press Network scan
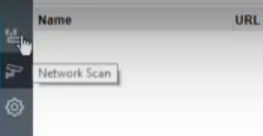
3. Search for the camera IP using its MAC address:
Option 2
IP Helper is a generic discovery and network-configuration tool for all Bosch IP Network Video Products.
It is used for discovering devices and basic network configuration and licensing
IP Helper Software can be downloaded from the following links and be installed on your Mobile device or Laptop:
Option 3
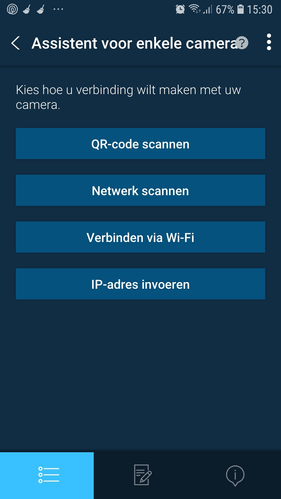
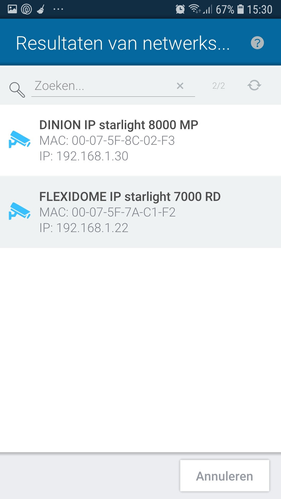
1. Connect your IP camera to the router through the physical cable
2. Power on the camera
3. Connect your PC to the router
4. Open CMD: Start > search for “cmd”
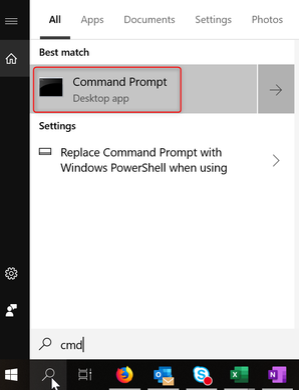
5. Type “arp -a” > press Enter
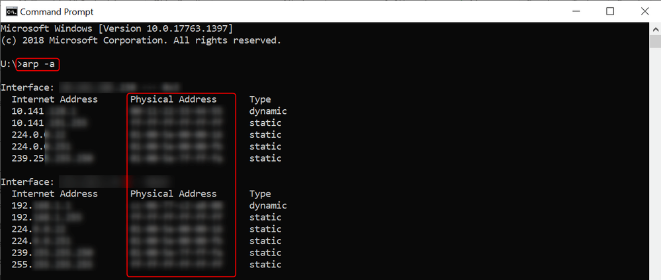
This list contains the IP addresses, MAC addresses and allocation type (whether static or dynamic) for all available hosts.
Your camera will be displayed in the “arp table” and will be identified through its MAC address. It can be found in the Physical Address column.
What if more than one device attempts to use the same IP address?
If two cameras share the same address, errors will typically not be generated.
Neither will be able to connect to the network and cameras may randomly go offline or not stream video to a recorder.
In this case, the recommendation would be to set a static IP address for one of them.
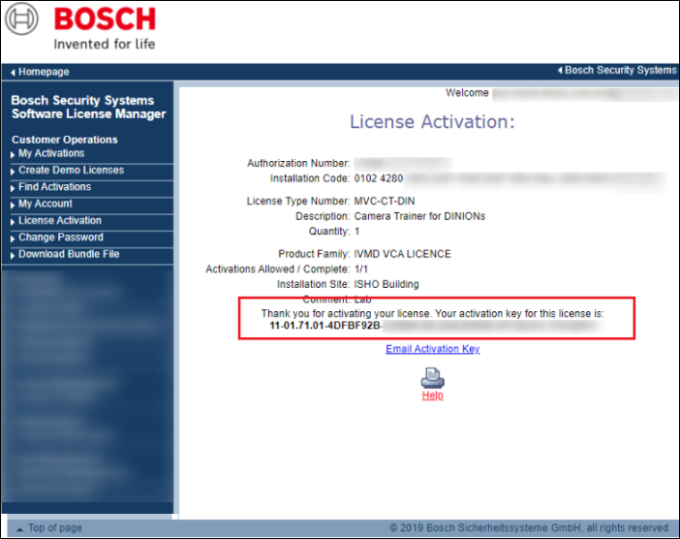
Where can you find the installation code needed to license a Bosch camera?
Question
Under most circumstances, Bosch IP cameras require additional licenses.
If you want to use features that are covered by different licenses, you must install the appropriate licenses using the camera’s installation code.
For example:
But where can you find the installation code needed to license a Bosch camera?
Answer
This article provides you 2 options for finding the camera installation code:
Option 1
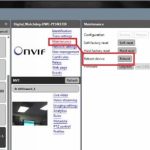
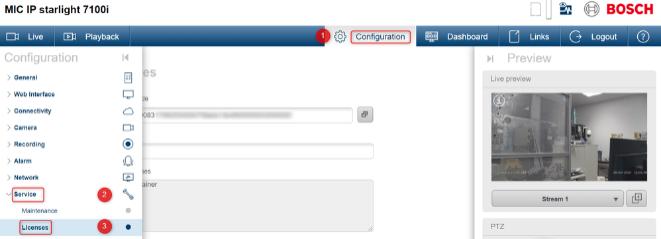
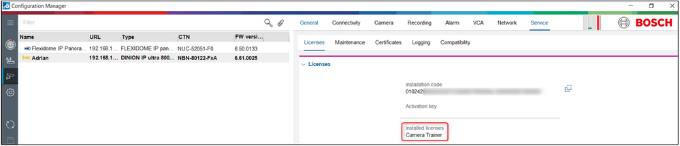
Using Configuration Manager
Login to the camera with its credentials > Go to the Service tab > select Licenses

Option 2
Using UI Web browser
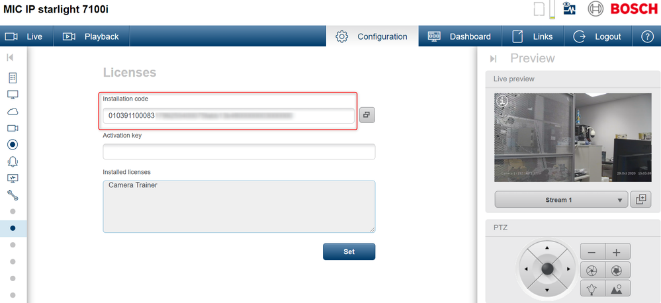
1. Open one browser > Access the camera by typing its IP address > login with its credentials
2. Go to Configuration > Service menu > Licenses submenu
How to license a Bosch camera?
Extra licenses can be purchased for additional features of your devices as your business grows.
After adding cameras to the system, you may need to use additional features of them, like microphone use, Serial Protocol Software License, Camera Trainer license for Intelligent Video Analytics, NTCIP license for moving cameras and so on.
Depending on the camera model, you can have additional features by installing the optional licenses.
Follow the instructions below and find out how you can activate a license on your Bosch camera.
Article requirements:
Step-by-step guide
The process for how you can find the installation code needed to license a Bosch camera is described here.
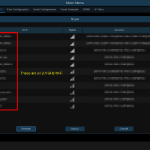
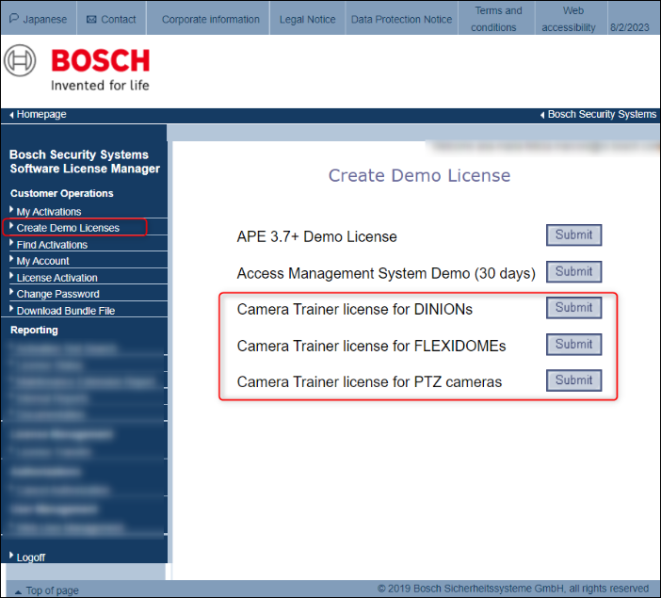
If you want to activate a Demo, select “Create Demo Licenses” and click on the “Submit” button next to the license you want to activate:
*Please keep in mind that this cannot be changed if you use something random.

The installed licenses of your device will be displayed straight away.
Which Browser is supported for Bosch cameras (web interface)?
Question
Which Browser is supported for Bosch cameras (web interface)?
Answer
The browser supported by Bosch cameras depends on the CPP that camera belongs to and on the Firmware version the camera has.
This information can be found in the System Requirements section from the Release Letter of the firmware version/CPP you have: https://downloadstore.boschsecurity.com/index.php
For example:
CPP13, Firmware version 8.46.0030 → the supported Web Browsers for configuration purposes are:
Important:
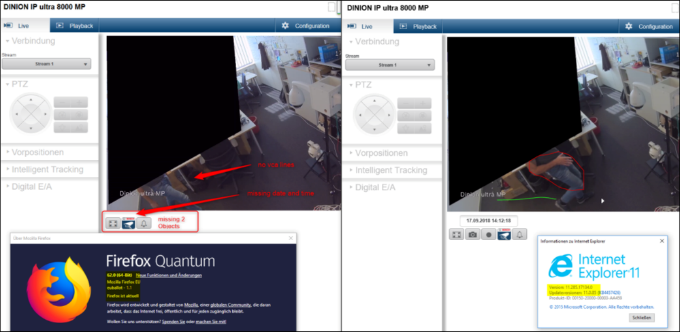
For a complete browser functionality, Mpeg ActiveX 6.34 or newer is needed. It can be used for live viewing and playback and is required for VCA configuration via Web browser interface for CPP6, CPP7 and CPP7.3 cameras with firmware versions 7.80 and beyond.
If you would like to avoid using **Internet Explorer or it is not available anymore on your device and you want to configure VA, it is recommended to use Configuration Manager.
** Internet Explorer 11 desktop application has retired and is out of support as of June 15, 2022 for certain versions of Windows 10
According to the Release Letter, Configuration Manager is used for configuration and licensing of the various products. It includes Video SDK 6.3 and latest plug-ins for VCA configuration.
Therefore, in web browsers that do not support MPEG-ActiveX, VCA configuration is only possible via Configuration Manager. An info message to use Configuration Manager is presented, with a hint where to get Configuration Manager if it is not installed.
You can Download Configuration Manager from Download Store > Software > select Configuration Manager
Firefox does not allow ActiveX elements.
Therefore, some features are missing inside the webpage.
If you use Firefox, the issue below might arise. In this situation, CM is recommended to be used in order to access the missing elements.
Fix IP cameras when they cannot be connected
Possible causes and solution(s)
You are using one Divar network 2000 and you have a new Flexidome IP 5000i IR camera, but you cannot add it to the Divar because it is not displayed in “Detection” > “Device search” screen.
System design:
Cause:
You didn’t set up the internal IP settings of the DIVAR.
Assigning the device to a network range which is different than the internal or external network range will lead to a situation where the cameras will no longer be accessible by the recorder.
A warning message is shown and using this feature will not work.
Solution:
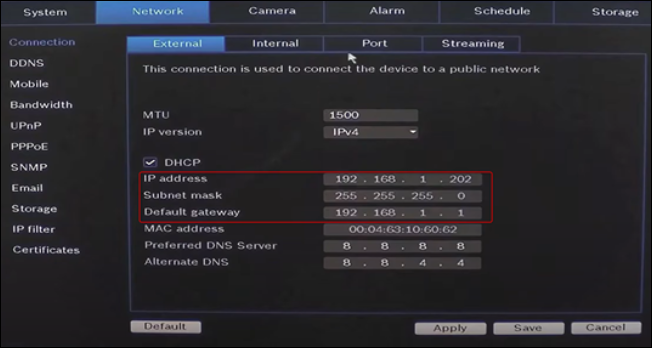
A) Make sure that the DIVAR has valid network settings.
You can find the network settings in the DIVAR’s menu Network tab > External
B) Add cameras to the recorder
Once you’ve made sure your network settings are correct, you can add cameras to your device.
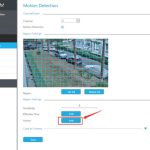
Go to Camera > Detection: This page is used to find cameras on the network and assign them to the recorder and this provides the option to configure the IP address of all cameras to a specific network range.
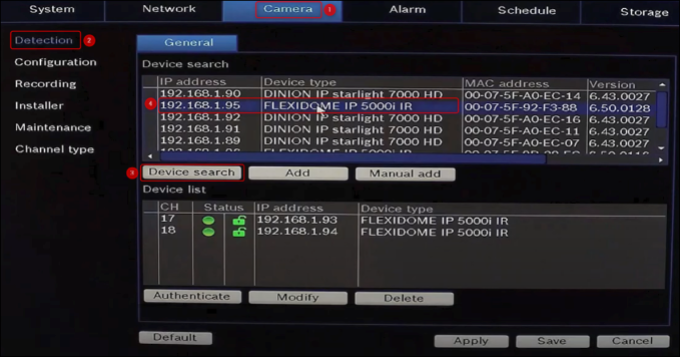
The Device list shows the list of channels with their assigned cameras.
For each camera in the device list the status is shown with the following icons:
– Green light ONLINE, red light OFFLINE
– Green lock AUTHENTICATED; red lock LOCKED
Select one or more channels to Authenticate, Modify or Delete the channel(s) by selecting the appropriate function:
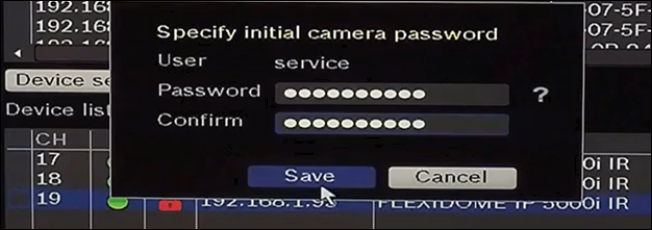
Authenticate is used to login to one camera, or multiple cameras with the same username and password. For all Bosch cameras, a username and password is required to use the camera.
Selecting Authenticate for this camera will request to specify the initial username (default: service) and password.
Modify can be used after a camera is authenticated and is used for assigning the camera to a different channel or to change the camera’s name.
The Modify button can also be used to change the network settings of the camera. The “Configure network addresses” screen appears, if the DHCP checkbox is deselected, the IP address and other network settings can be changed.
After making changes by selecting Modify, this opens a confirmation dialogue box. To confirm –> select Yes –> this will cause the modified cameras to be rebooted.
Bosch IP camera installation guide, Install Bosch IP camera software, Bosch IP camera setup instructions, How to configure Bosch IP camera, Bosch IP camera installation tutorial, Bosch IP camera wiring setup, Bosch IP camera mounting guide, Bosch IP camera installation cost, Bosch IP camera connection setup, Bosch IP camera manual download, Bosch IP camera setup help, Bosch IP camera network configuration, Bosch IP camera installation service, Bosch IP camera system setup, Bosch IP camera power installation, Bosch IP camera step-by-step setup, Bosch IP camera installation support, Bosch IP camera install tutorial video, Bosch IP camera firmware installation, Bosch IP camera app installation


Add Comment