
How to Configure Fisheye Camera to NVR and iVMS-Pro, A fisheye IP camera is a type of security camera that uses a fisheye lens to capture a wide-angle view, often up to 180 degrees horizontally or 360 degrees vertically. This lens provides a distorted, panoramic image that can cover a large area with a single camera. The term “IP” refers to the camera being a networked device that transmits video data over the internet or a local network.
Key Features:
These cameras are often used in surveillance systems for large areas where covering every angle with multiple standard cameras would be impractical or too expensive.
Fisheye Camera supports multiple mounting position and Display Modes. Fisheye view aside, it also supports a combination of Panoramic view and lower resolution PTZ view.
This document will show you how to configure different mounting positions and viewing angles through Web Interface and iVMS-Pro client software.
Test Environment
IPC model: IPC7F6-AF
Firmware Version: V5.4.14 build 160615
Software Name: iVMS-Pro
Software Version: V2.5.1.7 build 20160830
Default Camera IP address: 192.168.1.64
Default Password: 12345
Please refer to How to find IP address of IPC with SADP Tool in Local Network if you cannot find the IP address of the Fisheye Camera.
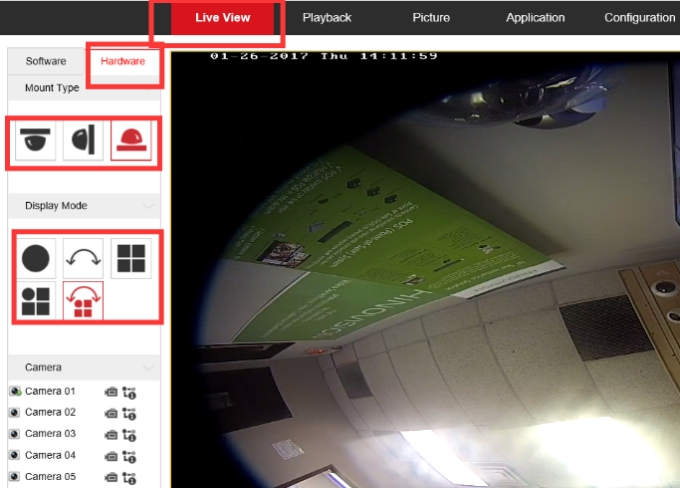
Note: Display mode supports the following combination; each channel is a dedicated stream and can be received by NVR separately.
.
.
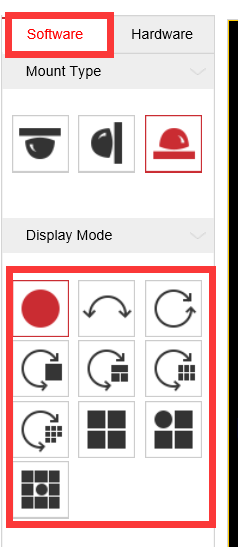
If viewed from IE browser, it can achieve up to 9 views, achieved by software (NVR is not able to receive channel achieved by software mode)
.
.
.
.
.
.
.

.
.
.
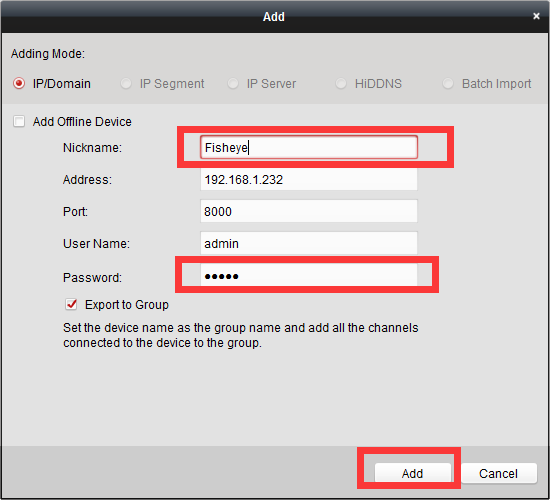
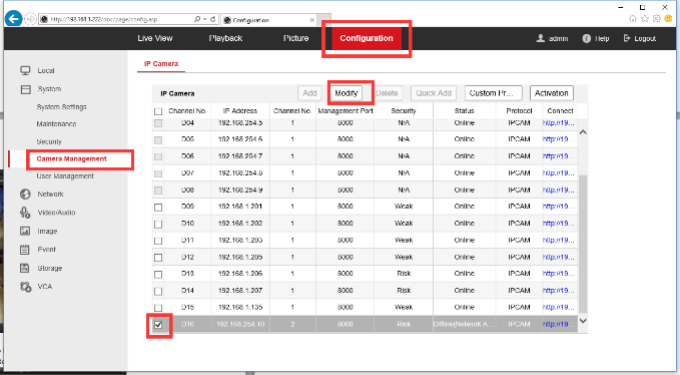
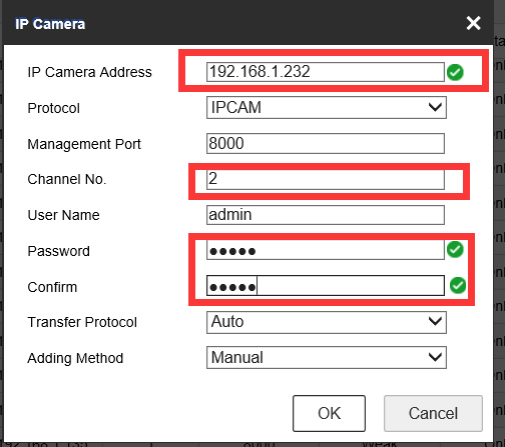
Note: Since fisheye camera output more than one channel, Repeat b and c to add all the channels you want to display
.
How to Configure Fisheye Camera to NVR and iVMS-Pro
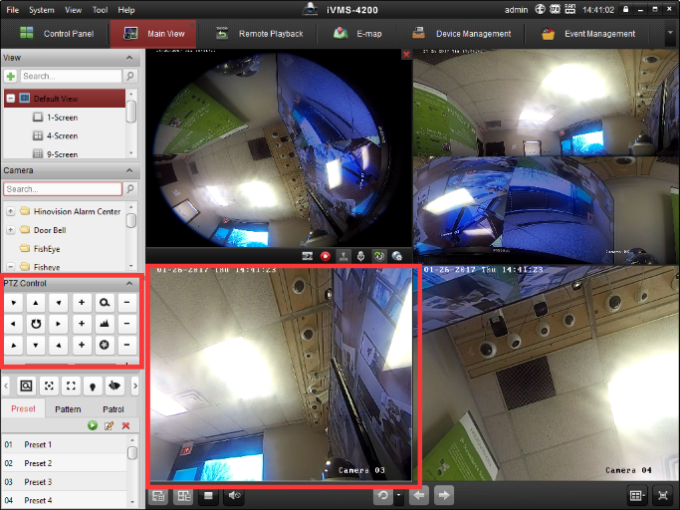
5.Control PTZ on Fisheye Camera
Fisheye camera supports up to 3 PTZ output, you can control them as regular PTZ camera with PTZ control button through iVMS-Pro, Web interface or NVR interface.
.

6MP Fish-eye faq
IPC7F6-AF supports a maximum of 5 channels simultaneously with 2048*2048 resolutions for fisheye view stream, 2048*1536 for panoramic and 1024*768 for the rest 3 streams.
It also supports the following combination:
x1536, 15fps) and 3 x PTZ (1024 x 768, 15fps)
If viewed from IE browser, it can achieve up to 9 views, achieved by software:

.
All images are processed within the IPC7F6-AF unit itself, with Lens distortion corrected. There is no extra processing required from NVR or PC side.
Connect through PoE port:
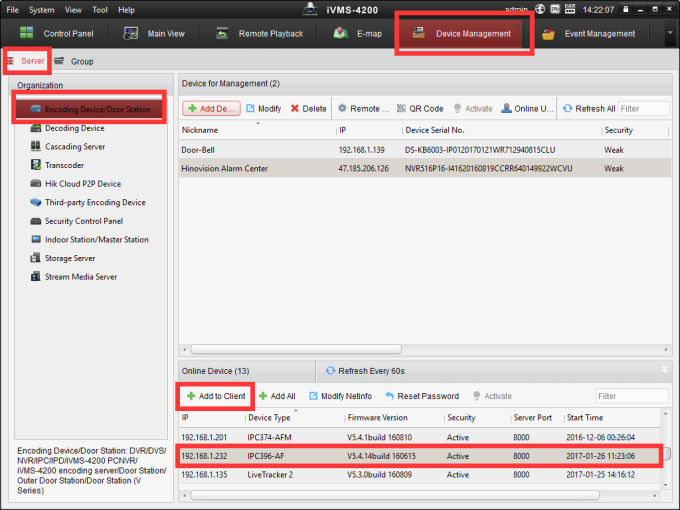
Connect the camera to the NVR PoE port with Ethernet cable. You can leave channel 1 in Plug and play mode and add the rest channels by manual configuration with same camera IP address yet different channel No.

Connect through LAN:
Connect the camera to the switch, power on the camera; assign IP address to the camera (Camera IP should be in the same segment as NVR IP), then manually add each channel to the NVR with same camera IP address and different channel No.
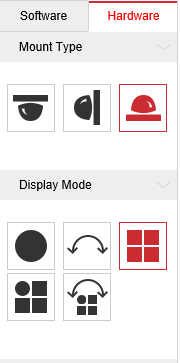
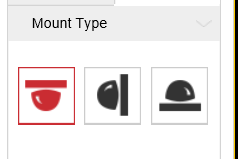
Fisheye Camera Mounting Positions and Display Modes
Fisheye Camera supports multiple mounting position and Display Modes. Fisheye view aside, it also supports Panoramic view and 3 lower resolution PTZ view.
.
This document will show you how to different mounting positions and viewing angles you can achieve on Fisheye Camera.
.
Test Environment
IPC model: IPC7F6-AF
Firmware Version: V5.4.14 build 160615
.
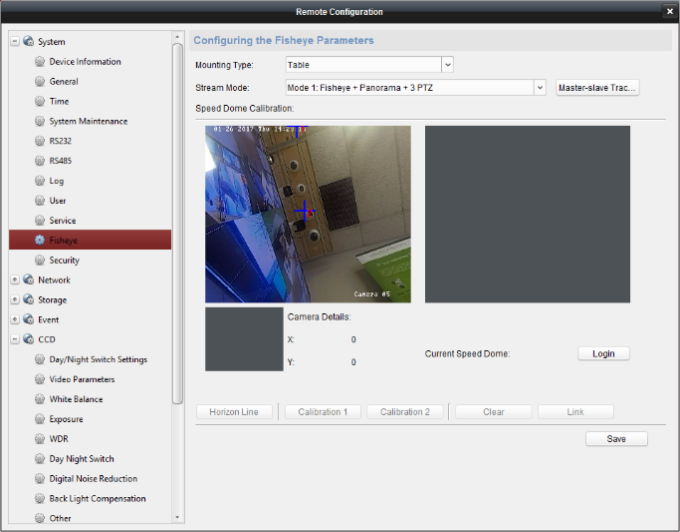
The Fisheye Camera supports following 3 mounting positions. You can choose to mount it lens facing up, Lens facing down, or lens facing sideway.
.
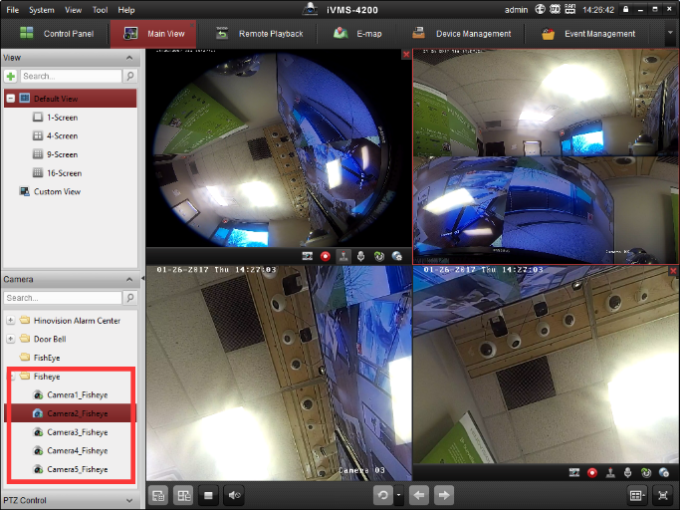
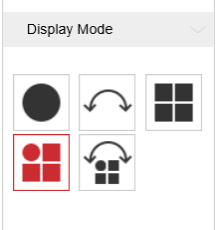
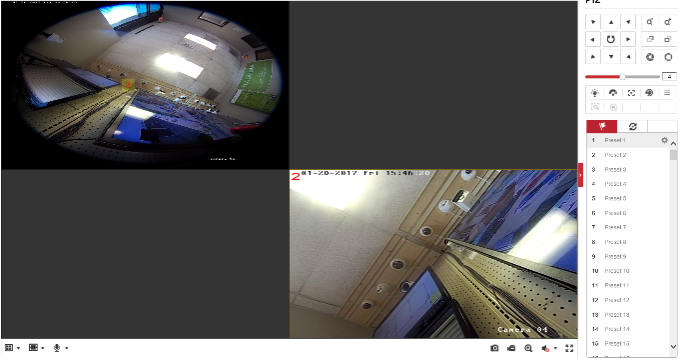
You can configured it to display one fisheye view, one panoramic view, 4 PTZ view, one fisheye view with 3 PTZ view, one fisheye view with panoramic view and 3 PTZ view.
.
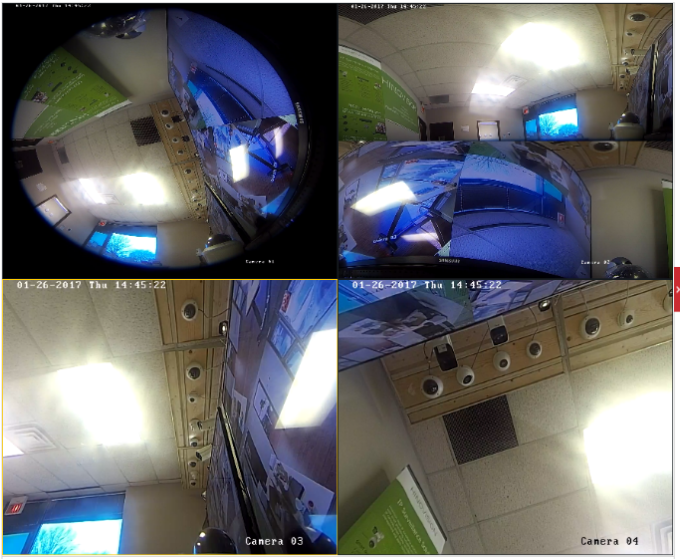
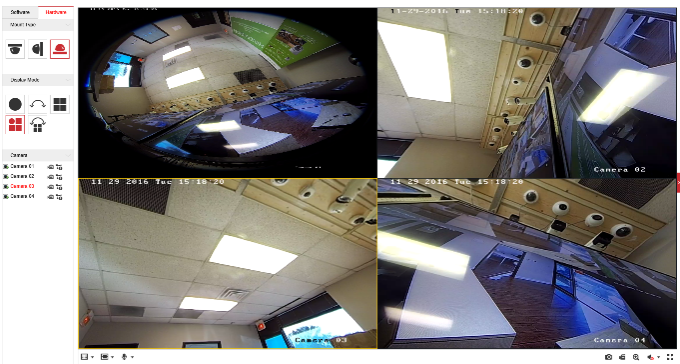
Each view can be recognized by NVR and recorded separately.
.
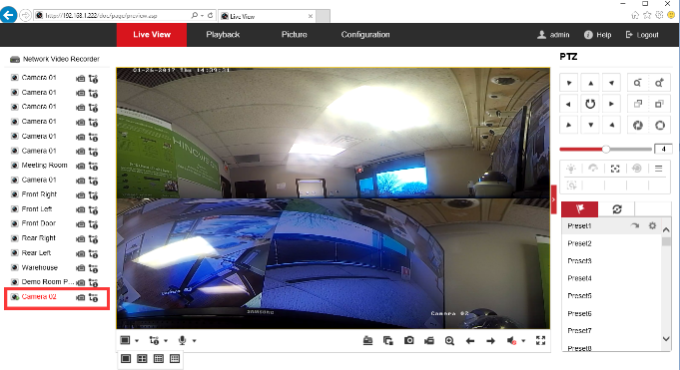
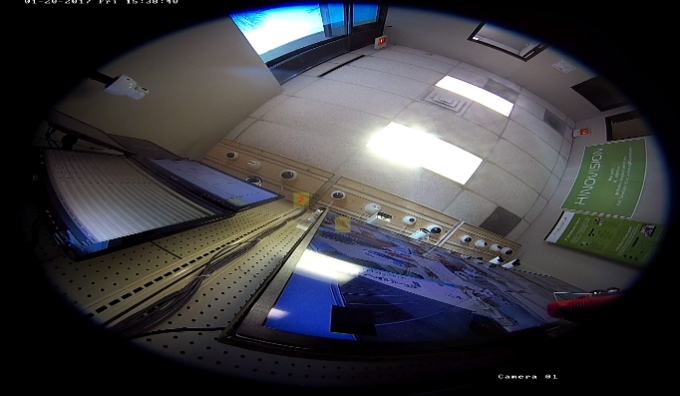
Fisheye view:
.
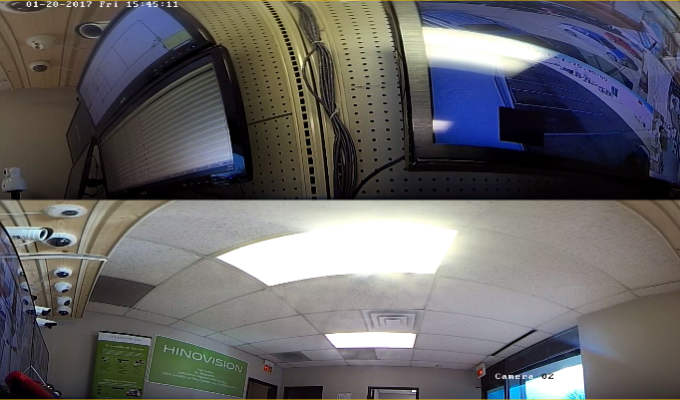
Panoramic view:
.
PTZ view:
.
PTZ view is generated from fisheye view, you can control the relative position of PTZ view by using the PTZ control button or click on the main view.
Access IP Camera Web Interface from NVR Web Interface
Step 1: Connect the NVR to the router or network switch.
Step 2: Connect your PC/MAC to the same network as the NVR.
Step 2: Find the IP address of the NVR. This can be done following ways:
– – Connect your PC/MAC to the same network as the NVR
– – Run the SADP Tool application. SADP will show the device name with IP address.
– – On the local menu, go to System –> Network –> IPV4
Step 3: Open the browser and input the NVR IP address. This will take you to the NVRs web interface.
Step 4: Login to NVR and go to Configuration –> Network –> Advanced settings –> Other –> Check the box for “Enable Virtual host” –> Save.
Step 5: Go to System –> Camera Management –> Click the blue link under “Join” to login to the camera directly.
Add Port Forwarded IP Camera to NVR
.
.
Step 1: Access the camera using the “SADP Tool” application and assign a static IP address.
.
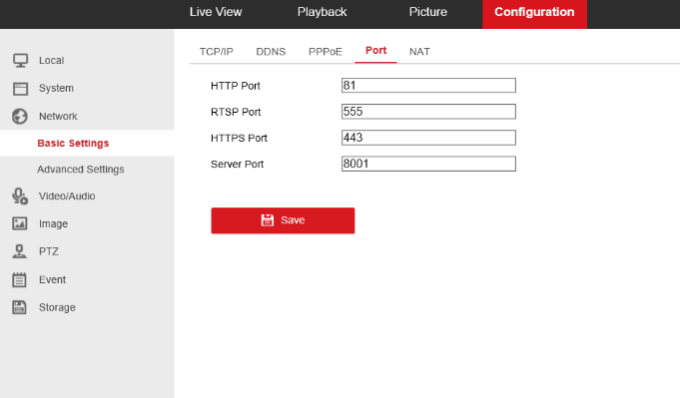
Step 2: Login to the camera from browser(IE Preferred) with IP address and assign port numbers. To access the port page, go to Configuration –> Network –> Basic –> Port and change the HTTP Port, RTSP Port and Server Port.
.
For multiple cameras, perform this step with different port numbers for each camera. For example, for camera 1 use “80,554,8000”, for camera 2 use “81,555,8001” etc.
.
.
.
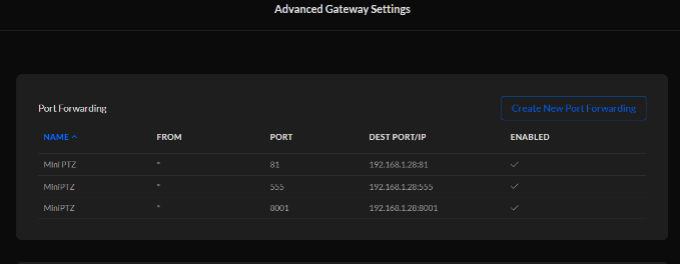
Step 3: Login to the router and perform port forwarding of the assigned ports. Below is a screenshot from a Ubiquiti router port forward page. It varies from depending on the brand of router you use.
.
.
Step 4: go to https://canyouseeme.org/ to find your public IP address and check to see if the ports are open.
.
Step 5: Login to the NVR and go to Camera management page.
.
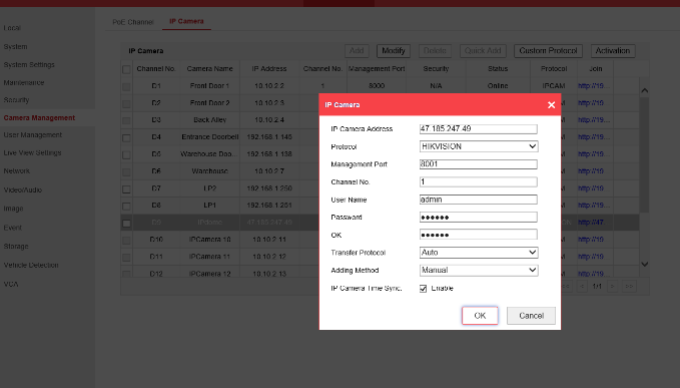
Step 6: Select a channel and click “Modify” –> Change adding method to “Manual” –> Enter the Public IP Address –> Enter the new server port assigned to the camera –> Enter the password –> Click “OK”
.
.
Step 7: Repeat the above steps for each camera if you have multiple cameras.
.
Add Comment