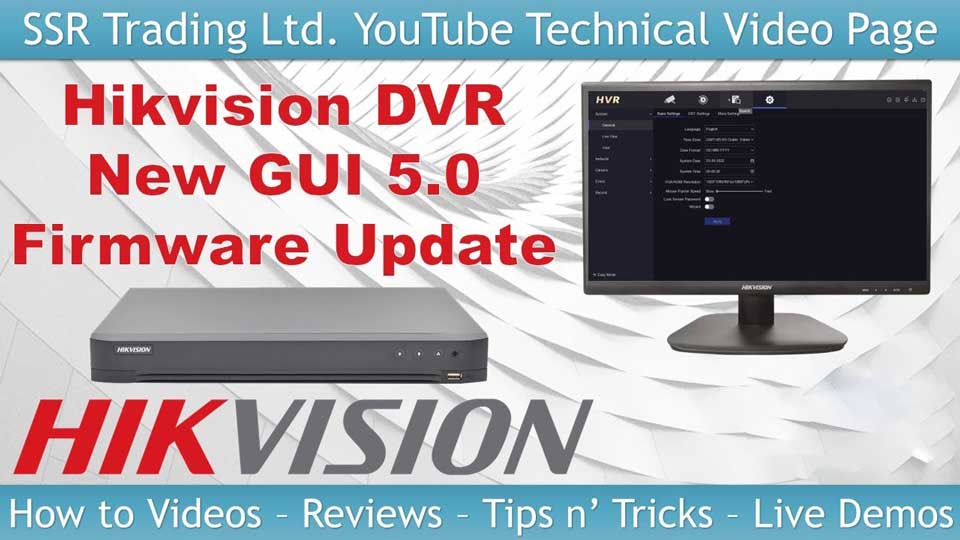
Guides for Hikvision NVRs with V5 firmware, Hikvision’s NVRs are keeping moving forward. The NVR 3.0 fitted the basic video security management. When evolved to NVR 4.0, it focused on the AI function update. Now, Hikvision NVR 5.0 leads the innovative change from traditional NVR to AIoT NVR. AIoT NVR as the domain center provides an intelligent platform as well as scenario-based applications, opening a new era of AIoT.
How to add a Hikvision NVR to Hik-Connect
Before you start…
• Make sure that the
network your NVR is connected to has an internet connection.
• Check that you have set the gateway address on your NVR correctly in Configuration > Network Configuration > Network Parameter > TCP/IP page, which is usually your router’s IP address.
• On the same TCP/IP page ensure that you have set DNS servers by
choosing any from this list, or enabling
Auto DNS on this page. We tend to recommend Google’s DNS servers, which are 8.8.8.8 for the primary, and 8.8.4.4 for the secondary.
• Ensure that the firmware on your NVR is up-to-date.
Part 1: Enable Hik-Connect on the NVR…
1.Open a web browser and enter the IP address of your NVR in the address bar. If you are not sure what this is,
use the SADP tool to find it.
.
2.Log in to the NVR using the “
admin” username and password you have set on it.
.
3.Go to Configuration > Network Configuration > Hik-Connect, which is where you can access all the Hik-Connect settings on your NVR.
.
4.Set a verification code by clicking the small pen button at the bottom of the page under Verification Code.
.
5.Turn on the Hik-Connect connection on the NVR by using the Enable toggle at the top of the page. The connection status should change to Online when you click on the Refresh button – if it does not, check the “Before you start…” points above. If you are still struggling after this, you should contact Hikvision Support as your NVR may be blacklisted.
Part 2: Set up Hik-Connect on your mobile phone or tablet…
1.Download Hik-Connect from your device’s app store.
2.Open the app and press Login/Register – if you already have a Hik-Connect account, enter the username and password here; if not, press Register.
.
3.Select your region, enter your email address and set a strong password
.
4.Enter the CAPTCHA code from the image on the right-hand side, and then press the tick to confirm.
.
5.Hikvision will email a security code to the address you have registered with to verify it, enter enter the code here and press Finish to create your account and login.
Part 3: Add the NVR to your Hik-Connect account…
1.The easiest thing to do here is use the QR code adding method. First, press Add Device (or the + in the top-right hand corner), and then press Scan QR Code.
.
2.Use your phone’s camera to scan the QR code on the NVR’s Hik-Connect page, or the one on the white sticker on the bottom of the unit.
.
3.Press Next when the app finds your NVR, and then press Skip on the Service provider Authorization page (unless you need to set this up with your installer).
.
4.The NVR will now be bound to your account and visible in the home screen of the app. You may be asked for a verification code to view the cameras, which is the one you set during part 1.
Other tips…
• If you do not want to use Hikvision’s P2P cloud service to connect your NVR to the app, then you can add the NVR via IP address by pressing
Add > Add Device Manually > Adding Type: IP/Domain. However, alerts in the app will not work for anything added this way, and you will need to
configure port forwarding for remote access to work.
• If you do not have access to the QR code, you can also use the NVR’s 9-digit serial number to bind it to your account by pressing Add > Add Device Manually > Adding Type: Hik-Connect Domain, and then following steps 3 and 4 in part 3 above.
• You cannot bind the NVR to multiple Hik-Connect accounts via the above steps. Instead, once it’s bound to yours, you can share it with other Hik-Connect accounts by pressing More > Share > Share with User and then searching for their account, generating a QR code for them to scan, or scanning their QR code, which is located in their Account Management page.
Guides for Hikvision NVRs with V5 firmware
How to set up motion detection and alerts on a Hikvision NVR
What is Motion Detection and why is it useful?
Motion detection is one of the easiest events to set up and will notify you as soon as a person or vehicle enters a predefined detection zone in your scene. Traditionally, it would just rely on lots of pixels changing between frames in your camera’s video stream, which would indicate movement in the scene.
Of course, this would cause lots of alerts for things you are not interested in, such as animals, moving plants and rain. Hikvision’s Acusense cameras and NVRs now have something called Motion Detection 2.0, which cuts the false-positive detections right down as will only notify you when people and/or vehicles are in the scene by learning what they look like. In this simple step-by-step guide, we will show you how to get motion detection set up on the new NVR 5.0 web interface.
Step 1: Go to your NVR’s Motion Detection configuration page…
1.Browse for your NVR’s IP address in a web browser.
2.Login using the admin username and password that you have set on it.
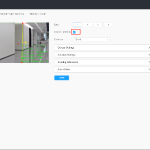
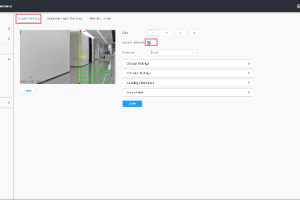
3.Go to Configuration > Event Center > Event Configuration > Generic Event
4.Select your camera from the Channel dropdown.
5.Select Motion Detection from the row of options beside Sub Event.
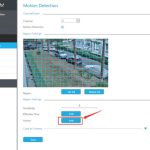
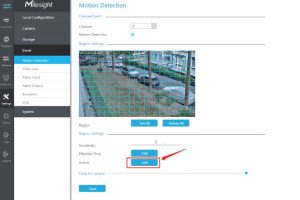
Step 2: Configure your Motion Detection zone and rules…
1.First, turn on Motion Detection by turning the Enable toggle switch on (green).
2.If you would like any trigger objects to be highlighted by a green box overlay in your footage, then turn the Dynamic Analysis toggle switch on. This can be especially useful when your scene is large and target objects are tricky to spot.
3.For the Sensitivity setting, there is no set rule. The higher this is, the more sensitive the trigger is to any movement, so setting this to the maximum 100% will likely leave you with lots of alerts. We recommend starting with the default 60% and adjusting this over time to get the results you are happiest with.
4.If you have an Acusense-enabled NVR, then you will see an Enable AI by NVR option – turn this on if your camera does not have Acusense built-in to is, and the NVR will analyse whether a moving object is a person or vehicle. If your camera is an Acusense model, then leave this option off, as it is better to have your camera do this work if possible.
5.Beside Detection Target, tick the object types you would like to trigger the event. You can also tick both if you would like Humans and Vehicles to trigger it, or even leave both unticked, which will notify you on any form of motion, such as animals in the scene.
6.On the right-hand side you should see a preview of the camera with a green rectangle filling it, which is your detection zone. You have a couple of options here:
7.Adjust the existing box by left-clicking on and dragging each of the four corners to your chosen boundary. You can also move the whole box, just left-click on the middle and drag it while holding the clicker down.
8.Delete the existing shape by clicking on the Clear All (dustbin) button in the toolbar and draw one from scratch, which will allow you to draw a more complex shape with up-to ten points (or nine sides). You will first need to click on Draw Area (the box with a pentagon inside it) in the toolbar. Then left-click to drop each point, and then right-click to complete the shape.
9.Once you are happy with the shape, you can up-to three more by clicking the Draw Area button again.
10.When you are finished, click Save.
Quick tip…
If you find that the camera preview is too small when drawing your detection zones, you can switch the view to full screen by clicking on the Full screen (four arrows) button in the toolbar, and then exit full screen by pressing Esc on your keyboard.
Step 3: Set the arming schedule to specify when you want Motion Detection active…
1.Click on the Arming Schedule tab.
2.You will see a grid representing the week in hours, broken down into 30-minute segments. Motion Detection will be active for any period that is blue in this grid, so it’s on constantly by default.
3.If you would like to have the event turned off for a certain period, then just click on the Erase button and then click on each 30-minute segment to turn it white (meaning “off”). You can also left-click and drag to erase several segments quickly.
4.If you would like to change a white segment blue again, click on Arm, and do the same as explained above.
5.When you are happy with the schedule, click Save.
Quick tip…
If the 30-minute segments are not precise enough for you, you can finely tune a period of arming or disarming by double-clicking on the segments and specifying your start and end times in minutes using the arrows.
Step 4: Set what you need the NVR to do when a camera detects a target…
1.You have four toggle switch options here to tell the NVR what to do every time the event is triggered – which ones you enable is up to you:
Notify Surveillance Center: You’ll need to enable this if you want the NVR to send notifications with a video clip of the trigger object to the Hik-Connect mobile app or iVMS-4200 software.
Alarm Pop-Up Window: Enabling this will mean that, when a camera detects motion, it switches to full screen on the NVR’s local console interface.
Buzzer: When you enable this, the NVR will make an audible beep every time the camera detects motion.
Send Email: This will get the NVR to send an email notification with a still image of the trigger object, which was popular before Hik-Connect notifications were introduced. These guides have more information on configuring email notifications, but Hik-Connect notifications are easier to set up and view.
2.Below these toggle switches you will see another table of options labelled Other Linkages, which have some more advanced camera instructions. Again, you only need to tick the boxes that you feel are necessary for your application:
Video Recording: Tick the box for any camera that you want to save a clip when motion is detected on the selected one. This only really applies for cameras that aren’t set to continually record anyway. The selected camera will be ticked by default, so keep this ticked.
Alarm Output: Your NVR, and some cameras, will have an alarm output terminal connector. Ticking one of these will mean that your camera sends a signal over the selected output when motion is detected to trigger an external device, such as an automated gate or security alarm system.
Audio and Light Alarm Linkage: Any Live Guard camera will have these options – you just need to tick the Light box if you would like the camera to use it’s strobe light when motion is detected, or Audio if you would like it to play your audible warning through the speaker.
3.When you’re finished, click Save.
How to connect an IP camera to a Hikvision NVR
Adding cameras to your Network Video Recorder (NVR) is a crucial step in any CCTV setup. Not only does it allow you to store and access all your camera recordings in one place, but it also simplifies camera configuration. In this simple step-by-step guide, we’ll show you how to add cameras to a Hikvision NVR using the new NVR 5 web interface.
.
Why add cameras to an NVR?
• Centralised storage: Storing all recordings on the NVR ensures easy access and management.
• Simple and efficient configuration: With cameras connected to the NVR, you can configure settings from a single interface.
• Streamlined viewing: View your camera feeds and adjust the settings conveniently.
.
Before you start…
Before anything, to be able to add your IP cameras, you need to make sure that:
.
• Each camera is connected via a network cable to a
POE switch that’s connected to your local network, or to the POE ports on the NVR.
• Each camera is connected to a power source (normally a POE port on the NVR or a switch) – if you are not using POE, you will need to power the camera via its optional 12V barrel connector.
.
How to add your cameras using the V5 GUI…
Step 1:
Open a web browser and enter the IP address of your NVR in the address bar. If you are not sure what this is, use the SADP tool to find it.
Step 2:
Log in to the NVR using the “admin” username and password you have set on it.
Step 3:
Go to: Device Access > Device Configuration > PoE Settings
If you are connecting your camera via the Plug-and-Play method, then make sure that Network Camera Plug-and-Play is enabled on the POE port you will be connecting the camera to on this page.
For any camera with a cable run under 100m, leave the Network Cable Distance as Short Distance.
If you are connecting your camera manually by IP address, disable the Network Camera Plug-and-Play option for the channel that you plan to add the camera to.
Step 4:
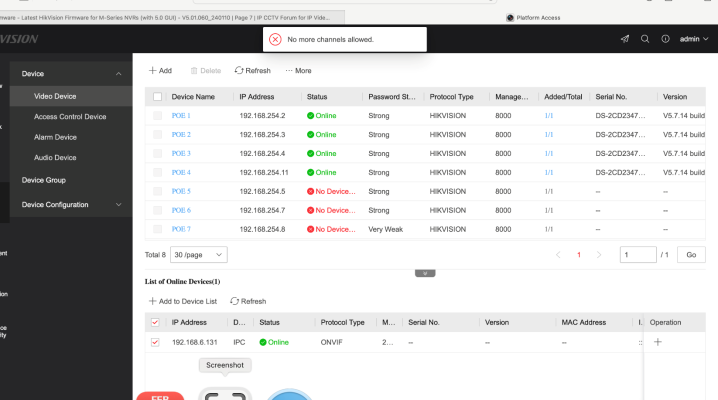
Go to: Device Access > Device > Video Device
For any Plug-and-Play camera, just make sure that it is in its inactive default state and then connect it to the port you reserved in step 3. After 20 seconds or so, the camera Status should turn to Connecting and then Online (you may need to click on Refresh to see this).
For Manually added cameras, if you can see the camera in the List of Online Devices section, then just tick the box for the camera and then click + Add to Device List, which will then automatically add it to one of the channels you disabled Plug-and-Play on in the last step.
Alternatively…
Click on +Add at the top of the page and fill out the fields as follows:
IP Address: Enter the IP address of your camera, using the ‘Test’ button to verify there is a camera at that address.
Device Name: This can be anything you like, as it is the name the camera will show with on your NVR.
Protocol: Select the camera’s manufacturer from this list, or failing that, use the ONVIF protocol (your camera will need to have ONVIF enabled for this to work).
Management Port: Enter the Server port set on the camera, which you can find in the SADP tool or in Network>Basic Settings>Port in the camera’s web browser interface. If you haven’t changed this, it is usually 8000 by default.
User Name: “admin” or the username of any other users set up on that camera.
Password: The password set with that user on the camera – if this is the same as the ‘Default Activation Password‘ you have set on the NVR, then you can tick this box instead.
Transfer Protocol: ‘Auto’ is normally best.
When these are completed, click OK.
Your camera should then appear in the list of devices with an assigned channel, and an Online status, meaning it has been successfully added.
.
Extra tips…
• To rename your channels, so you can easily identify each camera within the NVR, you will need to go to Device Access > Device Configuration > Device Parameter > OSD Configuration. Then, select your camera from the Channel dropdown and enter your chosen name for it beside Channel Name.
• One useful feature with the new V5 NVR firmware is that you no longer need to use the Virtual Host feature. Instead, to access the configuration menus on the cameras now for doing things like updating the firmware, accessing advanced image settings, and hard resetting the cameras, you just need to use the Go button (a monitor with an arrow on it) in the Operation column.
Source : https://www.use-ip.co.uk/forum/forums/guides-for-nvrs-with-v5-firmware.71/
.


Add Comment