
Foscam CamCloud Setup Guide v1, Foscam is a Chinese company that specializes in the design and manufacturing of IP cameras and security solutions. Established in 2007, Foscam is known for providing a wide range of affordable yet reliable home and business surveillance products. Their product portfolio includes indoor and outdoor cameras, baby monitors, doorbell cameras, and network video recorders (NVRs), primarily designed for residential users and small-to-medium businesses.
Here are some key aspects of Foscam:
1. Product Range:
2. Cloud and Local Storage:
Foscam cameras typically support both local storage options, such as microSD cards or NVRs, and cloud storage services. Their cloud platform allows users to store footage securely, access it remotely, and receive alerts for motion detection events.
3. Mobile App and Smart Home Integration:
Foscam’s cameras can be controlled and monitored through their mobile app, which allows users to view live footage, manage multiple cameras, and receive alerts. Some Foscam cameras also integrate with popular smart home ecosystems like Amazon Alexa and Google Assistant.
4. Affordability:
Foscam is known for providing budget-friendly IP cameras compared to premium brands, making them an accessible option for consumers looking for cost-effective surveillance solutions.
5. Privacy and Security:
Over the years, Foscam has worked to address concerns around the security of their devices by improving encryption standards and software updates. They have taken steps to enhance user privacy by providing stronger security features in their newer products.
In summary, Foscam is a reputable brand for consumers seeking affordable and reliable IP cameras, with a focus on ease of use and accessibility for home and small business applications.
There are many different ways to setup a Foscam camera.
Please Note: V3 models of Foscam cameras are unsupported.
Foscam H.264 cameras include the 98xx/99xx series, Fosbaby, R2, C1, C2 (Highly Recommended and the only option for continuous recording)
Manual setup Foscam H.264
This applies to cameras named 98xx/99xx series, Fosbaby, R2, C1, C2. This is the recommend approach to setup your Foscam camera.
Note: Before starting, make sure that you’ve port-forwarded your camera. If you’re unsure how to start the port-forwarding process, take a look at our guide forwarding> for some guidance.
Step #1. Start the “Add Camera” Wizard
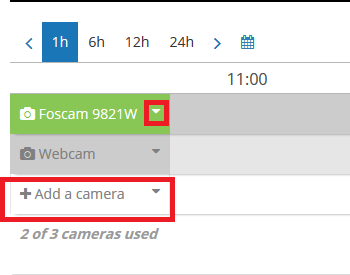
First login to you account. Click on the “Timeline” tab. This is where you’ll have a list of any cameras you’ve already setup.
Click on “Add Camera” and pick “Foscam”. Choose your camera model, then name your camera whatever you’d like.
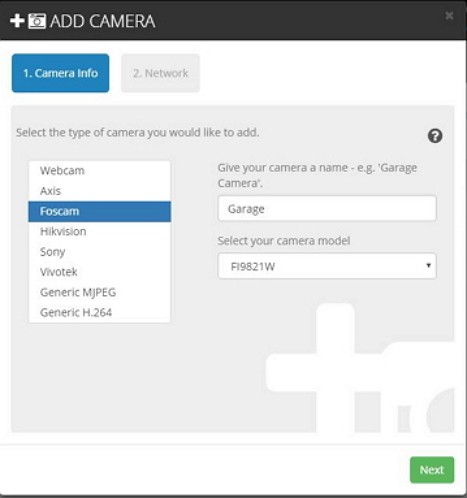
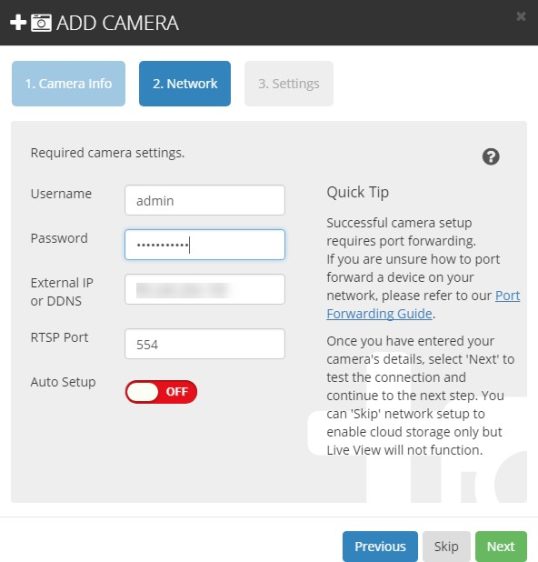
Once you click on next, you’ll have to add in your camera’s username, password, IP address, and HTTP port (and in some models the RTSP port as well). This means your HTTP port needs be forwarded on your router. (Note: To enable HTTP on a Foscam, go to Network -> Port, assign a port (e.g. default is 80). This is the port that must be forwarded on your router.

Click on Next.
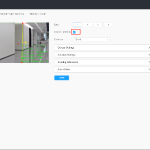
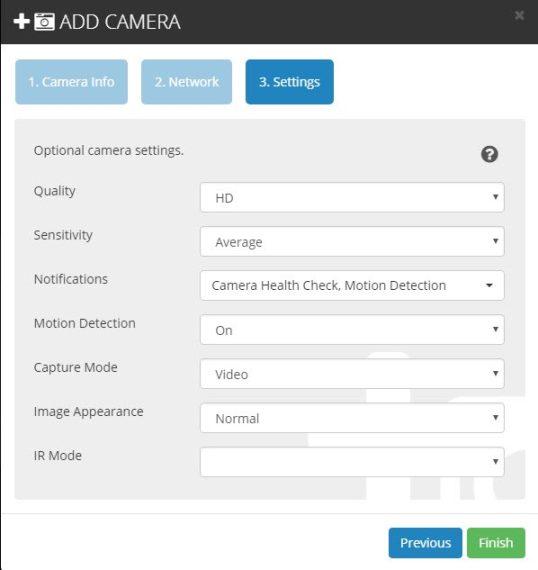
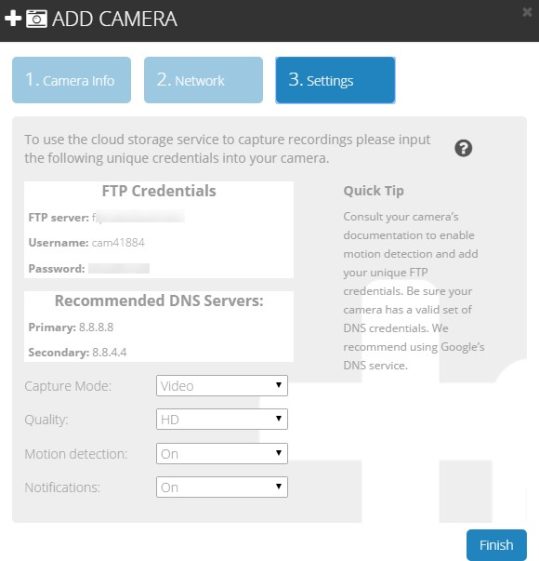
In the Camera Settings menu, choose the Quality you desire, your camera sensitivity and if you’d like to have email
notifications. Capture Mode options are still “Images” or 30 second
“Video” clips. Image appearance settings include the ability to adjust your cameras image based on your needs and the camera placement. Settings include “Flip”, “Mirror”, “Flip-Mirror” and the default “Normal”. Once you’re done, click on “Finish”.
Now the setup wizard will configure your chosen settings and close. Verify you are getting a live view and that motion events are coming in when triggered.
Foscam Manual Setup
This applies to all Foscam cameras. If you want to control what settings to apply, this option is for you. However note this option is very error prone and not recommended.
#1 First, setup your camera to the cloud service.
You’ll select a Foscam camera and model as usual, then at the network step turn off Auto Setup. You’ll be asked either for your RTSP or HTTP port depending on the camera model. Don’t forget to port foward your camera.
Once your done the add camera wizard will give you the FTP credentials which you’ll use later. Don’t worry if you lose these, you can always bring this up later in your camera menu right on the Timeline.
Foscam CamCloud Setup Guide v1
#2. Login to your Camera.
Enter your camera’s IP address into your browser’s address bar. You can download a Foscam IP utility to find the IP the camera is currently using. Now login using the camera’s credentials.
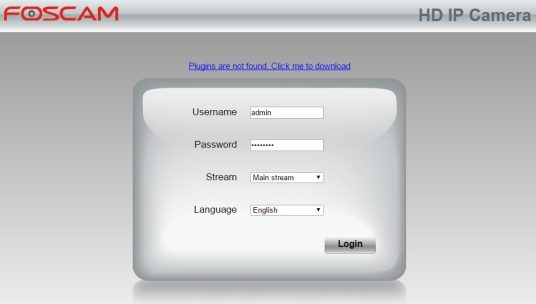
Tip: If you’re having trouble logging into your camera, try using Internet Explorer as your browser. Sometimes you even need to use “compatibility mode”.
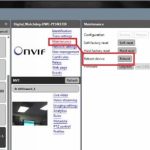
#3. It’s time to update the FTP Settings.
Under Network, click on FTP Settings. This example is for typical Foscam H.264 cameras.
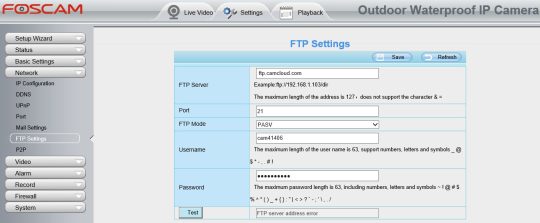
Older interfaces with the old MJPEG cameras will have a menu called “FTP Service Settings”.
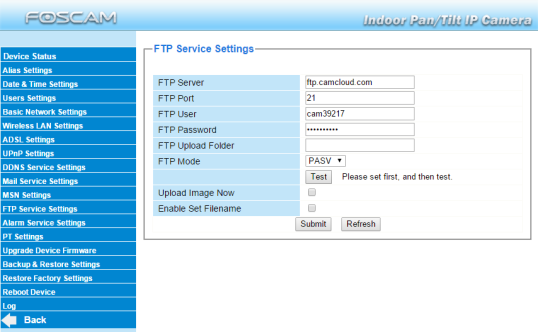
Replace the FTP server, username, and password with the information you received after setting up the camera. In the case of the newer Foscam H.264 cameras they have a strange syntax where you need to add the prefix like so: “ftp://<ftp server>”. FTP Mode needs to be “PASV”
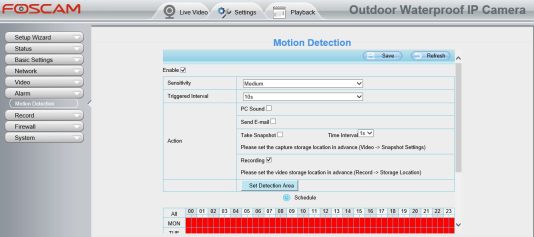
#4. Setup the Recording
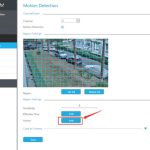
Click on Alarm, then Motion Detection, and make sure “Recording” is checked.
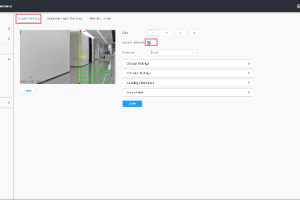
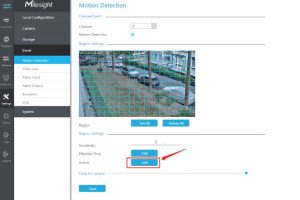
Note: Some Foscam user interfaces may slightly differ from others depending on your camera model. For example, your interface may have “Motion Detection” under “Alarm”. Another version of the interface may have Action Detection under “Detector”, as seen below.
Interface #1:
or
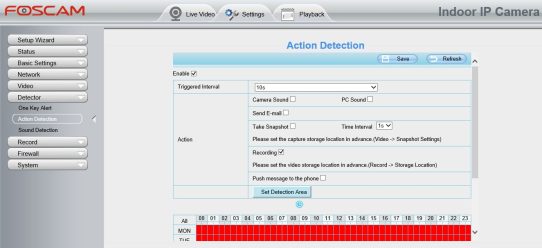 Interface #2:
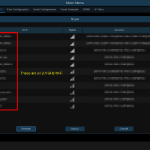
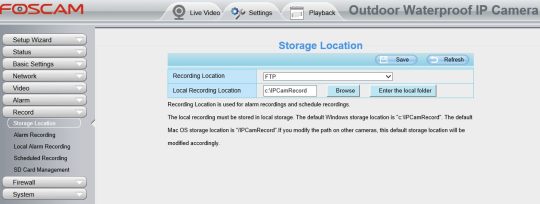
#5. Now add the storage location
Under “Record”, click on Storage Location, and make sure “FTP” is selected for Recording Location.
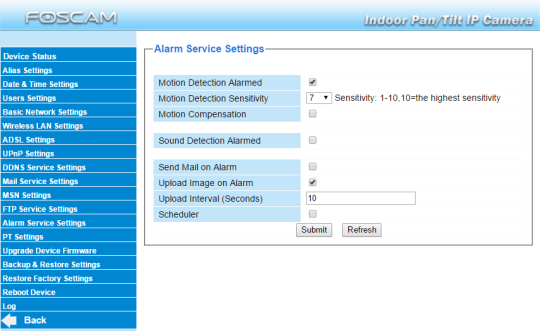
In the case of the older MJPEG cameras you only need to add the Alarm Service Settings. Select “Motion Detection Alarmed” and “Upload Image on Alarm”. In terms of the Sensitivity and Upload Interval that is up to you. Play around with these numbers for your motion detection needs.
That should be it. Verify you are getting a live view and that motion events are coming in when triggered.


Add Comment