

FLEX AI Setup and Use Guide, FLEX AI enables you to enhance camera capabilities, enabling them to detect and track previously unidentifiable objects. While many cameras can detect and track people and specific vehicle types, it is a different matter identifying shopping carts, forklift trucks, hovercrafts, or items on a conveyor belt.
FLEX AI: Get started
Summary:
FLEX AI enables you to enhance camera capabilities, enabling them to detect and track previously unidentifiable objects. While many cameras can detect and track people and specific vehicle types, it is a different matter identifying shopping carts, forklift trucks, hovercrafts, or items on a conveyor belt.
With FLEX AI you can create custom object detection models for solid objects that can then be deployed to cameras, enabling you to detect objects that standard analytics does not already detect.
It is a cloud-based application, and its results are compatible with deployment to P-series AI cameras.
How it Works:
FLEX AI operates on a subscription-based model, granting users comprehensive access to train, process, and download custom detection models for end customers. However, the allocation of licenses requires a careful consideration of each end customer, with a separate FLEX AI license needed for each one. This process is typically managed by a STEP Partner, who oversees the distribution of licenses to ensure effective deployment.
For actual deployment onto cameras, FLEX AI uses a perpetual licensing system, distinct from its subscription model. Each camera necessitates its own perpetual license to run FLEX AI models effectively. This approach ensures that users can deploy and utilize the models on their cameras without the constraints of a subscription-based licensing system.
In terms of training models, FLEX AI currently supports the MP4 format or tagged WAVE Sync videos for training.
NOTE: Each project can only train one model.
Camera Compatibility:
Refer to the following article: Which Cameras are Compatible With FLEX AI
Note: Each camera can only run one FLEX AI model, although it may run in parallel with WiseAI.
The FLEX AI Flow:
The general process is as follow:
FLEX AI: What do I need to train a model with FLEX AI?
Summary:
This article covers what you need to build effective models with FLEX AI.
Training Requirements and Recommendations:
NOTE: After you click Train, the data you have created is sent to the cloud and
the algorithm is trained to detect your object. This process can take anywhere
from 30min to 1 hr and depends on the number of training images you included.
Performance Issues:
The following may cause object detection to have performance issues:
Camera Recommendations
Limitations:
FLEX AI has the following limitations:
Processing Times
FLEX AI: How do I create and manage FLEX AI projects?
Summary:
This article provides instructions for creating and managing FLEX AI projects.
Step By Step Guide:
Creating New Projects
To create a new FLEX AI project:
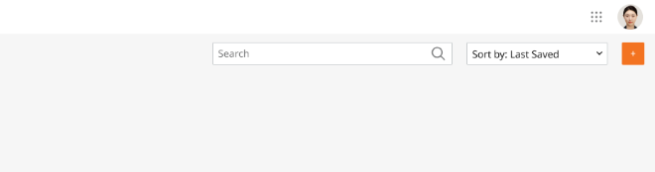
1. On the Project screen, click the plus (+) button to create a new project.
2. Name your project after the detection type.
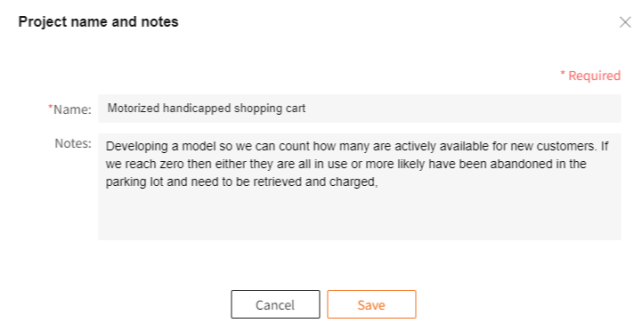
NOTE:
Project names must be unique.
Each project can only consist of one object detection type.
Managing Projects
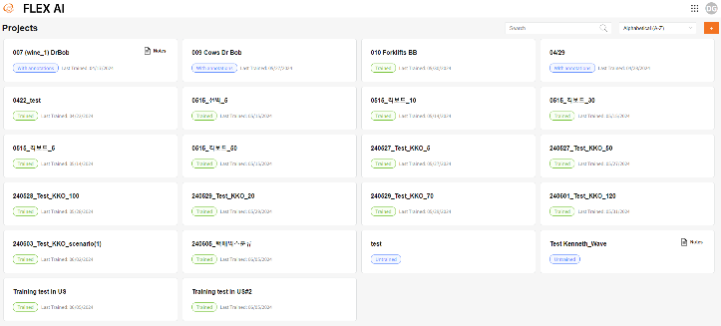
Here is an example of multiple projects being worked on in parallel.
To search for a FLEX AI project:
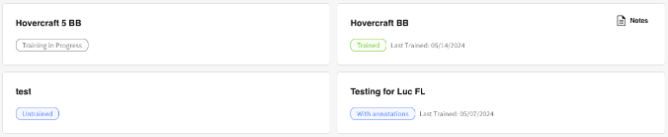
Existing projects will indicate their current status:
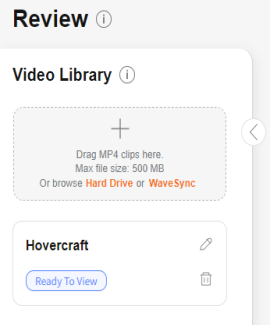
FLEX AI: How do I add a video clip for FLEX AI usage?
Summary:
This article describes the process for uploading training video clips to train a FLEX AI model.
Step By Step Guide:
Uploading a video
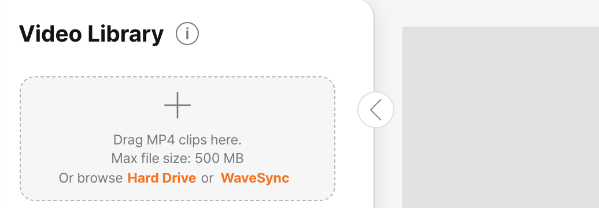
NOTE: The Video Library drawer can be expanded and collapsed by clicking the arrow.
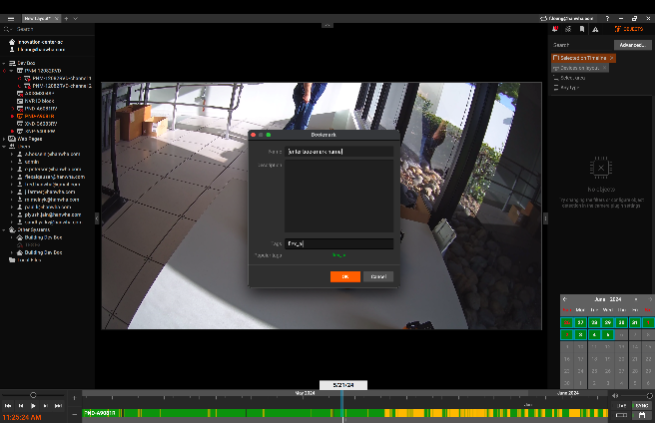
Pulling bookmarked videos directly from WAVE Sync
NOTE: First tag WAVE Sync bookmarks with “flex_ai” to make them to appear in FLEX AI.
Tagging WAVE Sync videos
1. Sign in to your WAVE account.
2. Add a bookmark.
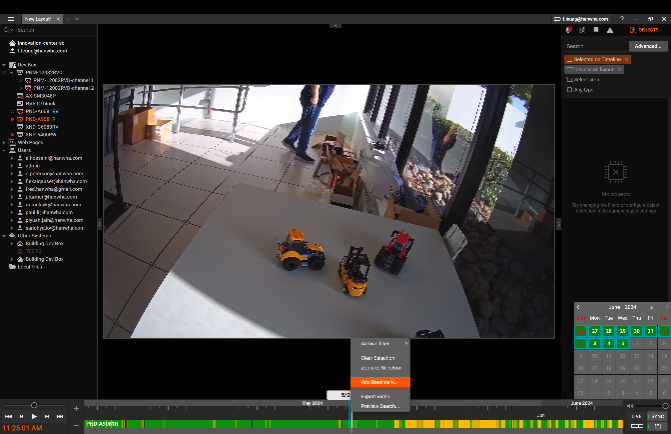
3. Tag your bookmark with “flex_ai”.
Importing WAVE Sync clips
1. Click WAVE Sync and enter your user ID and password.
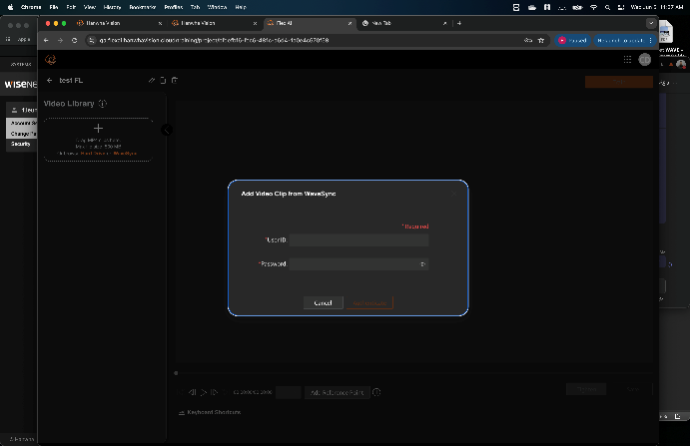
2. Select your system from the dropdown menu.
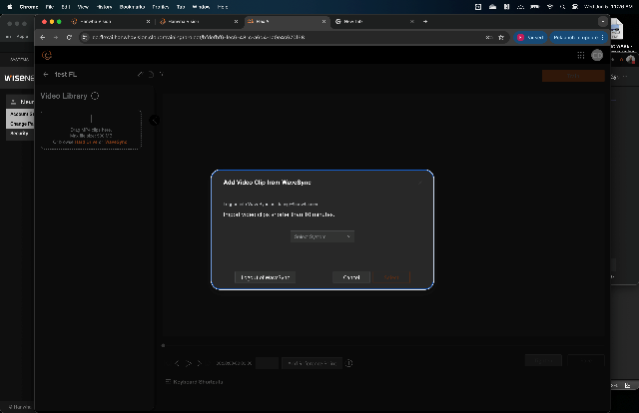
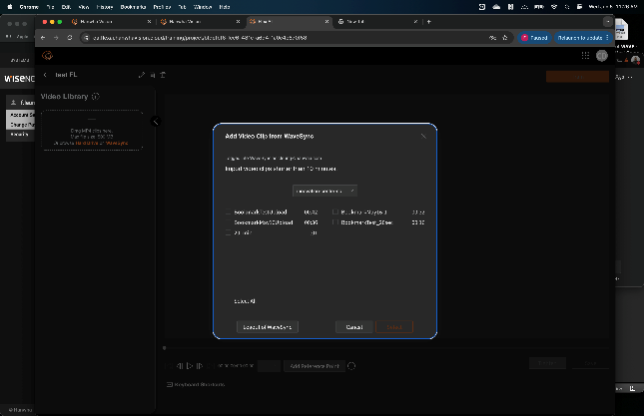
3. Select the checkbox for each WAVE Sync Bookmark you would like to import.
Recommendations
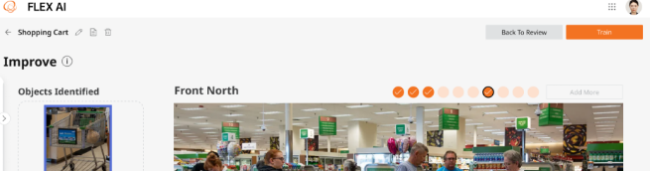
FLEX AI: How do I annotate objects?
Summary:
This article describes how to move through a training video and mark objects. The goal is to take a video clip and pause at several points in the video and annotate objects (draw boxes around) you are teaching FLEX AI to detect.
Step By Step Guide:
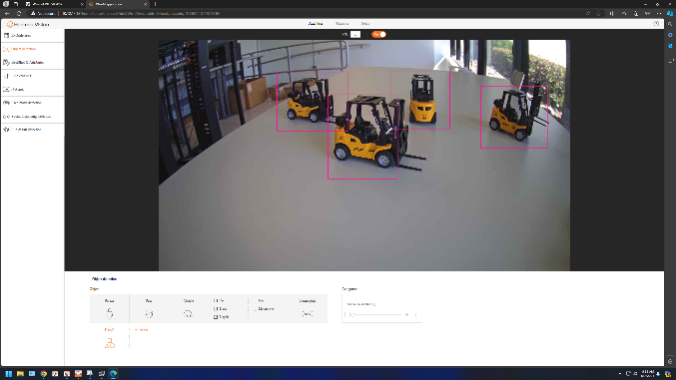
Annotating objects
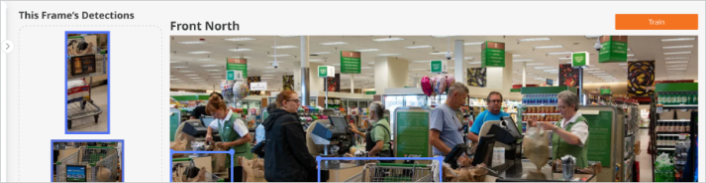
1. Pause the video on any frame that contains the object of interest.

2. Draw a detection box around every instance of the object. There can be multiple instances of an object and each instance should have its own detection box.
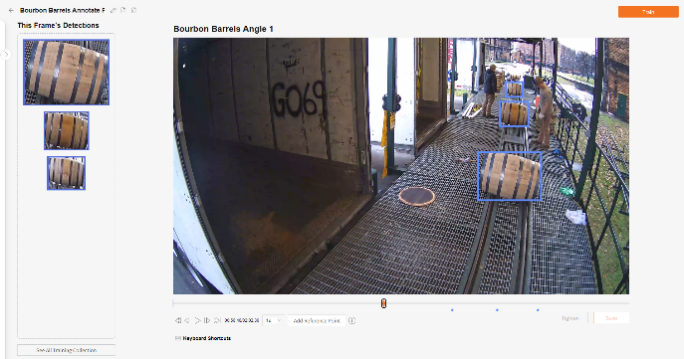
3. Click the Tighten button (or the keyboard shortcut T) to resize the detection boxes.
This means you can save time by roughly drawing the boxes and then tightening.
| Step 1: Roughly draw a box around the object | 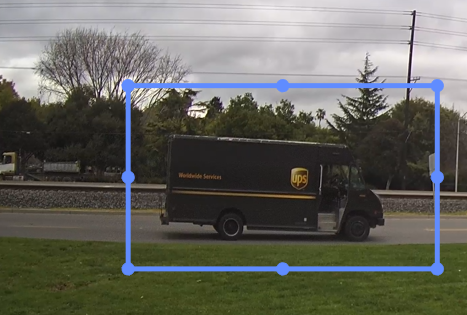 |
| Step 2: Click the Tighten button (or press T) to quickly get you close |  |
| There will be times that FLEX AI does not properly capture the true edges of the object, that’s why the application allows you to readjust the edges of the box.
Step 3: Drag the edges/corners of a detection box to finely edit. |
 |
4. To remove a detection box, select the appropriate box and click the Delete key on your keyboard.
5. Click Save (or the keyboard shortcut S) to save the marked detection boxes.
6. Once you have drawn the necessary detection boxes, click the Train button. Your project will be unavailable during the training period which typically takes 15 to 30 minutes depending on the number of annotations.
NOTE: Since training is done in the cloud, you can work on any number of other projects
while a project is training.
.
NOTE: The blue detection boxes also appear in the This Frame’s Detections area after you
save. It is recommended that a minimum of 50 detection boxes be defined before your
initial object training is complete. An AI model can include detection boxes from
multiple video clips.
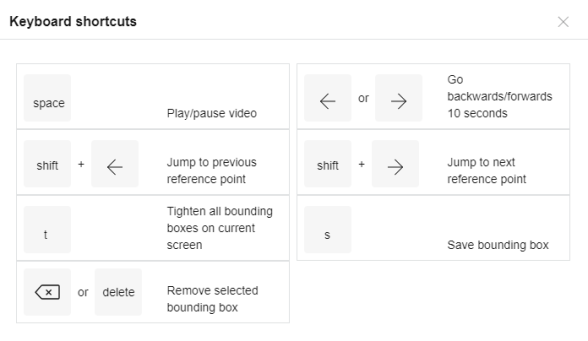
Keyboard shortcuts
You can save time and effort when navigating video, marking, tightening and saving annotations, by using the keyboard shortcuts below.
FLEX AI: How do I improve my object detection model?
Summary:
This article covers improving the AI Object Detection model of your uploaded videos. This process will result in more accurate detections, fewer false positives, and fewer false negatives.
Step By Step Guide:
To improve the AI Object Detection model:
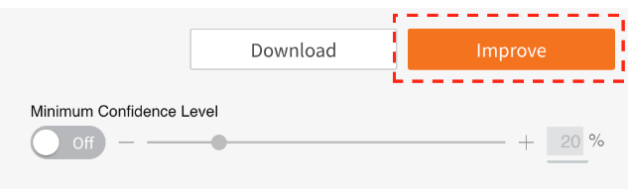
FLEX AI will suggest the top 10 frames crucial for highlighting your object(s) to enhance your object detection model. Markers represent each frame the application is asking you to revisit.
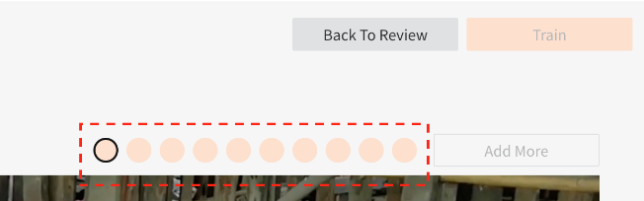
Remember to save your detection boxes.

The current limit for a (1) year license is to have a maximum of (100) total trainings or improvements.
NOTE: All 10 suggested frames must be completed per video for them to be included
in the training. Detection boxes on any video where all 10 frames are not marked
will be discarded and not included.
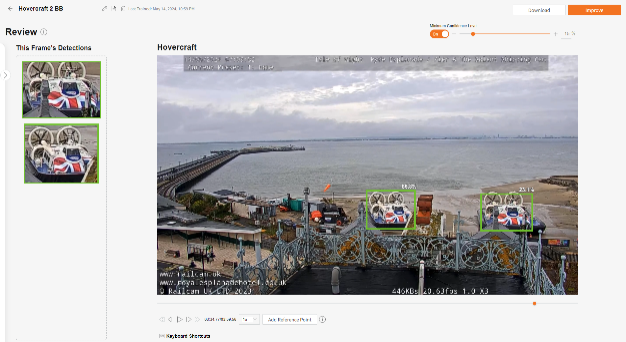
FLEX AI: How do I review and download my FLEX AI model?
Summary:
This article covers reviewing the AI Object Detection model of your uploaded videos.
Step By Step Guide:
To review your uploaded videos:

The following model has been trained only once, so there is no option to compare.

The following model has been improved, so both the previous (left) and current (right) can be compared. We can already notice the newer model is performing better.
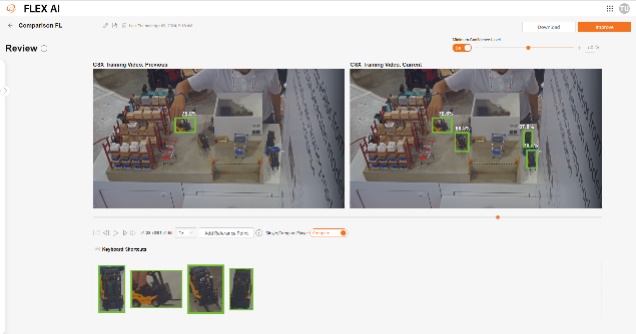
For tips on improving detection accuracy, refer to the following article: How do I improve my object detection model in FLEX AI?.

Refer to the following article: How do I upload a FLEX AI model to a camera?
NOTE: Downloaded AI models can be deployed to a camera via Device Manager/Wise Detector.
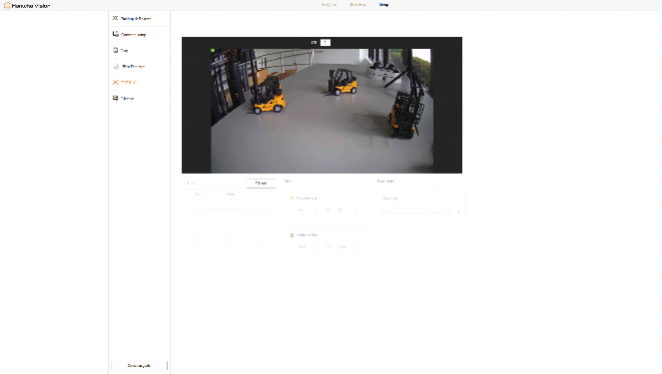
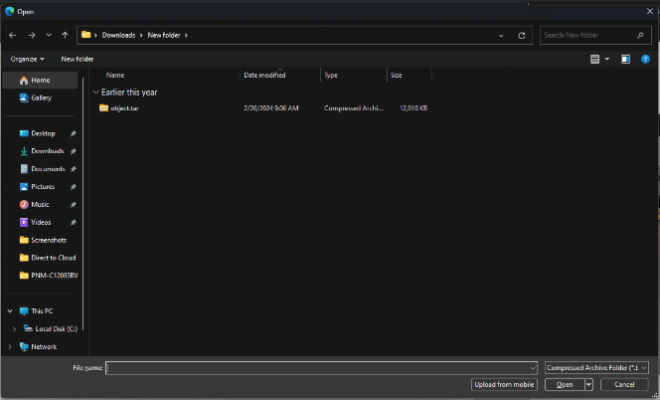
FLEX AI: How do I upload a FLEX AI model to a camera?
Summary:
This article describes how, after training a FLEX AI model, you can download it, and then upload it to a compatible P-Series AI camera.
Note: For simplification, the term ‘model’ refers to a ‘custom object model’.
Requirements:
Refer to the following article: Which cameras and AI applications are supported by SightMind?
NOTE: A FLEX AI model cannot run concurrently with a Hanwha Vision AI Pack.
Any existing AI Pack must first be uninstalled from the camera.
However, a FLEX AI model can run in parallel with the WiseAI app.
Step By Step Guide:
To initially upload a Custom Detection Model:
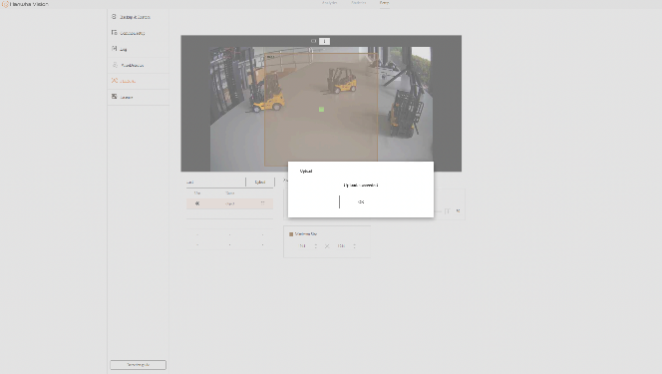
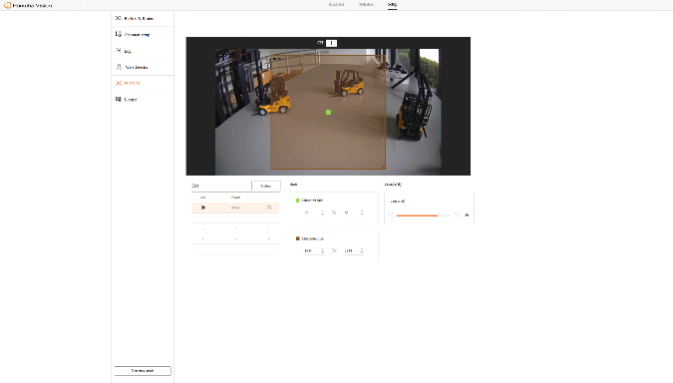
Also from within the Object Detection from the menu.
You should also see FLEX AI Model below the other object detection options.
To upload a different model:
Remove the previous model(Click the trashcan icon next to the model)
FLEX AI: Which cameras are compatible?
Summary:
This article lists the cameras onto which an object detection model created using FLEX AI can be uploaded.
Compatibility:
FLEX AI supports the camera models listed below. They are all P series AI cameras which incorporate the greatest processing power required to run the AI models.
| Indoor Dome | Outdoor Dome | Bullet | Box |
| PND-A9081RV
PND-A9081RF PND-A6081RV PND-A6081RF |
PNV-A9081R
PNV-A6081R PNV-A6081R-E |
PNO-A9311R
PNO-A9081R PNO-A6081R |
PNB-A9001
PNB-A6001 |
Add Comment