EseeCloud Nvr User Manual, EseeCloud(IP Pro, VR Cam) is a simple, stylish, user-friendly, and powerful mobile video surveillance software. We are committed to continuously improving our video processing technology and video innovation technology and providing global security products, professional industry solutions, and superior services to continuously create greater practical value for our customers.
With concise and fashion GUI, it supports multiple and real-time previews, QR scan, PTZ control, video capture, and recording backup. More functions are waiting for you.
Tips: Play H265 encoded format video in APP personal center album, you need iOS11 or above to support.
EseeCloud(IP Pro, VR Cam)– Remote view for 24 hours in Mobile APP.
With concise and fashion GUI, support multiple and real- time preview, QR scan, PTZ control, video capture, recording backup. More functions are waiting for you.
Tips: User manual and more software (including CMS), please go to https://eseecloud.app/download/ to download.
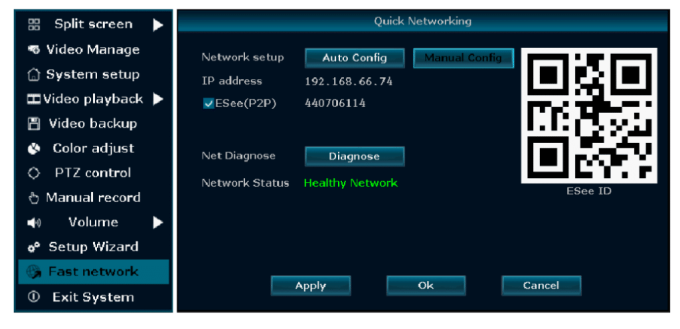
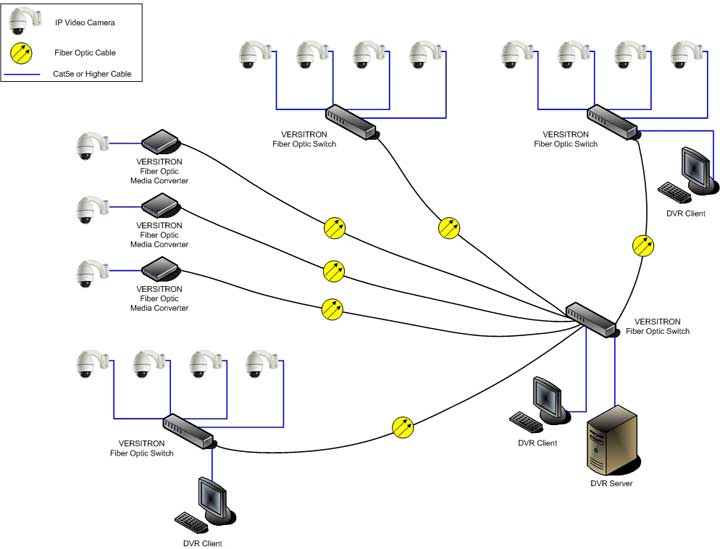
Fast Networking
Step:
EseeCloud Nvr User Manual
IPC Set Up
Step:
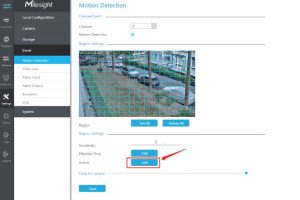
Video Detection Setup
Step 1: Enable Motion Detection
Step 2: Configure Record Plan
Video Playback
Steps:
Playback Controls:
.
Video Backup
Steps:
Tips: Supports up to 32GB USB disk backup. Each recording file is packed every one hour for backup.
Access In LAN
Step 1: Network Configuration
Step 2: Connect Within LAN
Step 3: Viewing the Video
Tips: Ensure that the video recorder and computer are on the same network segment for proper connectivity.
Access In WAN
Step 1: Device Identification
Step 2: WAN Access
Step 3: Video Access

Tips: Video quality and fluency depend on the upload speed of the video recorder and download speed of the computer. Each channel requires at least 30KB/s.
Mobile Application Download and Installation

Esee Mobile Application (IP PRO) – Add Device
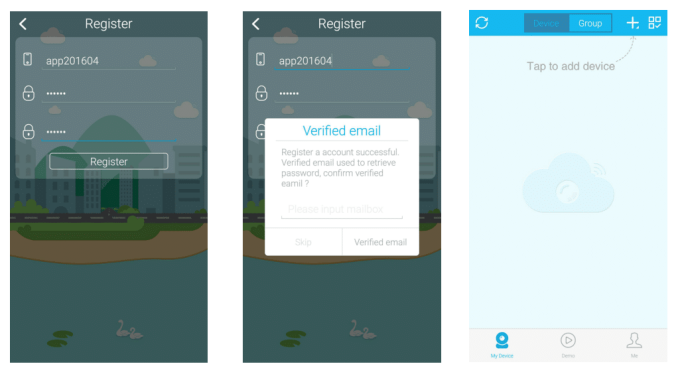
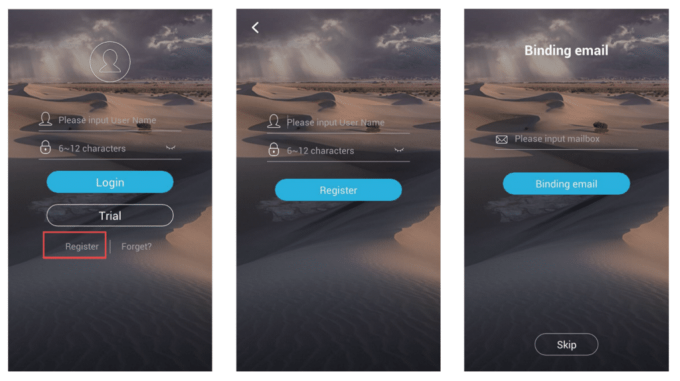
Step 1: Register
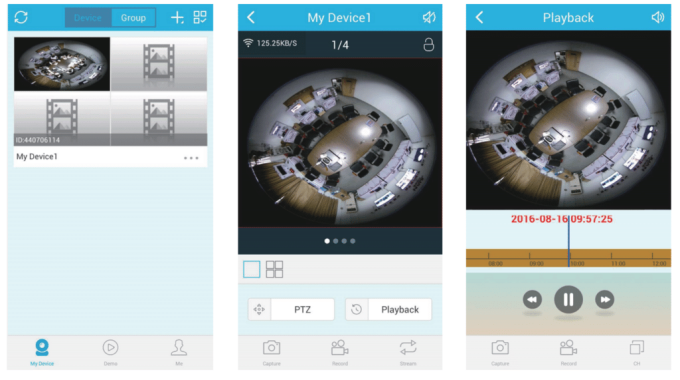
Step 2: Enter the device interface
Step 3: Add the device
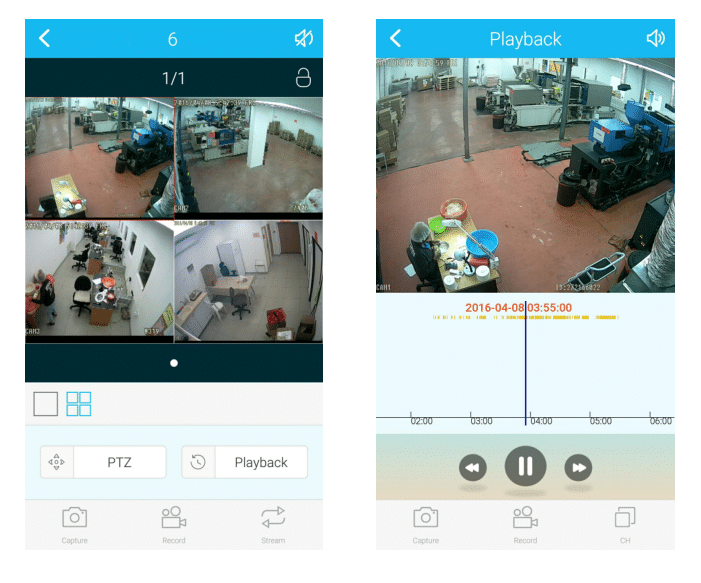
Step 4: Added successfully. Click channel No. to get video
Step 5: Remote playback

VR-NVR USER MANUAL
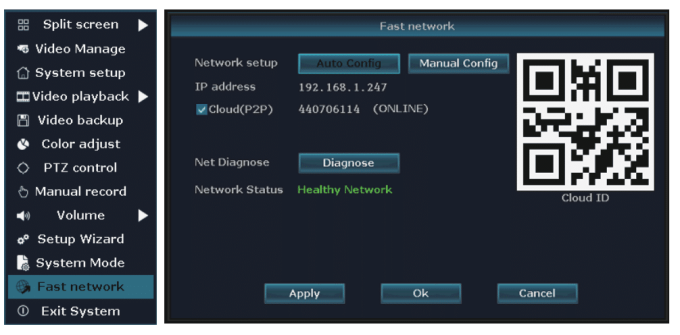
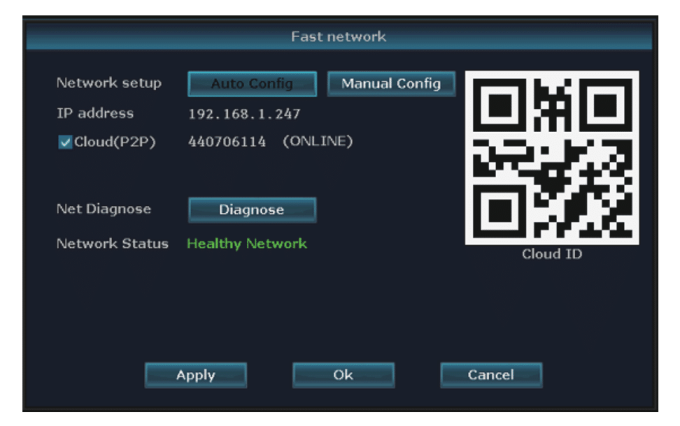
Fast network
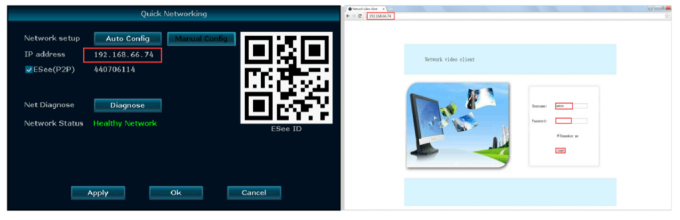
Step: Right-click the mouse in the main menu → Fast network → Choose Auto Config → Click OK. If you want to manually configure the IP address, click diagnose. If it shows a healthy network, it indicates the connection to the Internet is good. If there is a network anomaly, plz process according to the clew. (Ensure your device has accessed the network)
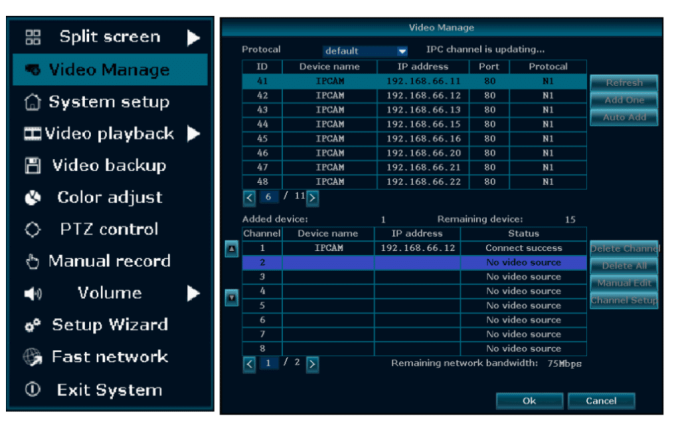
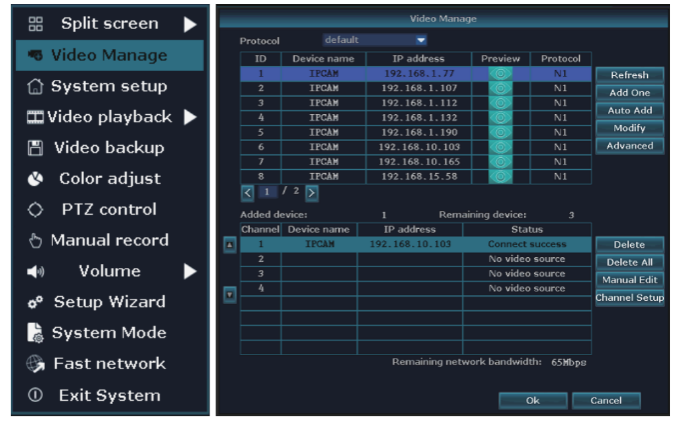
IPC Set UP
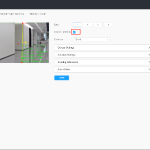
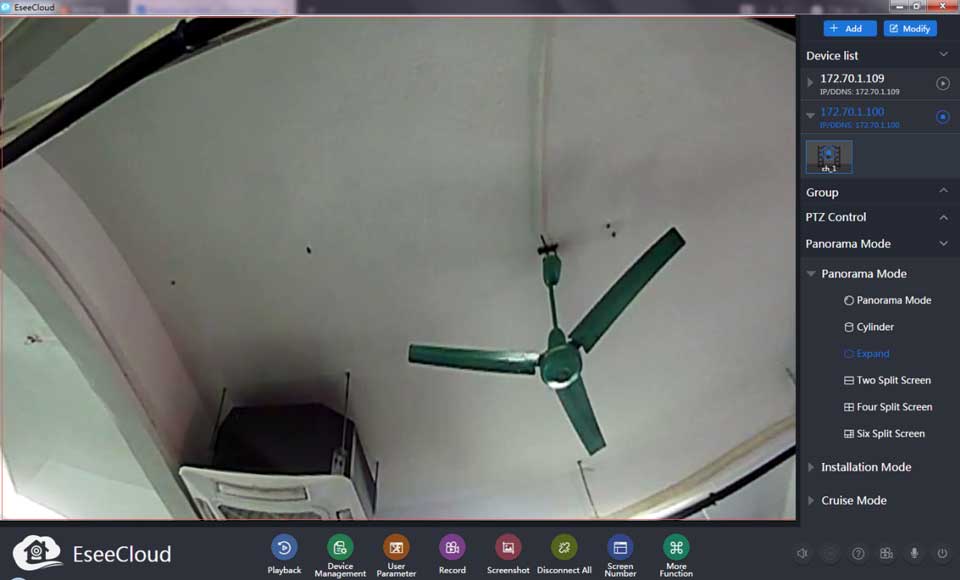
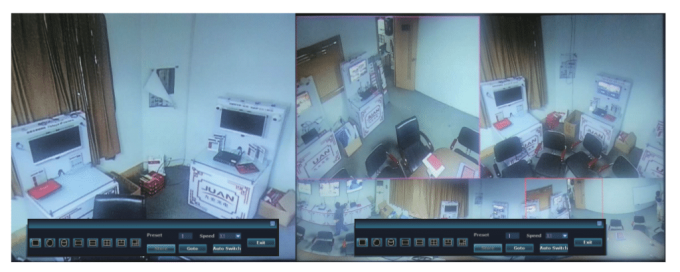
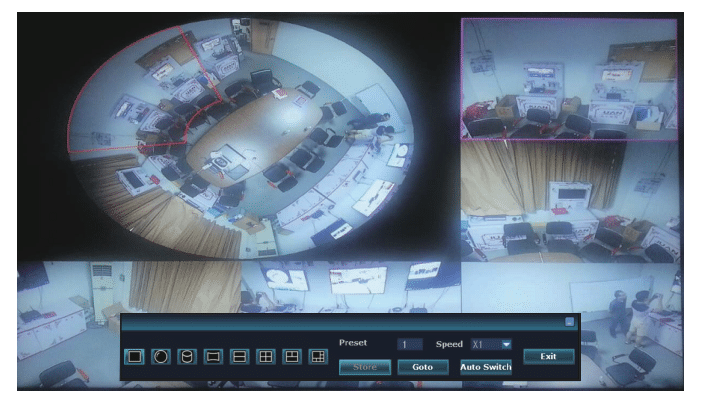
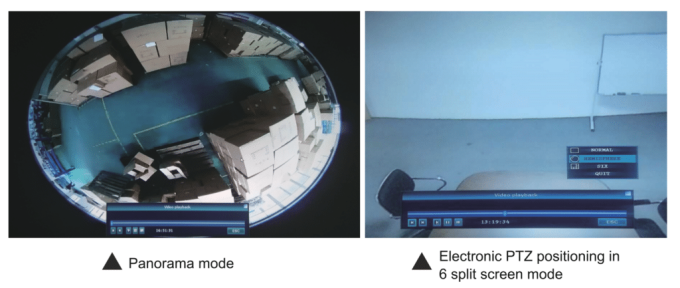
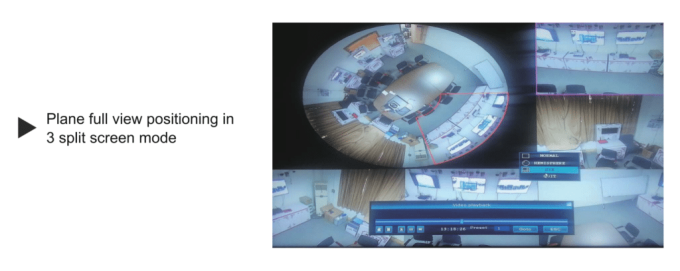
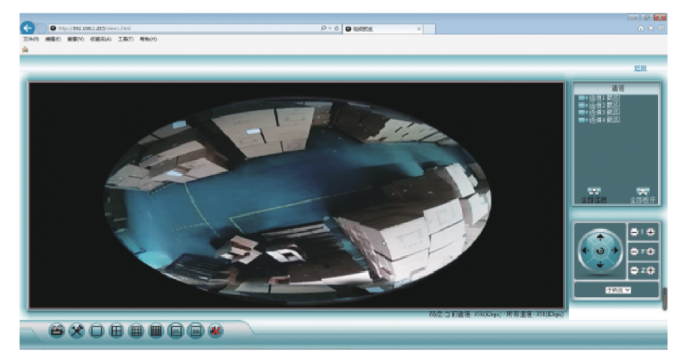
Preview of VR Camera
Double-click the image on the main interface—choose a different preview mode.
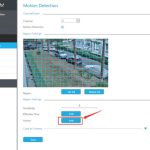
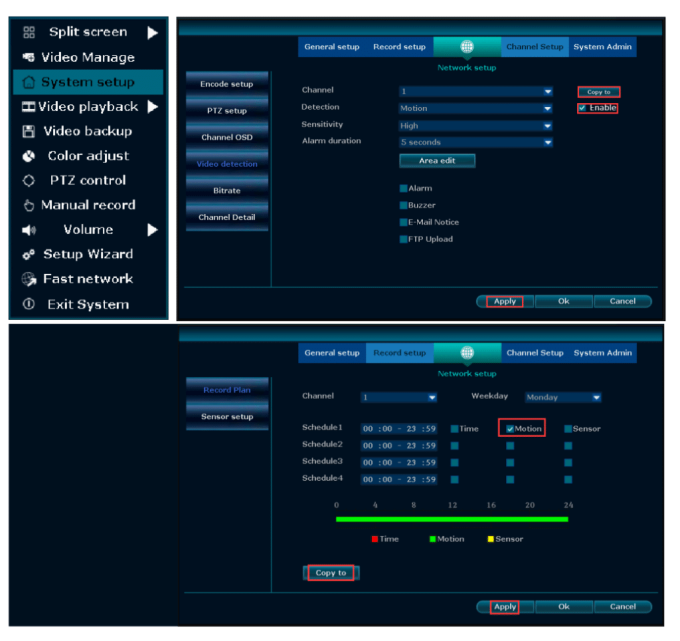
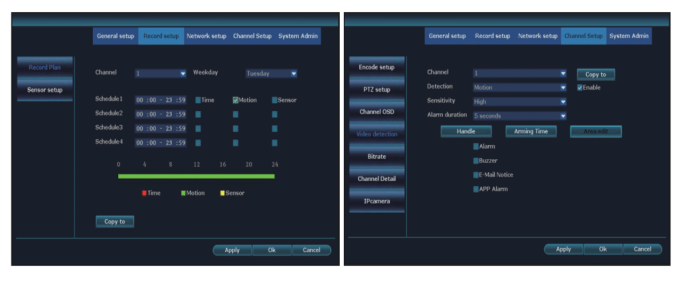
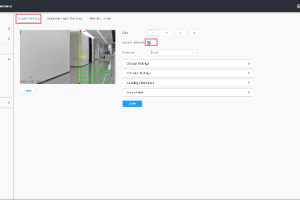
Video detection
Step 1: Right click mouse in main menu→System setup→Record setup→Record plan→choose motion→choose all→click Copy to→click OK to save setting
Step 2: Right click mouse in main menu→System setup→Channel setup→choose Video detection→choose motion→click Enable→Click OK
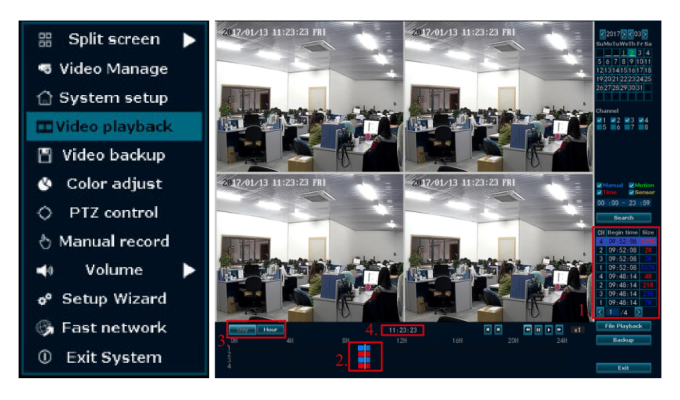
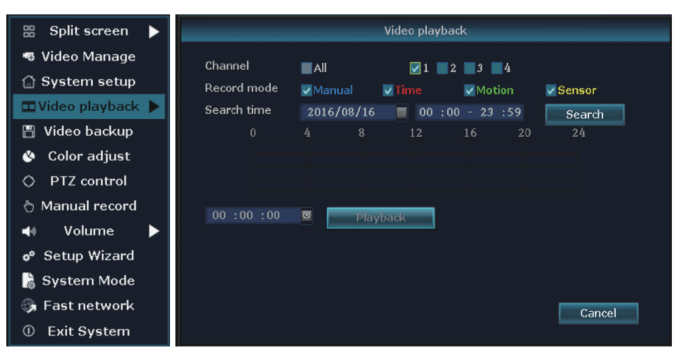
Video Playback
Step: Right click on main interface→video playback→choose “channel”→choose “record mode”→setup “search time”→click “search”, click timeline to choose time→click “playback” to check recording file.
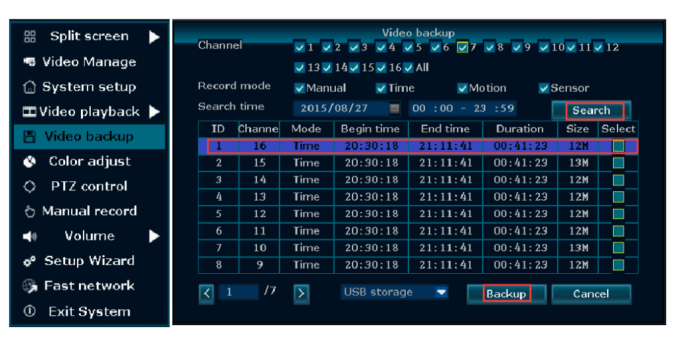
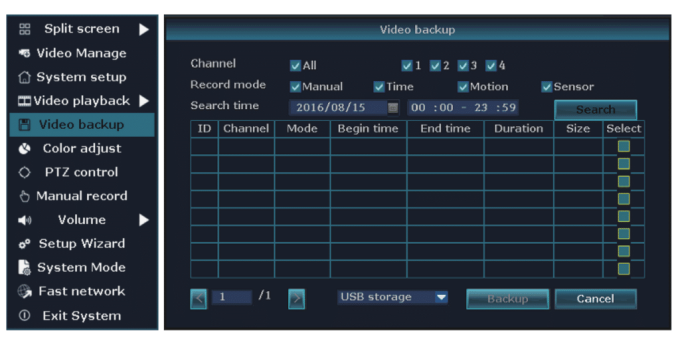
Video Backup
Steps: Right-click the mouse in the main menu→Video backup→choose channel No.→choose Record mode→In search time, input beginning time and end time→click search, and recording will come out→choose the video which needs to be backup→click video backup.
Tips: Support 32G U disk backup maximum, recording file will be packed every one hour.
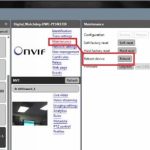
Access in LAN
Step 1: Quick Networking—check the IP address of the device.
Step 2: The correct web port needs to be put in the web port is changed, such as the web port changed to 1111, then input http://192.168.1.247:1111
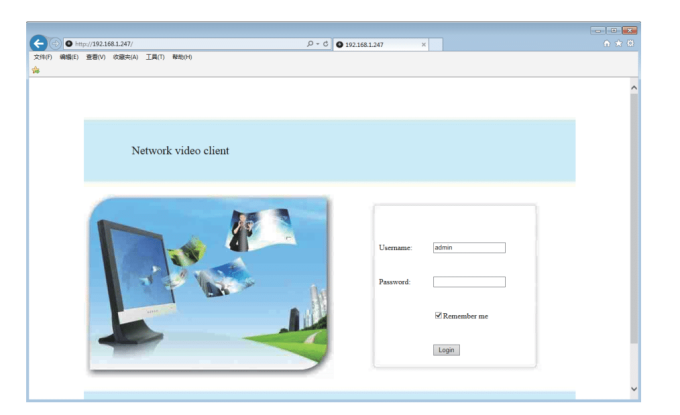
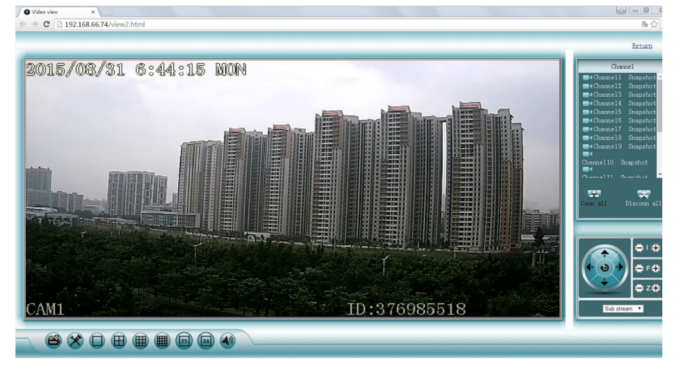
Step3: Once access successful, you can get the video
Tips: Please make sure the video recorder and computer are in the same network segment.
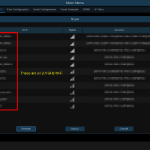
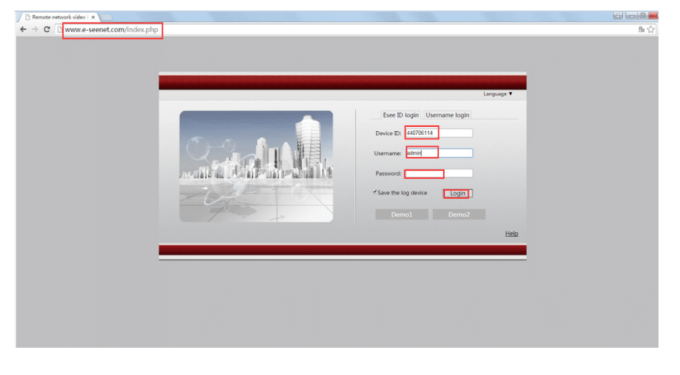
Access in WAN
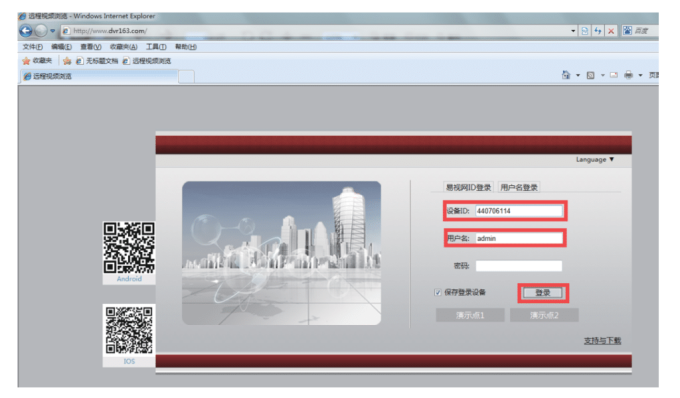
Step1: Right-click the mouse in the main menu—Quick Networking—check the ID of the device.
Step 2:
Input http://www.dvr163.com on IE browser, input ID, user name, and password, and click log in.
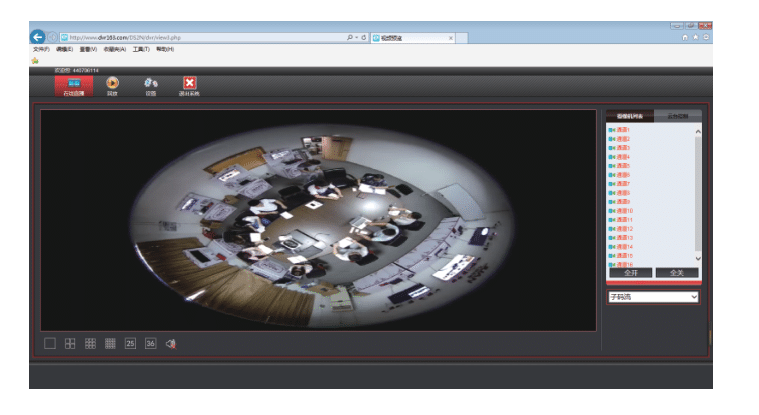
Step 3:
Once you access it successfully, you can get the video.
Tips:
Video quality and fluency depend on the upload speed of the video recorder and the download speed of the computer; each channel needs above 30KB.
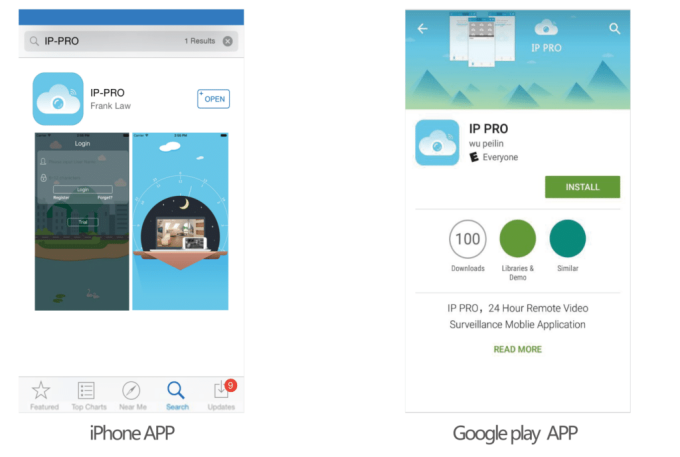
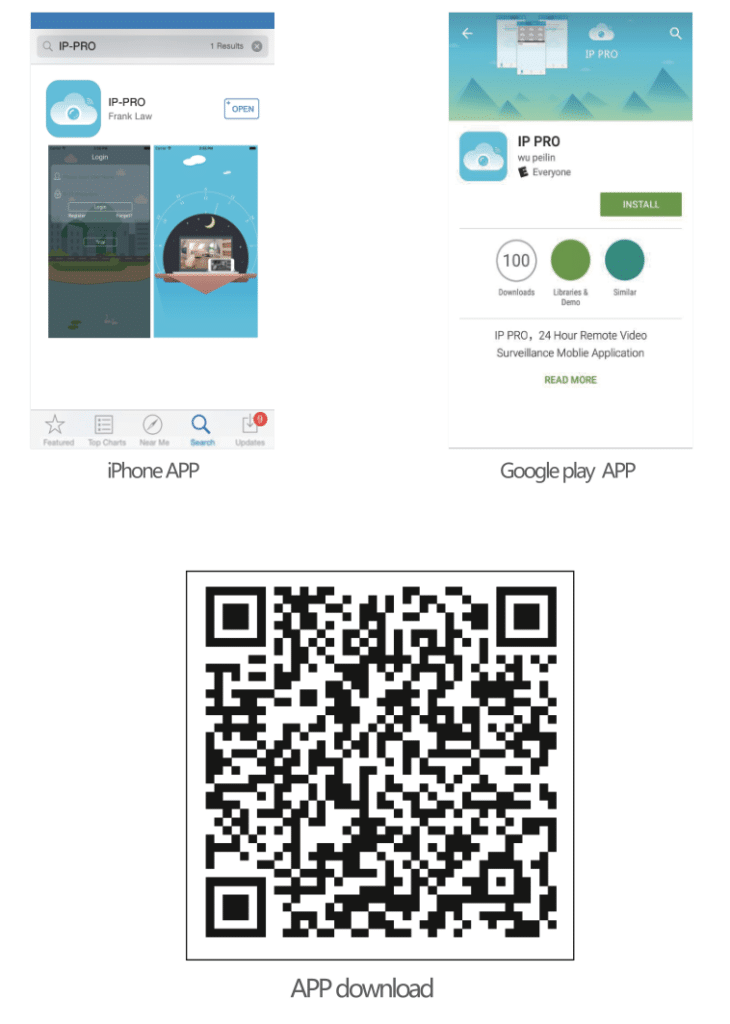
Mobile application download and installation
No. 1: Go to http://www.dvr163.com/download/indexm.php?p=ippro in a mobile browser, enter the download page, click install to download, and install the APP.
No.2: Please scan the QR code in the manual to download the APP.
Esee mobile application (IP Pro)-Add device


Add Comment