Table of Contents
ToggleContents
How to boot?
Find the camera’s power button, press and hold the power button for three seconds, and see if the camera’s work light is on.
How to restore the factory settings?
Find the reset button or reset hole on the camera.
- If it is the reset button, press and hold the reset button with your fingers for five seconds, then release it after hearing the “cuckoo” from the camera. The reset is successful.
- If it is the reset hole, find the reset pin in the packing box, insert it into the reset hole, press and hold the reset button for five seconds, then release after pressing a ” Cuckoo “heard from the camera. The reset is successful.
The camera is in abnormal condition?
If the camera is in an abnormal condition, press and hold the power button for about 15 to 20 seconds to try to restart the camera
Cannot add camera for the first time?
The first time you add a camera, make sure the camera is turned on and the working status indicator is slowly flashing red.
- Make sure the WIFI account and password are correct.
- The camera only supports 2.4 GHz WIFI and not the 5G frequency band. Please do not use 5G wifi to configure the network.
- When adding a camera, make sure the network is working properly. It is recommended to work near the router.
- If the QR code in the network configuration is unsuccessful, try configuring the network manually. Try not to make the password as complicated as possible and try not to use special characters like \ ‘.
- If the two methods still do not match the internet, it is recommended to restart the router and try again.
- Provide the router’s nameplate.
No response to scanning QR codes?
- Make sure the mobile phone’s QR code is 15 to 20 cm from the camera lens when you scan the code. You can try scanning the code from multiple angles.
- The QR code generated by the mobile phone may be abnormal. This situation often occurs with new cell phones or models with low market share. At this point you will receive a screenshot of the QR code and the system version of the mobile phone.
- To make sure the lens is clean, you can try the AP network configuration and see if the lens has virtual glue after connecting to the internet.
- If all network distribution methods do not match and the device does not respond during network configuration, the device may be abnormal. Please contact us.
Why is the camera always separated and separated?
Network problems are causing the camera to fall. Solution:
- Make sure the place where the camera is installed can receive a fluid WIFI signal. It is recommended that it be above 75%. You can use the “Installation Guide” in the APP to perform network diagnostics, determine where to install the camera and whether the camera can get a smooth WIFI network.
- Restart the camera and router.
- Make sure the camera is fully charged. When the battery is almost empty, the camera will shut down automatically.
- Take the camera next to the router and see if the video is smooth. If the camera is still offline, the camera hardware may be faulty. Contact the customer support.
Can the camera work without WIFI?
The camera must be connected to a WIFI network for it to work normally.
How to turn on WIFI for the camera?
After waking the camera, press and hold the reset button for 5 seconds to reset the camera, then add the camera again over the new WIFI network.
Why the camera cannot detect moving objects?
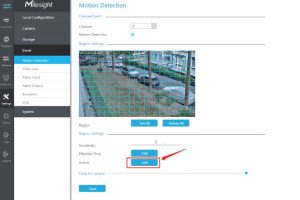
- Check that all motion detection settings are enabled in the app.
- If you need to recognize animals, you need to turn off “Alert when only people appear”.
- It is recommended to install the camera at a height of 2-3 meters and tilt it down about 15 degrees to enlarge the area of motion detection.
- Increase the sensitivity of motion detection.
- The range of motion detection is limited. Moving objects that are 8 meters away from the camera are difficult to detect successfully.
- It is not recommended to install the camera in a small space as it will greatly affect the motion detection area.
Why the alarm image can only be photographed from behind?
After PIR detects a moving object, it activates the camera and takes a screenshot within a second.
- If the subject is moving too fast, there is a high possibility that only the back can be photographed.
- Adjust the motion detection sensitivity to enlarge the detection area.
- Try aiming the camera at an open area, which is helpful for increasing the spatial coverage area.
Why can’t the phone receive the alarm push message?
You have to activate the push authorization of the app in order to receive push notifications normally. The first time you download the app and sign in to it, a pop-up window will ask you to activate the permission. If you want to disable the device, you need to enter the phone system settings (notifications), find the app and enable the notification permission.
Why there is no moving object but the alarm is sent frequently?
PIR was accidentally triggered. There may be objects in the motion detection area that could easily trigger an alarm, e.g. B. a running air conditioner or a car. Solution:
- It is recommended not to install the camera by the roadside or in crowded scenes.
- To avoid accidental triggering, do not point the camera at a heat source similar to an outdoor unit in an air conditioner.
- Avoid exposing the camera lens directly to the sun’s rays to avoid accidentally triggering it.
- Adjust the sensitivity of motion detection to narrow the camera’s motion detection area.
- 5.An alarm schedule can be set to appropriately divide the time the camera will alarm.
- 6.The alarm interval of the camera can be set to avoid uninterrupted alarms.
- 7.It is recommended to set the maximum recording time of the camera to 10 seconds.
How to charge the camera?
We are sorry that our product does not contain a power adapter, but there is a charging cable. It is recommended that you remove the camera and return it to the house first. Use a 5V / 2A power adapter (if you don’t have a power adapter of this specification, you can use other 5V voltage adapters) to connect the power adapter to the charging cable and plug it into the USB charging port on the camera. and watch whether the indicator light next to it lights up.
Why the loading process failed?
Please check if the charging indicator lights up while charging. If it is lit, it means that the charging process was successful. If the light does not come on, it indicates that the charging process has failed. You need to check whether the power adapter and charging cable are faulty and whether there is any abnormality in the camera’s charging port.
Why the camera consumes electricity quickly?
The battery life of the camera depends on how often the camera works. The more often the camera is woken up to work, the faster the battery will be used up. According to laboratory test data, the battery can be used for 3-5 months if the camera is stimulated to wake up 15 times a day. If your camera’s battery drains very quickly, please check whether the camera is triggered too often. It is recommended to place the camera in a work environment with a smooth and stable network.
How to improve the battery life of the camera?
Solutions for fast battery discharge:
1.It is recommended not to install the camera by the roadside or in crowded scenes.
2.To avoid false triggering of PIR, do not point the camera at a heat source similar to an outdoor unit of an air conditioner.
3.Avoid having the camera lens directly facing the sun rays to avoid false triggering of PIR.
4.Adjust the sensitivity of the alarm to narrow the camera’s motion detection area.
5.An alarm schedule can be set to properly schedule the camera’s alarm period.
6.The alarm interval of the camera can be set to avoid uninterrupted alarms.
7.Set the maximum recording time of the camera to 10 seconds.
8.It is recommended to place the camera in a work environment with a smooth and stable network.
Why the battery is not durable after charging?
Do not charge the camera in low temperatures. If you need to charge the camera especially in winter, please bring it back to your house and leave it for an hour. Wait for the battery to warm up before charging it.
Why the battery is not durable when the solar panel is connected?
1.The charging efficiency of the solar panel is low. If the camera alarms too often, the power consumption of the camera will be much higher than the charging capacity of the solar panel and the battery will be used up faster.
2.Please check if the solar panel is working normally. Check the steps: If there is enough sun, check that the camera’s charging indicator is on and that the charging status is displayed on the APP.
3.To ensure that the solar panel receives enough sunlight, it is recommended that the panel be installed in an open environment to ensure that it is exposed to sunlight for more than 5 hours a day.
Can I change the battery myself?
unsupported.
How does the camera record?
The camera needs to insert an SD card or activate the cloud storage function to record videos normally.
SD card recognition problem
After inserting the SD card into the SD card slot of the camera, check whether the SD card capacity is shown in the APP under “Video management”. If “No SD card” is displayed, it means that the SD card detection failed. Suggest:
- Please use a branded SD card.
- The SD card can be recognized normally by the computer.
- Only the FAT32 format is supported.
- The capacity of the SD card should be between 2 and 128 G.
- It is recommended to use a high speed SD card of class 10 and above.
- Try inserting and removing the SD card several times.
- It is recommended to use a different SD card.
- It may take some time for the camera to recognize the SD card. After inserting the card, wait about 30 seconds under observation.
How to watch the video?
1.On the camera’s APP preview video page, select “Local Playback” or “Cloud Playback”, then “Calendar” and “Alarm Point”, select the date and time of recording / drag the timeline. You can play the video.
2.Click the play button on the left side of the alarm image to jump to the corresponding video.
How to download videos to local phone / computer?
On the video playing page, click Record to start recording. Click Record again to stop recording. The video file is automatically saved in the phone’s local album. The video in the Handy Album can be sent to the computer using third-party software and played on a computer player.
Does the camera support direct PC connection?
unsupported.
Cloud storage information
Cloud storage is the storage of recorded videos on Amazon cloud servers. This is an additional paid item for the camera. A seven-day trial period is free. If you want to continue using the cloud storage function after the trial period, you have to pay for the package.
Problem with unsubscribing / replacing cloud storage?
If the camera purchased a cloud storage service, you will need to request a refund of the cloud storage fee due to a camera failure. If you need to transfer the cloud storage kit to the new camera, please contact the brand manufacturer’s customer service department directly.
The camera supports 7 * 24 hours video recording?
Is not supported. The camera is powered by a rechargeable battery and cannot work for 7 * 24 hours. When the camera detects a moving object, recording starts.
Why are there white spots in the night vision image?
The night vision function of the camera is realized by the principle of infrared light, which has a light collecting effect. There should be no obstacles or walls within two meters of the camera screen. Otherwise infrared rays will collect here and cause overexposure.
Why is the night vision image so dark?
The night vision function of the camera may not be activated. It is recommended to set the basic functions day and night mode-night mode in the APP and control them via software in order to force the switching of the night vision function.
What to do if there are black spots in the picture?
1.Check for dust / smudges on the camera lens. It is recommended to wipe it once with alcohol.
2.There are still black spots after wiping them, and there may be dust on the sensor in the camera. If the position of the black spot does not affect the monitoring area or the area is small, it will not affect the normal use of the product. If the area of the black spot is too large, it is recommended that you contact the branded retailer’s customer service department.


I can’t upload
I am having trouble with the installation
my recorder is not working
please provide support for me i leave my email address
Can you write your contact number?
my recorder is not working
my recorder is not working
I sent an e-mail from the communication channel. Can you help?