Dahua IP Camera 5.0 UI Setup, Dahua is a leading manufacturer of video surveillance equipment, including network cameras. Dahua network cameras are IP cameras, which means they transmit video footage over a network, such as the internet. This allows you to view live footage from your cameras remotely, from anywhere in the world with an internet connection.
How to Change the Password on a 5.0 UI IP Camera
IPCamera/Change Password 5.0 UI
Step by Step Instructions
1. Input the camera’s IP address into a web browser.
Enter the current username and password of the camera into the designated fields.
Click the Login button to log in

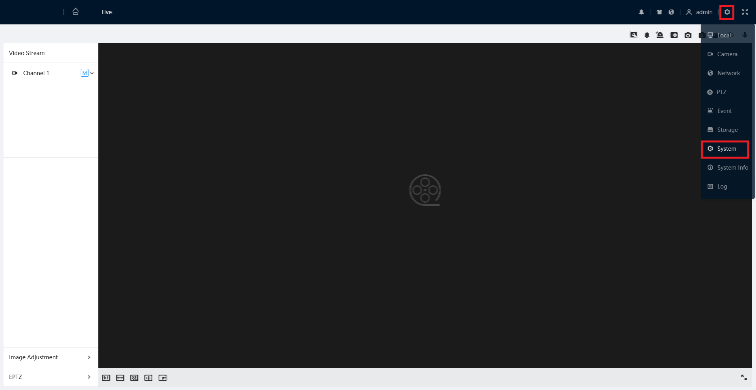
2. Select the Gear icon at the top right.
Then select the System option from the drop-down list
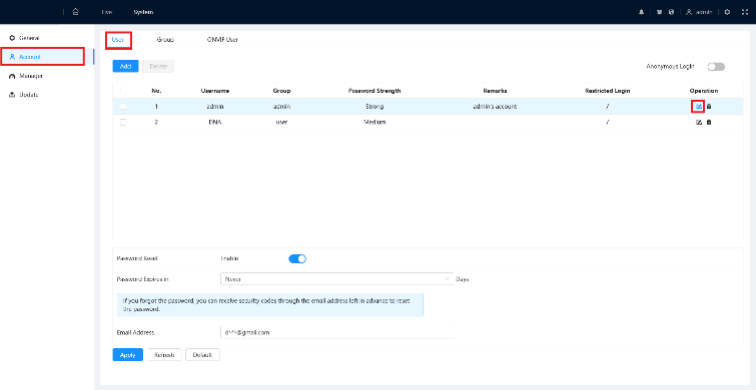
3. Select Account on the left.
Then select the User tab at the top.
Click on the Edit (Pencil) icon to the right of the user account who’s password you want to edit
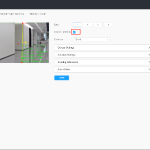
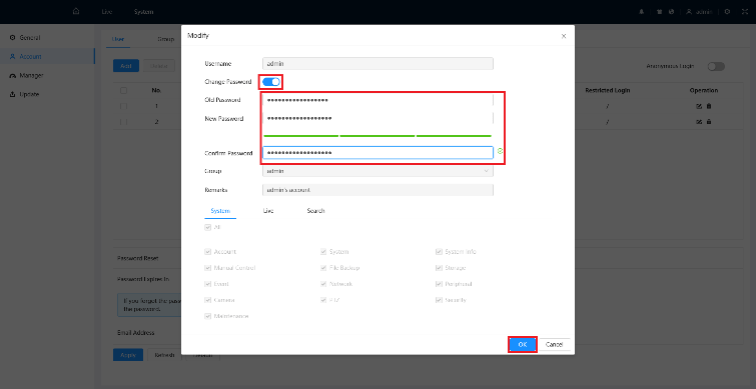
4. Enable the Change Password slider.
Then enter the current password in the Old Password field.
Enter the new password you want to change it to in both the New Password and Confirm Password fields.
Click on OK at the bottom
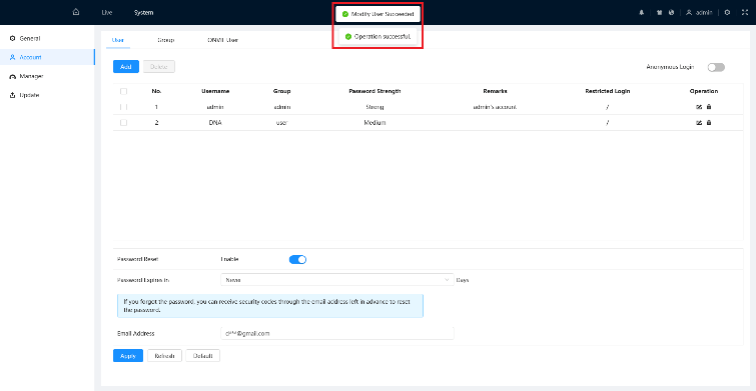
5. Once the new password is successfully changed, you will see “Modify User Succeeded” at the top
Dahua IP Camera 5.0 UI Setup
How to Set the Date and Time on a 5.0 UI IP Camera
IPCamera/Set Date and Time 5.0 UI
Description
This guide will show you how to set the Date and Time on a IMaxCamPro IP Camera with the 5.0 User Interface
Prerequisites
Step by Step Instructions
1. Input the camera’s IP address into a web browser.
Enter the username and password of the camera into the designated fields.
Click the Login button to log in

2. Select the Gear icon at the top right.
Then select the System option from the drop-down list

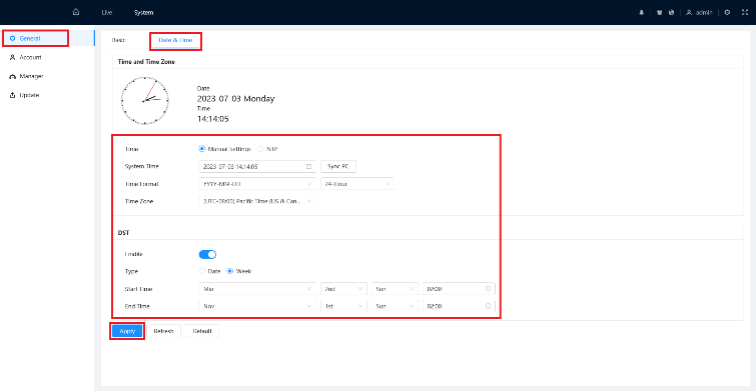
3. Select General on the left.
Then select the Date & Time tab at the top.
To set the date and time without an NTP server, select Manual Setting. Then adjust the Time, Time Format, and Time Zone. (You can press Sync PC if you want to pull the time from the PC you are using. The Time Zone still needs to be set manually though.)
To set the date and time with an NTP server, select NTP. Then fill in the information for a functioning NTP server. (This will only work if the camera has access to the internet.)
For locations that use Daylight Saving Time, enable the slider below DST and select the dates and times that Daylight Savings starts and stops.
When you are done adjusting settings, select Apply at the bottom to save the settings.
How to Set the IP to Static on a 5.0 UI IP Camera
IPCamera/Set IP to Static 5.0 UI
How to Set IP Settings to Static on a 5.0 UI IP Camera
Description
This guide will show you how to set the IP settings to static on a ImaxCamPro 5.0 User Interface IP Camera
Prerequisites
Step by Step Instructions
1. Input the camera’s IP address into a web browser.
Enter the username and password of the camera into the designated fields.
Click the Login button to log in

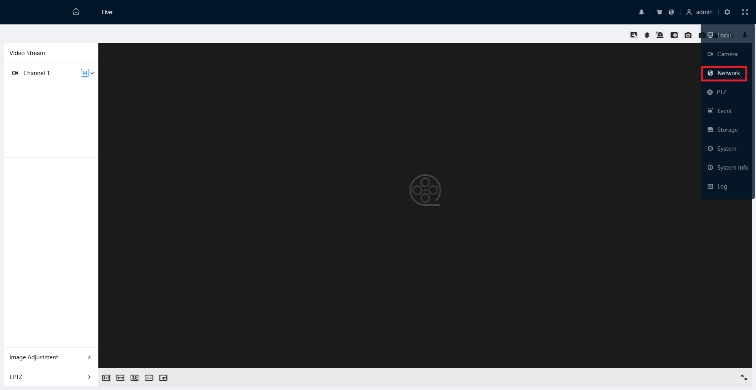
2. Select the Gear icon at the top right.
Then select the Network option from the drop-down list
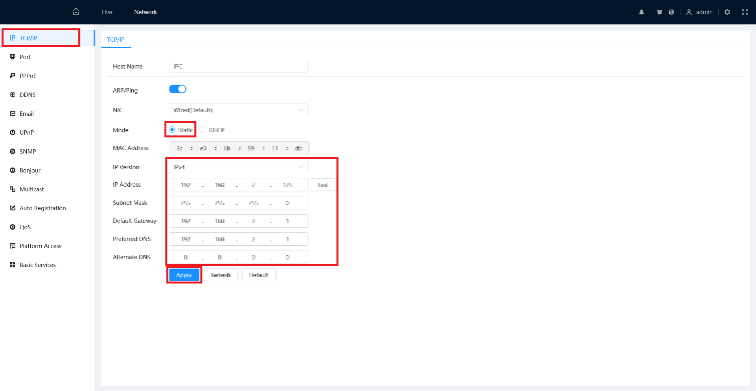
3. Select TCP/IP on the left.
Click on Static next to “Mode”.
Then fill in the IP Address, Subnet Mask, Default Gateway, and DNS settings below that. (You can press the “Test” button if you want to see if that IP address is free on your network.)
When you are done adjusting settings, click on Apply at the bottom
How to Configure Recording to an SD Card on a 5.0 UI IP Camera
IPCamera/Configure Recording SD Card 5.0. UI
How to Configure Recording to an SD Card on a 5.0 UI IP Camera
Description
This guide will show you how to configure recording to an SD Card on a IMaxCamPro 5.0 User Interface IP Camera
Prerequisites
Step by Step Instructions
1. Input the camera’s IP address into a web browser.
Enter the username and password of the camera into the designated fields.
Click the Login button to log in

2. Select the Gear icon at the top right.
Then select the Storage option from the drop-down list

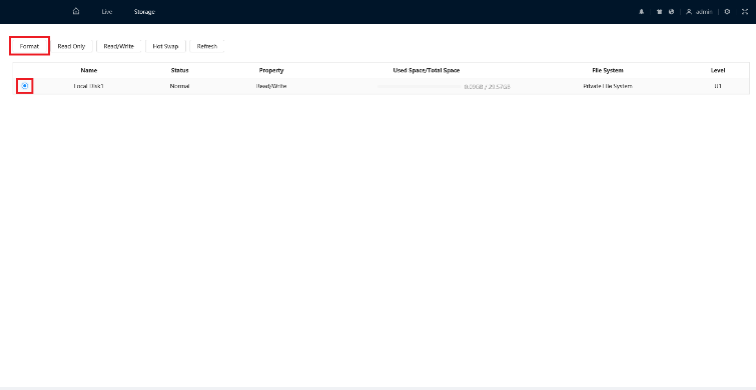
3. Select the SD card from the list by enabling the radio button on the left.
Click on Format at the top to wipe all the data on the SD card and configure it for recording on this camera.
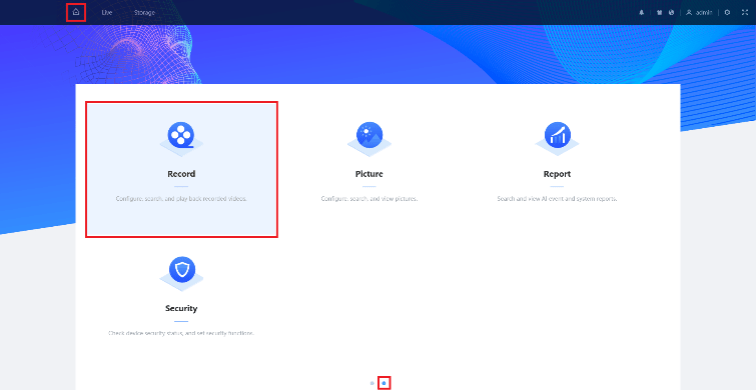
4. Click on the Home icon at the top left.
Select Record. (If you don’t see it on the main page, click the right circle at the bottom to switch pages.)

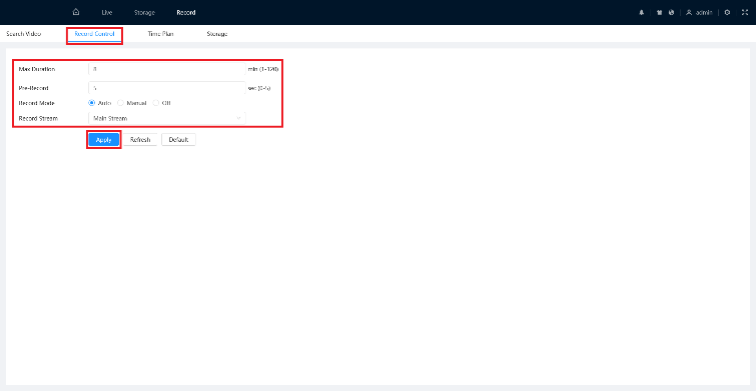
5. Select the Record Control tab at the top.
Adjust the settings on this page as desired:
When you are done adjusting settings, click on Apply to save the settings
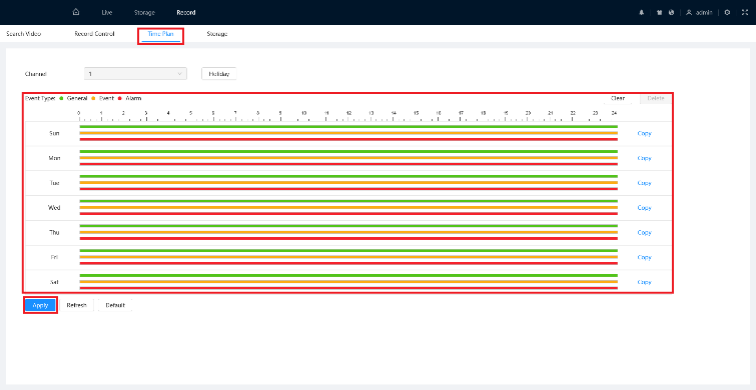
6. Select the Time Plan tab at the top.
Adjust each Event Type on the weekly calendar.
When you are done adjusing the schedules, click on Apply to save your changes
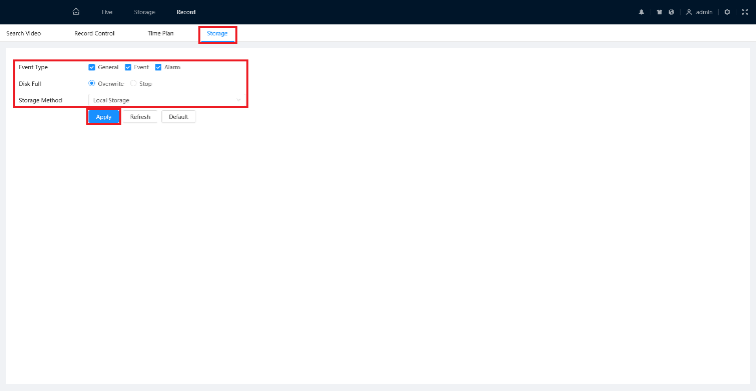
7. Select the Storage tab at the top.
Adjust the settings on this page as desired:
When you are done adjusting settings, click on Apply to save the settings
How to Playback Video from an SD Card on a 5.0 UI IP Camera
IPCamera/Playback Recording SD Card 5.0. UI
How to Playback Video from an SD Card on a 5.0 UI IP Camera
Description
This guide will show you how to view recorded video footage from an SD Card on a IMaxCamPro 5.0 User Interface IP Camera
Prerequisites
Step by Step Instructions
1. Input the camera’s IP address into a web browser.
Enter the username and password of the camera into the designated fields.
Click the Login button to log in
2. Click on the Home icon at the top left.
Select Record. (If you don’t see it on the main page, click the right circle at the bottom to switch pages.)
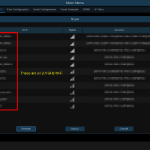
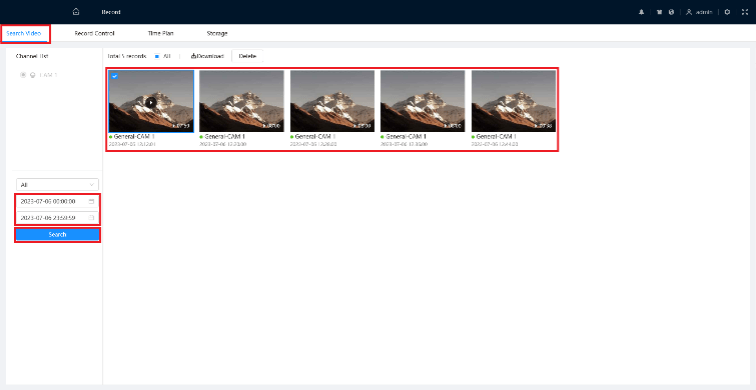
3. Select the Search Video tab at the top.
Select the start date and time, and the end date and time on the left.
Then click Search below that.
All the recorded footage on the SD card in the time range will appear.
Double-click on the specific clip you want to play
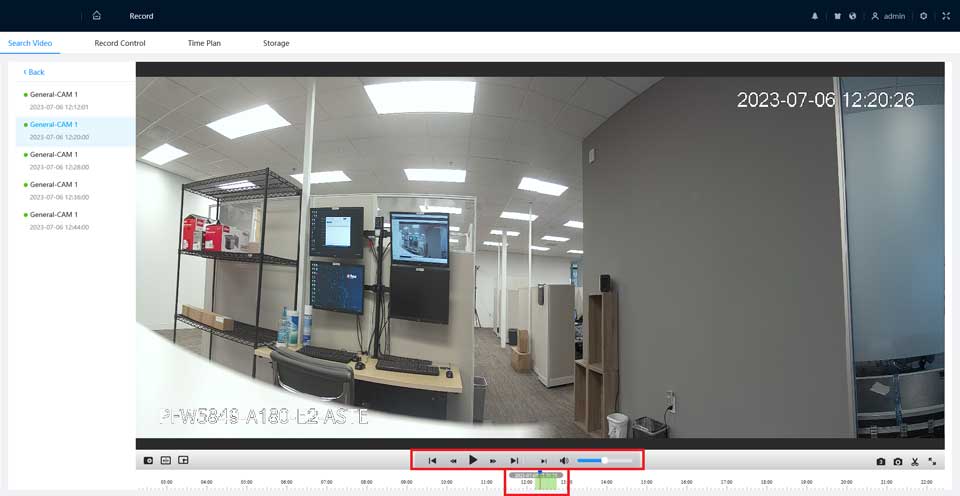
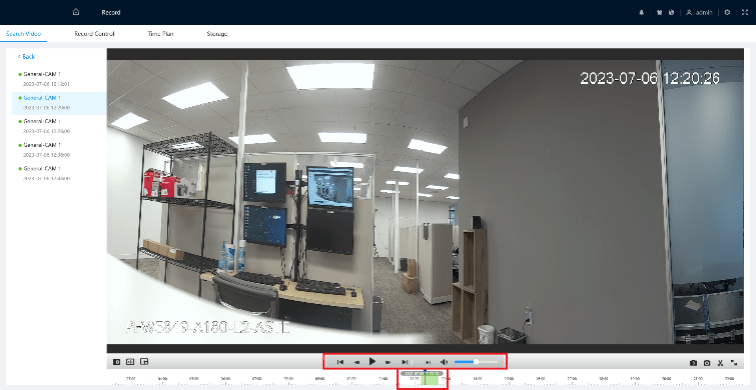
4. Move the slider at the bottom to adjust the playback time.
Use the controls to play, pause, rewind, fast forward, or jump between clips
IPCamera/Password Reset 5.0. UI
IPCamera/Password Reset 5.0. UI
How to Reset the Password on a 5.0 UI IP Camera
Description
This guide will show you how to reset the password on a IMaxCamPro 5.0 User Interface IP Camera
Prerequisites
Step by Step Instructions
Reset via Password Recovery in DMSS
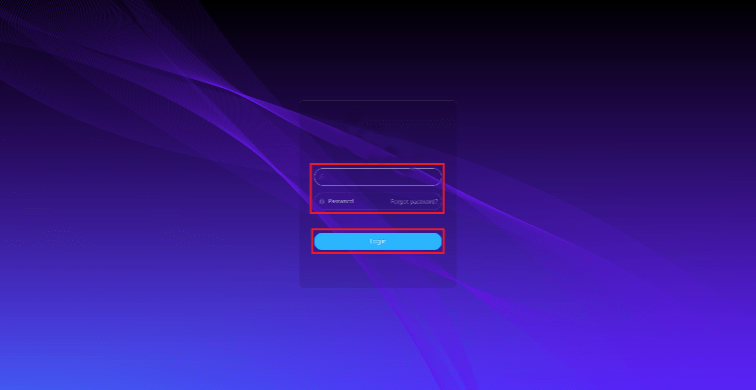
1. Input the camera’s IP address into a web browser.
Click on Forgot password?

2. Click on OK to agree to use your email address in this process

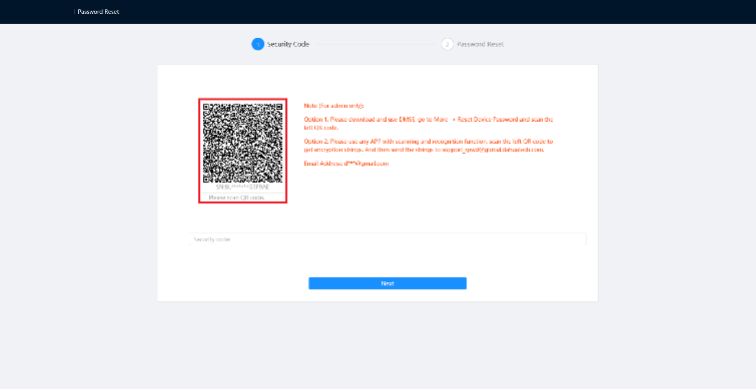
3. If you setup a recovery email you will be brought to a page with a QR code on it. (If you didn’t setup a recovery email, skip to “Reset via Physical Button” at the bottom of this page.)
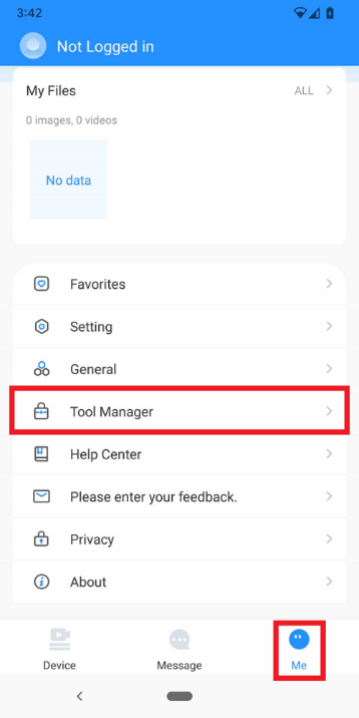
4. Open the DMSS app on a mobile device.
Tap on Me at the bottom.
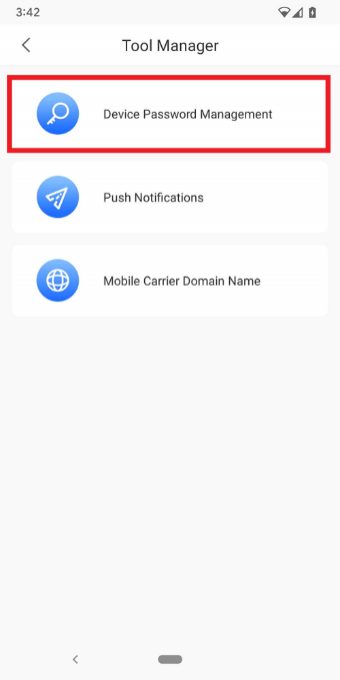
Then select Tool Manager
5. Tap on Device Password Management
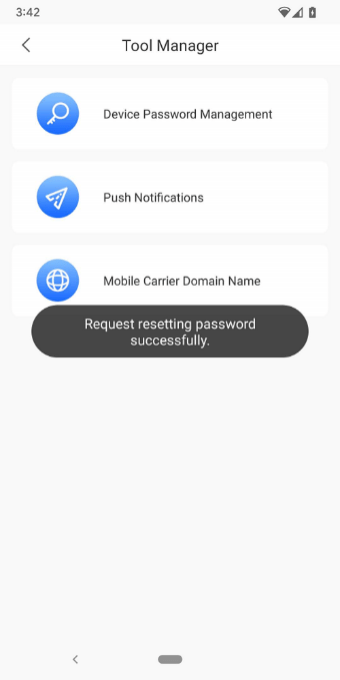
6. Use the mobile device’s camera to scan the QR code from Step 3 above

7. Once the QR Code has been successfully scanned you will see the following message
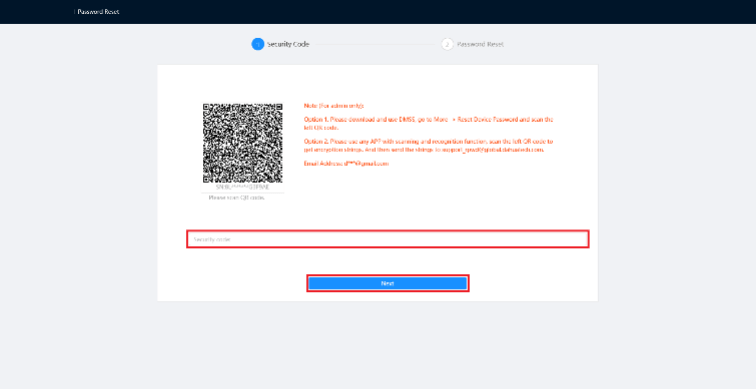
8. Check the email inbox for the email address that was registered for password recovery on this device.
Input the security code from that email in the Security code field.
Then click on Next
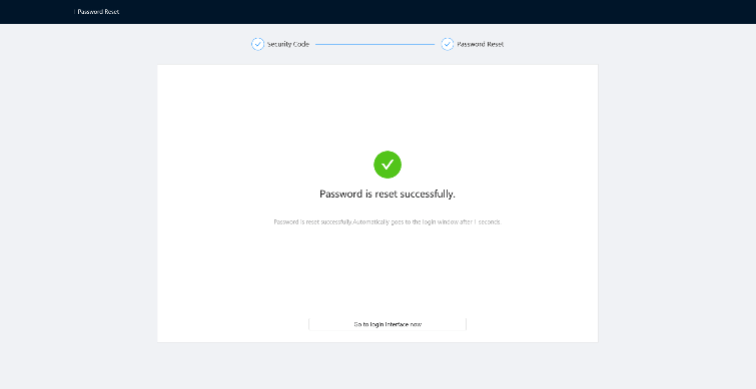
9. Enter a new password in the New Password and Confirm Password fields.
Then click on OK
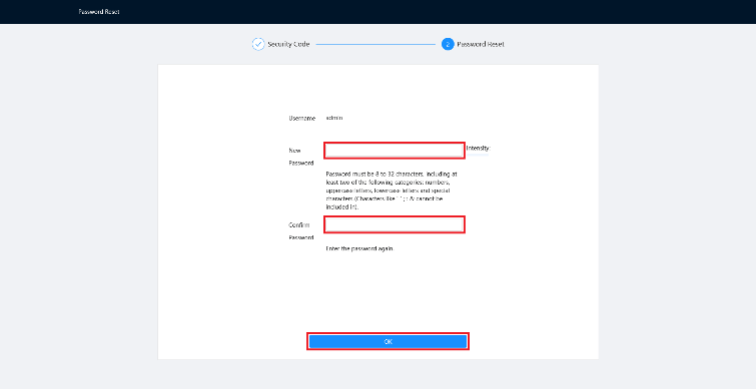
10. The password will be successfully reset
Reset via Physical Button
Depending on the model of your IP Camera, there could be a physical reset button on the outside body of the camera, or inside the camera body.
1. Reset: Press the reset button for 10-20 seconds while the camera is connected to power.
IP Camera Basic Info
Important Safeguards and Warnings
1.Electrical safety All installation and operation here should conform to your local electrical safety codes. The product must be grounded to reduce the risk of electric shock. We assume no liability or responsibility for all the fires or electrical shock caused by improper handling or installation.
2.Transportation security Heavy stress, violent vibration or water splash are not allowed during transportation, storage and installation.
3.Installation
4.Qualified engineers needed All the examination and repair work should be done by the qualified service engineers. We are not liable for any problems caused by unauthorized modifications or attempted repair.
5.Environment The NVR should be installed in a cool, dry place away from direct sunlight, inflammable, explosive substances and etc. This series product shall be transported, storage and used in the specified environments.
6. Accessories Be sure to use all the accessories recommended by manufacturer. Before installation, please open the package and check all the components are included. Contact your local retailer ASAP if something is broken in your package.
7. Lithium battery Improper battery use may result in fire, explosion, or personal injury! When replace the battery, please make sure you are using the same model! Before your operation please read the following instructions carefully.
Hardware Installation and Connection
Note: All the installation and operations here should conform to your local electric safety rules.
1. Check Unpacked NVR When you receive the NVR from the forwarding agent, please check whether there is any visible damage. The protective materials used for the package of the NVR can protect most accidental clashes during transportation. Then you can open the box to check the accessories. Please check the items in accordance with the list (Remote control is optional). Finally you can remove the protective film of the NVR.
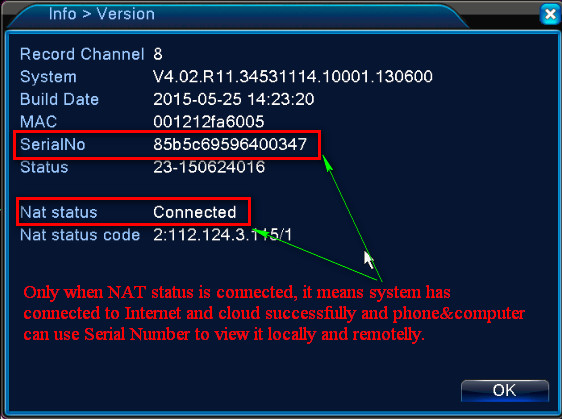
2. About Front Panel and Rear Panel For detailed information of the function keys in the front panel and the ports in the rear panel, please refer to the User’s Manual included in the resource CD. The model label in the front panel is very important; please check according to your purchase order. The label in the rear panel is very important too. Usually we need you to represent the serial number when we provide the service after sales.
3. After Remove the Chassis Please check the data cable, power cable, COM cable and main boar cable connection is secure or not.
4. Important:Please turn off the power before you replace the HDD. You can refer to the User’s Manual for recommended HDD brand. Please use HDD of 7200rpm or higher. Usually we do not recommend a PC HDD. For detailed operation instruction, please refer to the User’s Manual included in the resources CD.
1. Use the screwdriver to loose the screws of the rear panel and then remove the front cover.
2. Put the HDD to the HDD bracket in the chassis and then line up the four screws to the four holes in the HDD. Use the screwdriver to fix the screws firmly to secure HDD on the HDD bracket
3. Connect to the HDD data cable to the main board and the HDD port respectively. Loosen the power cable of the chassis and connect another end of the power cable to the HDD port.
4. After connect the cable, put the front cover back to the device and then fix screws of the rear panel.


Add Comment