DAHUA IP Camera 5.0 UI Setup, This guide will show you how to modify an account’s password on an IP Camera with the 5.0 User Interface. Please remember to change the passwords on all of the accounts to insure maximum security. Also, to ensure a higher level of security please use passwords with these requirements:
DAHUA IP Camera 5.0 UI Setup
How to Change the Password on a 5.0 UI IP Camera
Description
This guide will show you how to modify an account’s password on an IP Camera with the 5.0 User Interface. Please remember to change the passwords on all of the accounts to insure maximum security. Also, to ensure a higher level of security please use passwords with these requirements:
Example: HIgh91!?
Prerequisites
Step by Step Instructions
1. Input the camera’s IP address into a web browser.
Enter the current username and password of the camera into the designated fields.
Click the Login button to log in
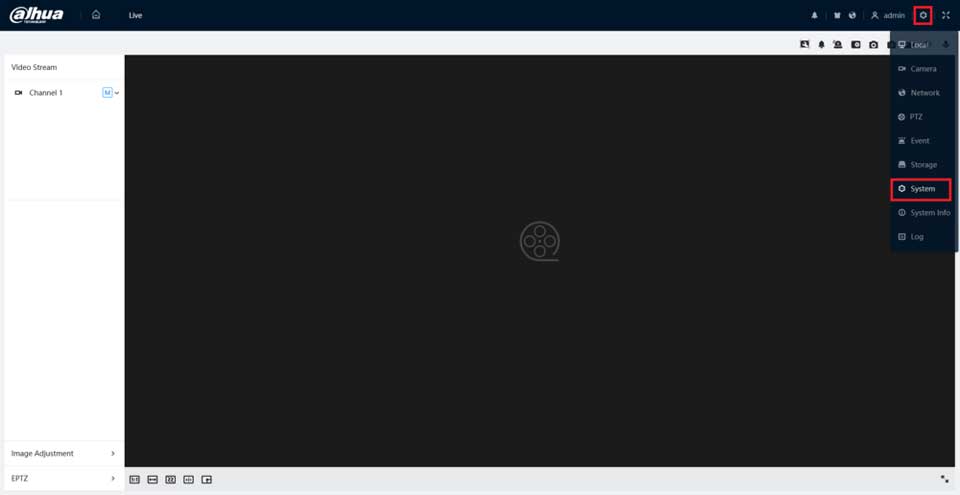
2. Select the Gear icon at the top right.
Then select the System option from the drop-down list
3. Select Account on the left.
Then select the User tab at the top.
Click on the Edit (Pencil) icon to the right of the user account who’s password you want to edit
4. Enable the Change Password slider.
Then enter the current password in the Old Password field.
Enter the new password you want to change it to in both the New Password and Confirm Password fields.
Click on OK at the bottom
5. Once the new password is successfully changed, you will see “Modify User Succeeded” at the top
How to Set the Date and Time on a 5.0 UI IP Camera
Description
This guide will show you how to set the Date and Time on a Dahua IP Camera with the 5.0 User Interface
Prerequisites
Step by Step Instructions
1. Input the camera’s IP address into a web browser.
Enter the username and password of the camera into the designated fields.
Click the Login button to log in
2. Select the Gear icon at the top right.
Then select the System option from the drop-down list
3. Select General on the left.
Then select the Date & Time tab at the top.
To set the date and time without an NTP server, select Manual Setting. Then adjust the Time, Time Format, and Time Zone. (You can press Sync PC if you want to pull the time from the PC you are using. The Time Zone still needs to be set manually though.)
To set the date and time with an NTP server, select NTP. Then fill in the information for a functioning NTP server. (This will only work if the camera has access to the internet.)
For locations that use Daylight Saving Time, enable the slider below DST and select the dates and times that Daylight Savings starts and stops.
When you are done adjusting settings, select Apply at the bottom to save the settings.
How to Set IP Settings to Static on a 5.0 UI IP Camera
Description
This guide will show you how to set the IP settings to static on a Dahua 5.0 User Interface IP Camera
Prerequisites
Step by Step Instructions
1. Input the camera’s IP address into a web browser.
Enter the username and password of the camera into the designated fields.
Click the Login button to log in
2. Select the Gear icon at the top right.
Then select the Network option from the drop-down list
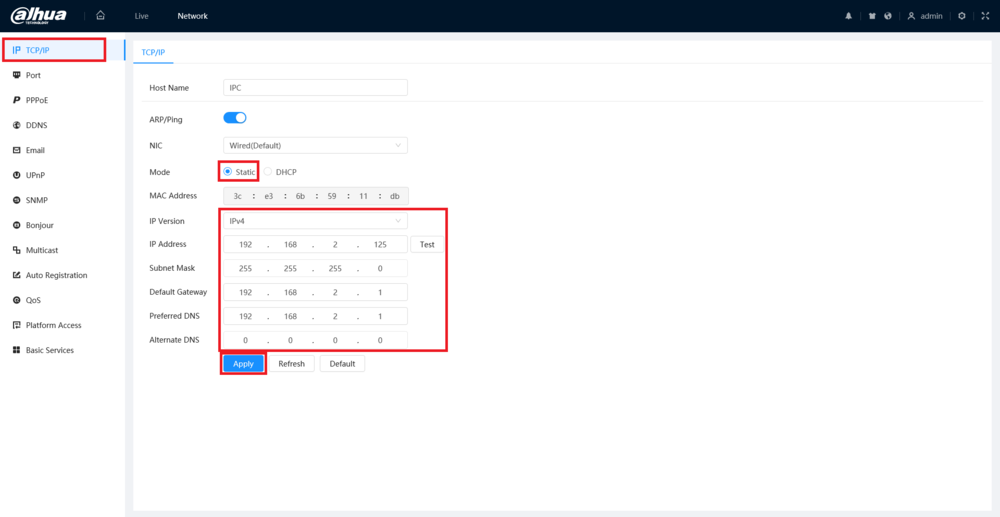
3. Select TCP/IP on the left.
Click on Static next to “Mode”.
Then fill in the IP Address, Subnet Mask, Default Gateway, and DNS settings below that. (You can press the “Test” button if you want to see if that IP address is free on your network.)
When you are done adjusting settings, click on Apply at the bottom
How to Configure Recording to an SD Card on a 5.0 UI IP Camera
Description
This guide will show you how to configure recording to an SD Card on a Dahua 5.0 User Interface IP Camera
Prerequisites
Step by Step Instructions
1. Input the camera’s IP address into a web browser.
Enter the username and password of the camera into the designated fields.
Click the Login button to log in
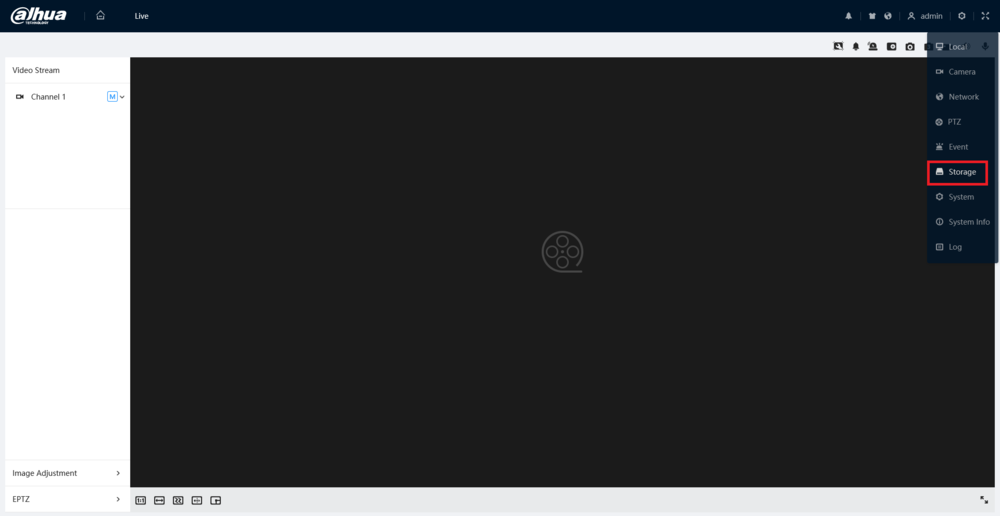
2. Select the Gear icon at the top right.
Then select the Storage option from the drop-down list
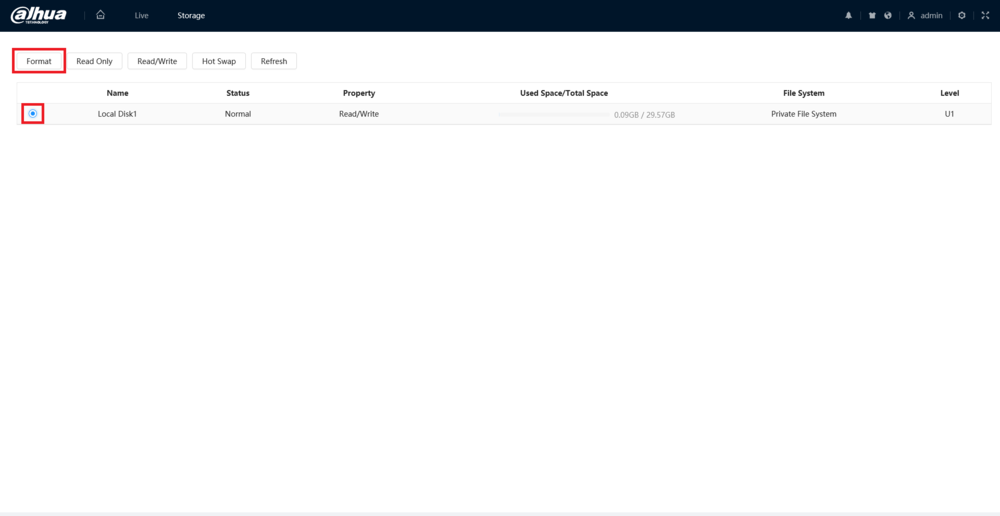
3. Select the SD card from the list by enabling the radio button on the left.
Click on Format at the top to wipe all the data on the SD card and configure it for recording on this camera.
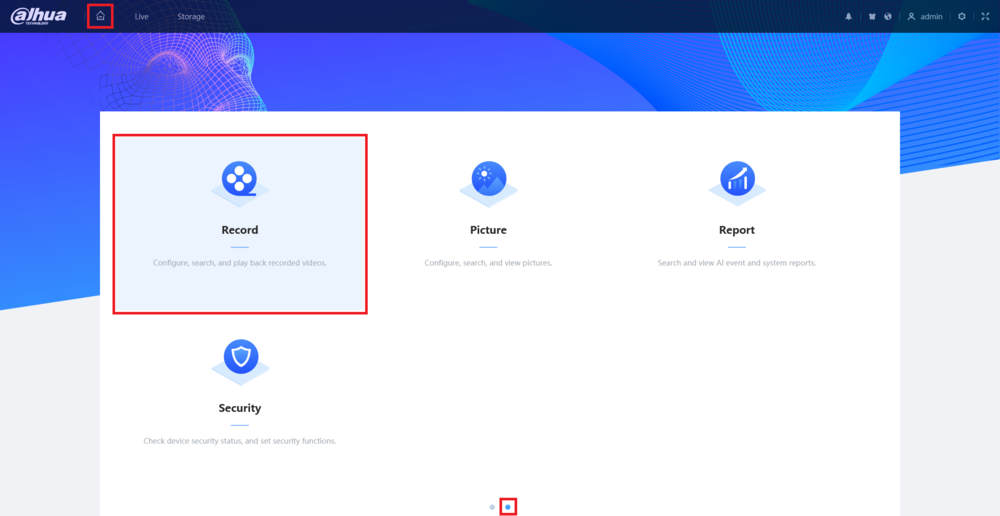
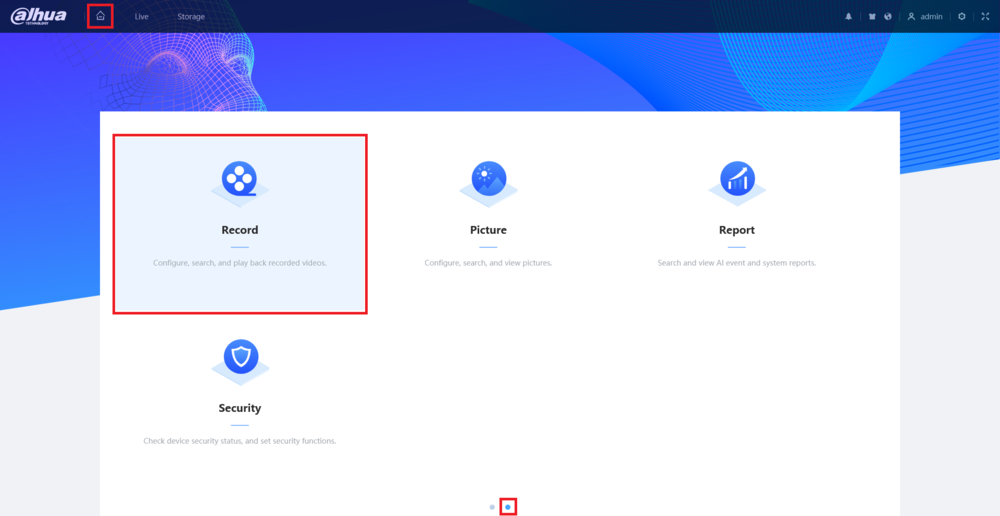
4. Click on the Home icon at the top left.
Select Record. (If you don’t see it on the main page, click the right circle at the bottom to switch pages.)
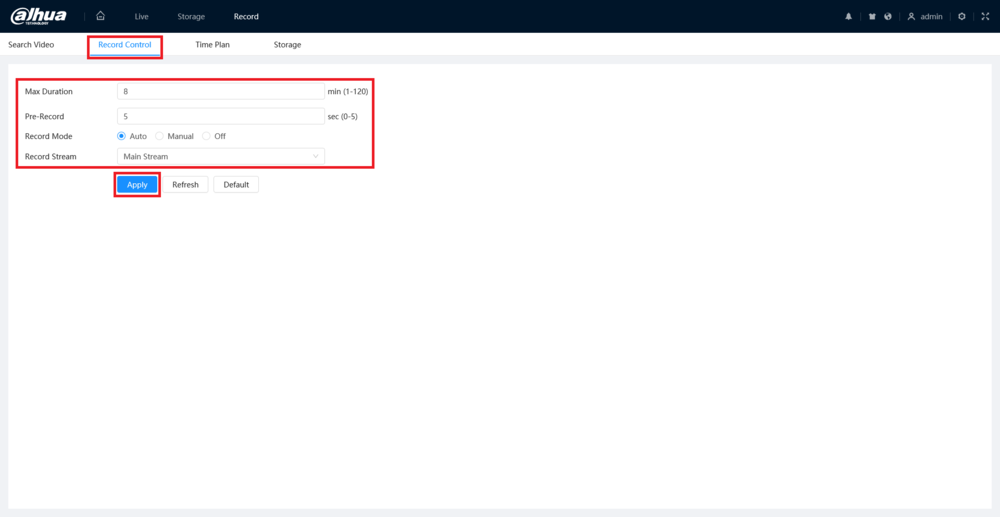
5. Select the Record Control tab at the top.
Adjust the settings on this page as desired:
When you are done adjusting settings, click on Apply to save the settings
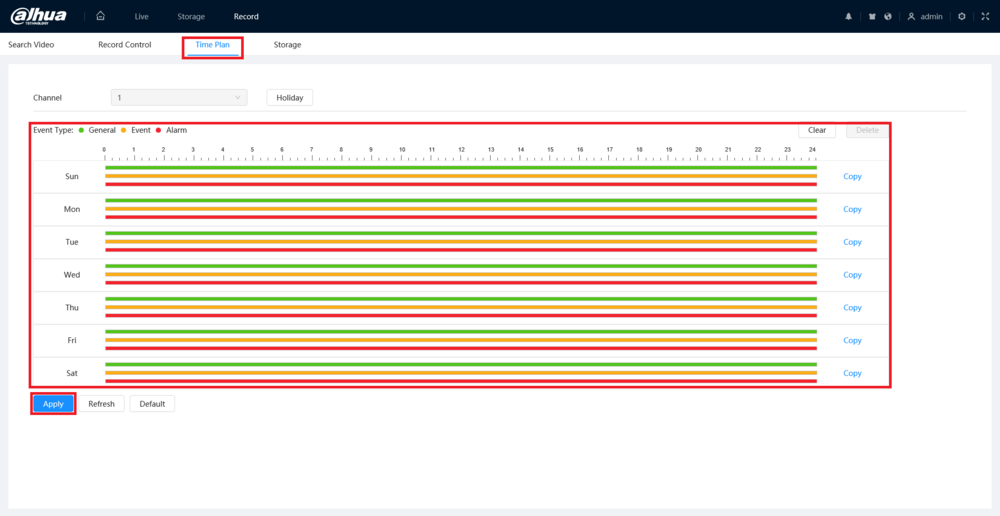
6. Select the Time Plan tab at the top.
Adjust each Event Type on the weekly calendar.
When you are done adjusing the schedules, click on Apply to save your changes
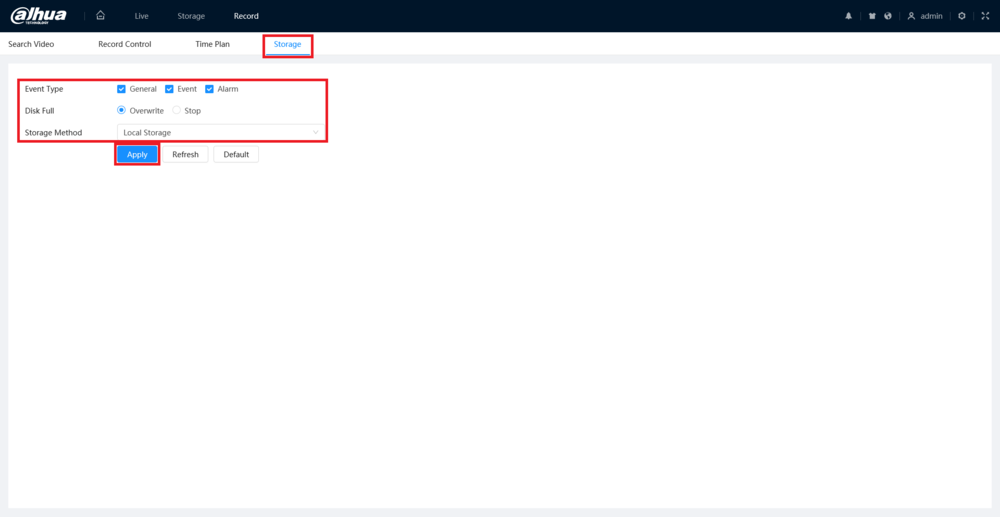
7. Select the Storage tab at the top.
Adjust the settings on this page as desired:
When you are done adjusting settings, click on Apply to save the settings
How to Playback Video from an SD Card on a 5.0 UI IP Camera
Description
This guide will show you how to view recorded video footage from an SD Card on a Dahua 5.0 User Interface IP Camera
Prerequisites
Step by Step Instructions
1. Input the camera’s IP address into a web browser.
Enter the username and password of the camera into the designated fields.
Click the Login button to log in
2. Click on the Home icon at the top left.
Select Record. (If you don’t see it on the main page, click the right circle at the bottom to switch pages.)
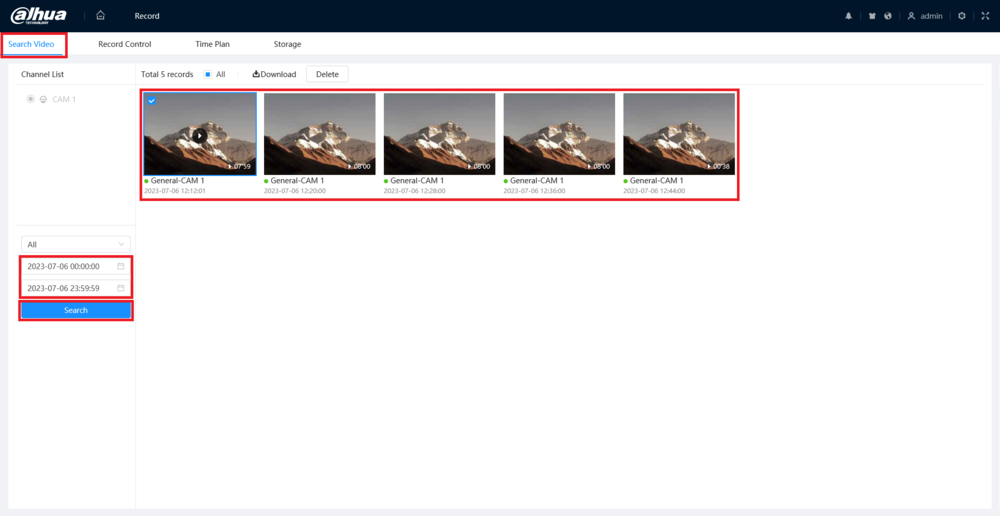
3. Select the Search Video tab at the top.
Select the start date and time, and the end date and time on the left.
Then click Search below that.
All the recorded footage on the SD card in the time range will appear.
Double-click on the specific clip you want to play
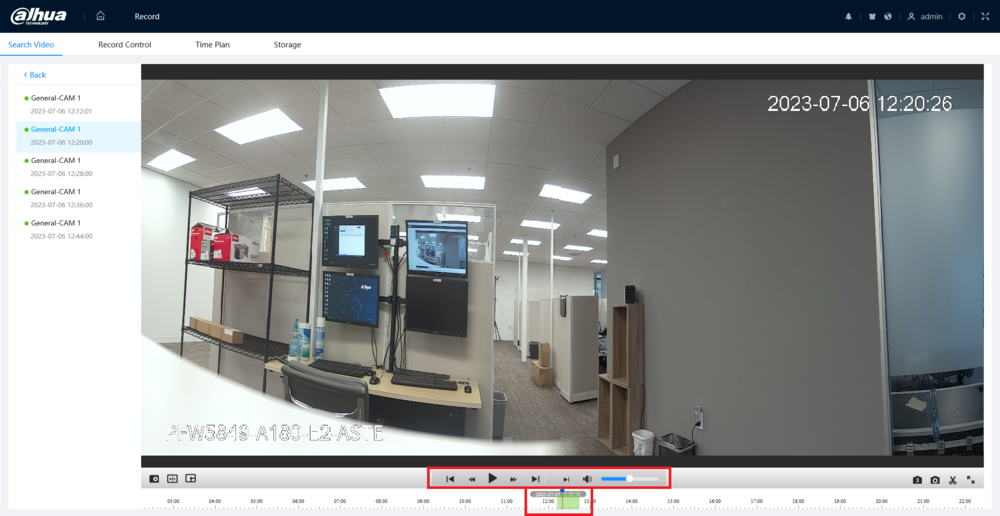
4. Move the slider at the bottom to adjust the playback time.
Use the controls to play, pause, rewind, fast forward, or jump between clips
How to Reset the Password on a 5.0 UI IP Camera
Description
This guide will show you how to reset the password on a Dahua 5.0 User Interface IP Camera
Prerequisites
Step by Step Instructions
Reset via Password Recovery in DMSS
1. Input the camera’s IP address into a web browser.
Click on Forgot password?
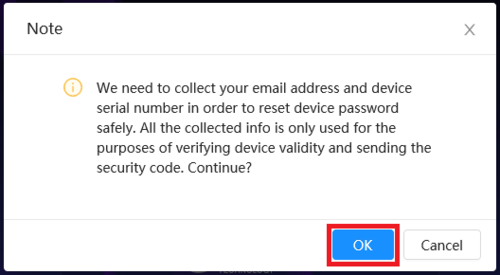
2. Click on OK to agree to use your email address in this process
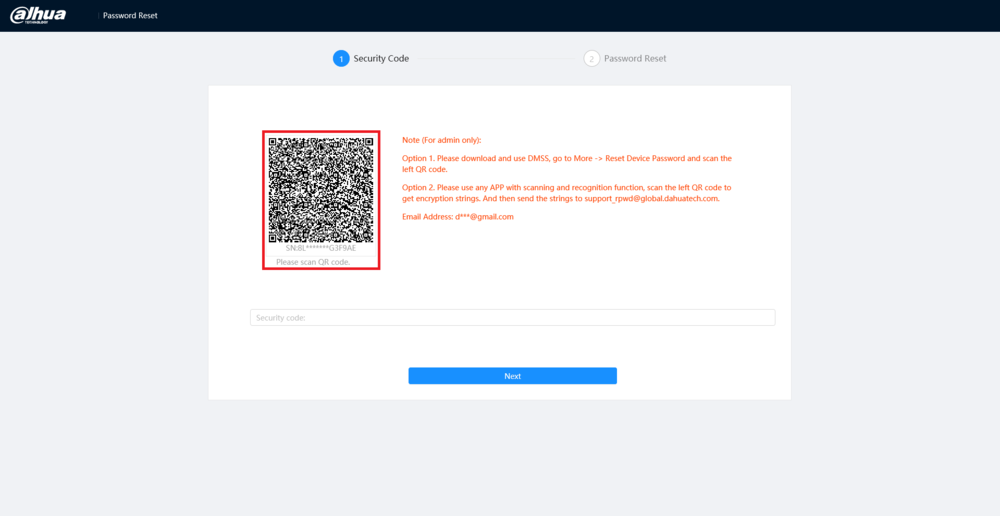
3. If you setup a recovery email you will be brought to a page with a QR code on it. (If you didn’t setup a recovery email, skip to “Reset via Physical Button” at the bottom of this page.)
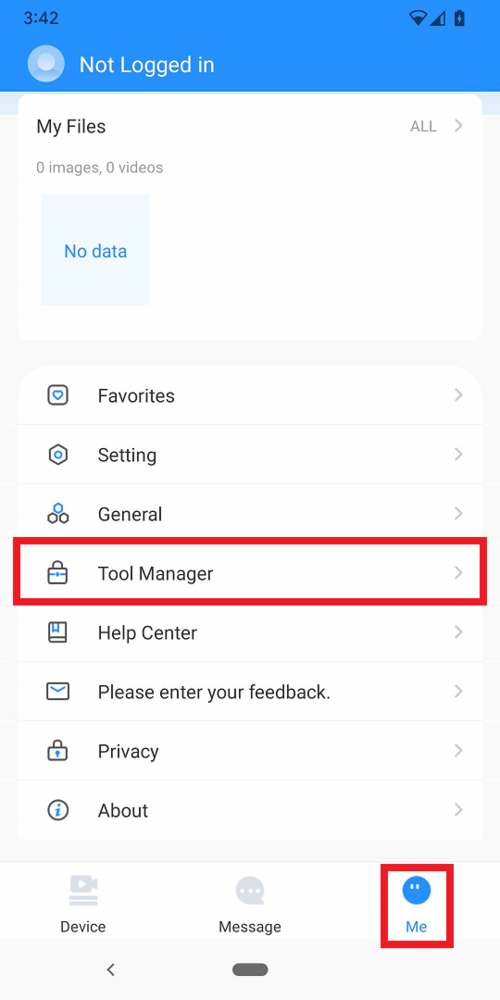
4. Open the DMSS app on a mobile device.
Tap on Me at the bottom.
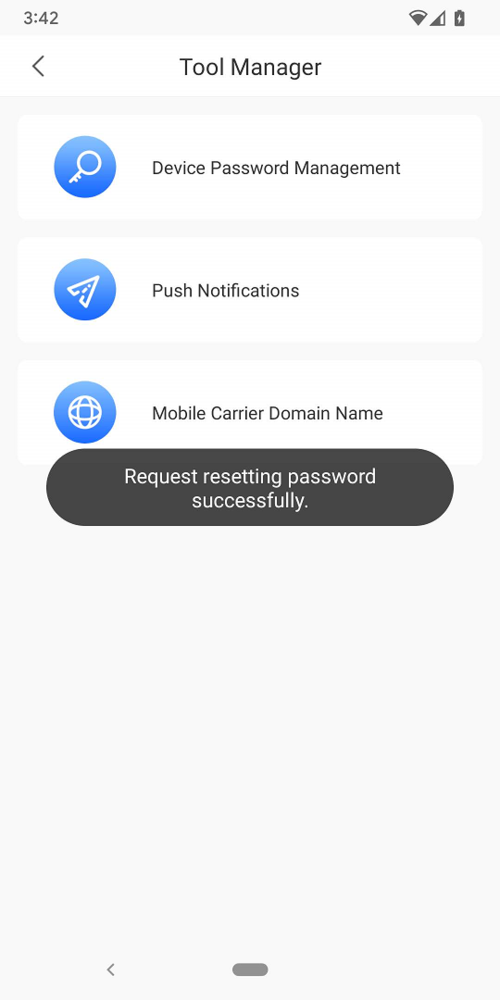
Then select Tool Manager
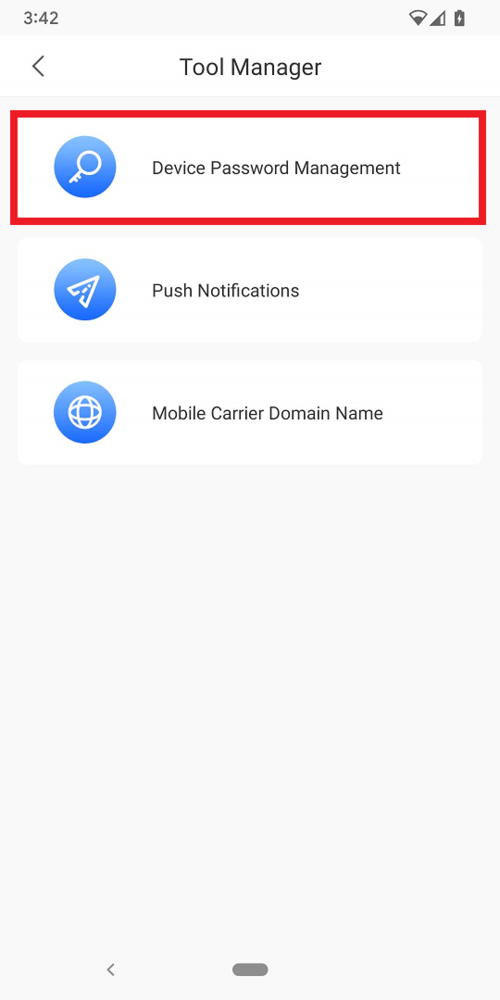
5. Tap on Device Password Management
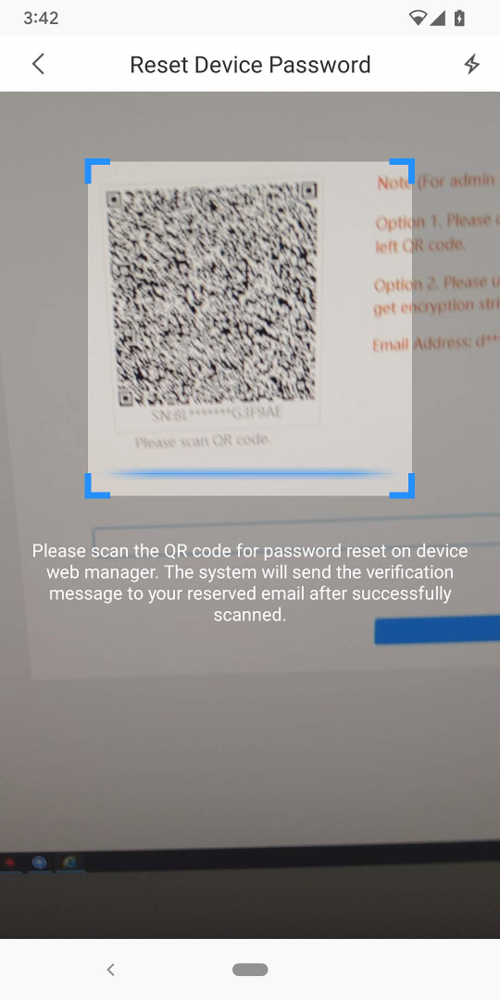
6. Use the mobile device’s camera to scan the QR code from Step 3 above
7. Once the QR Code has been successfully scanned you will see the following message
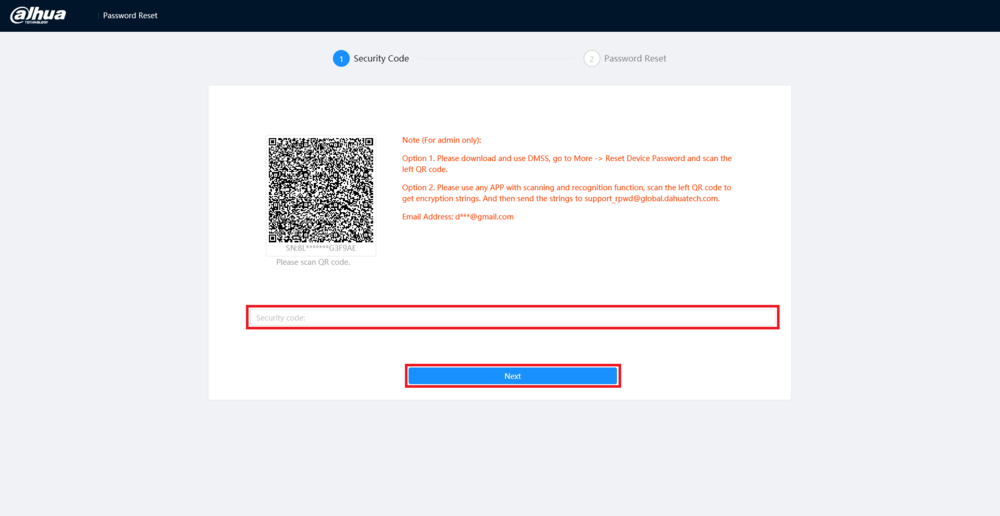
8. Check the email inbox for the email address that was registered for password recovery on this device.
Input the security code from that email in the Security code field.
Then click on Next
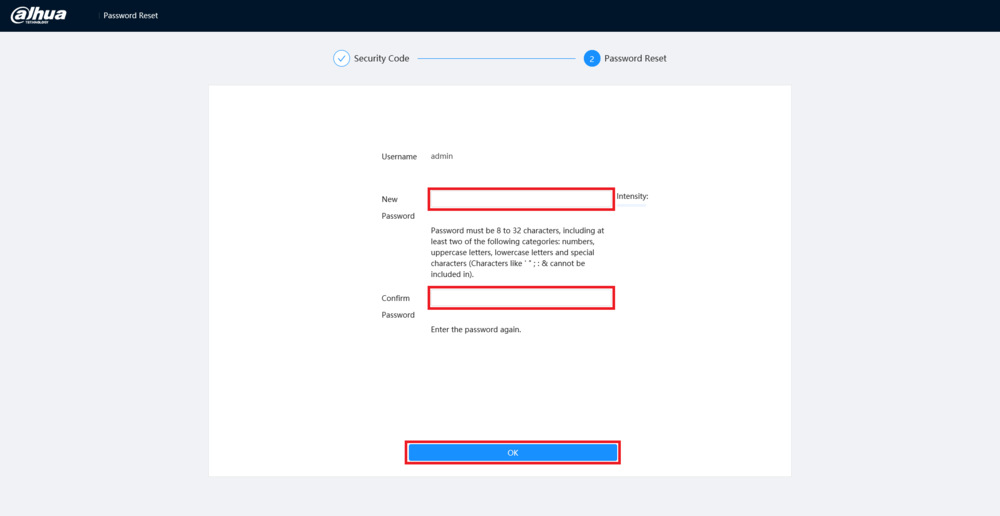
9. Enter a new password in the New Password and Confirm Password fields.
Then click on OK
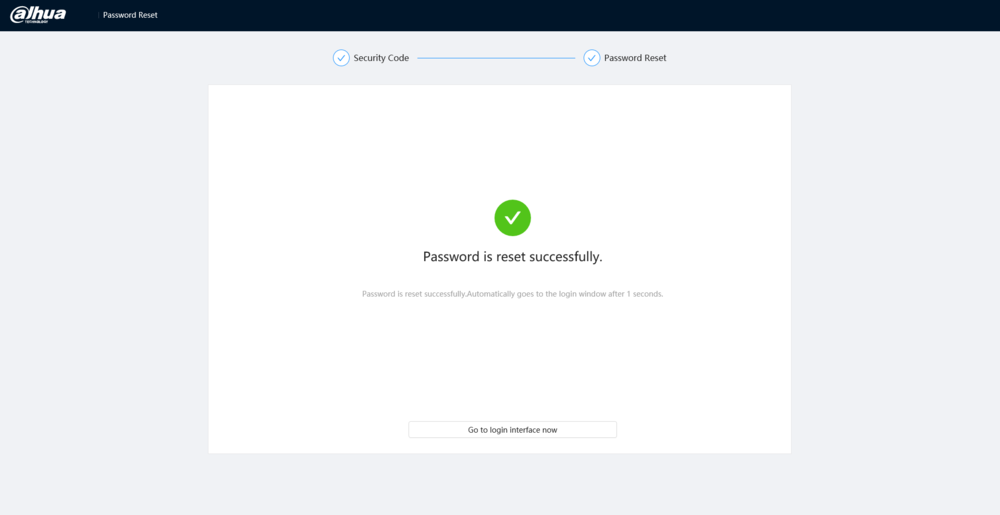
10. The password will be successfully reset
Reset via Physical Button
Depending on the model of your IP Camera, there could be a physical reset button on the outside body of the camera, or inside the camera body.
1. Reset: Press the reset button for 10-20 seconds while the camera is connected to power.









Add Comment