How to add IP Camera to NVR (Same LAN, using POE switch)
Requirements
- 1. Powered NVR or HCVR
- 2. PoE Switch
- 3. PoE IP Camera
- 4. 2 Ethernet Cables
Step by Step Setup
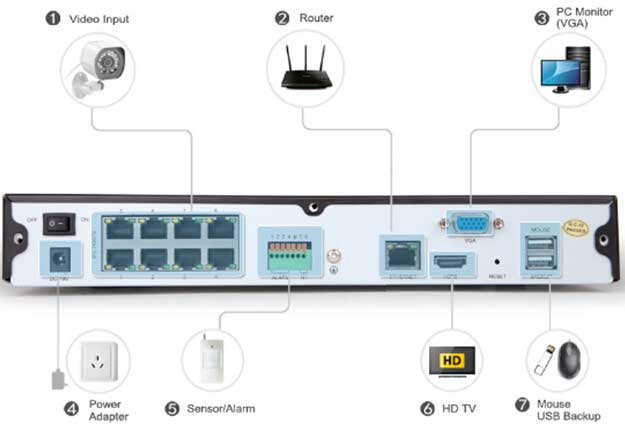
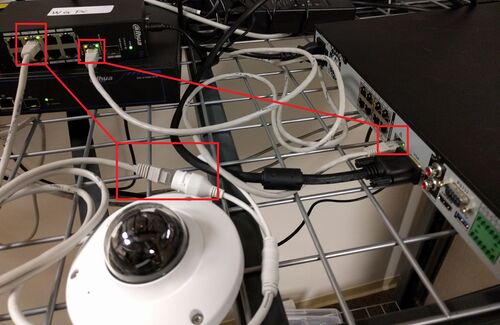
1. Plug the Ethernet cable into the powered NVR or HCVR, then plug the other side into powered PoE switch. Now plug the second Ethernet cable into IP Camera’s harness and plug the other side of the cable into the PoE switch. Make sure if you are using new cameras to plug them in one at a time to avoid an IP conflict since most cameras out of the box come with a 192.168.1.108 address. Having several devices on the same address disables any IP functionality, therefore you cannot change the IP address in order to gain functionality.
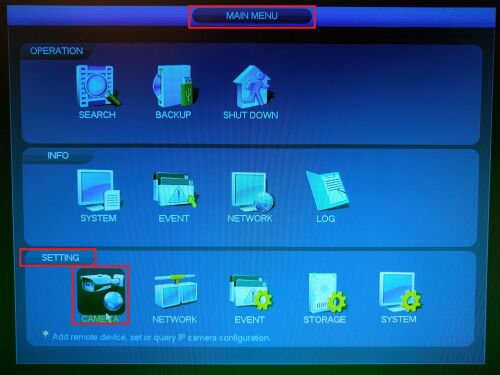
2. Now go into the NVR or HCVR’s MAIN MENU and select CAMERA under SETTINGS.
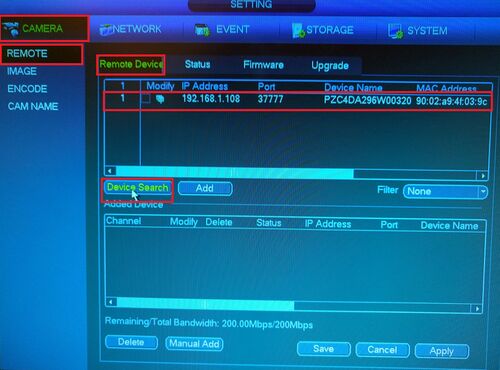
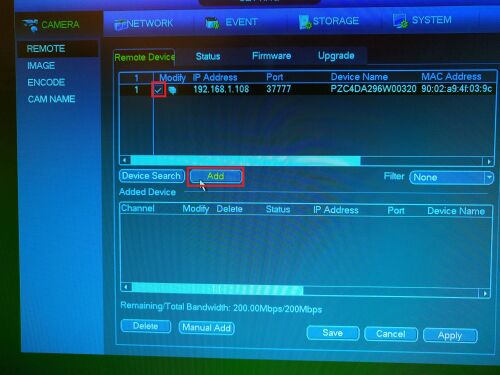
3. Under REMOTE on the left hand column, and the Remote Devices tab select Device Search. Notice that if you are connecting a new IP camera into a PoE switch the IP address should be 192.168.1.108.
4. Try to add this camera
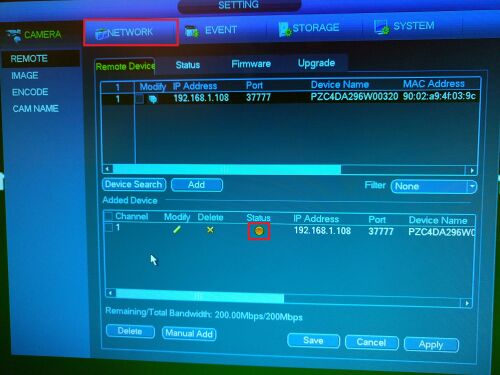
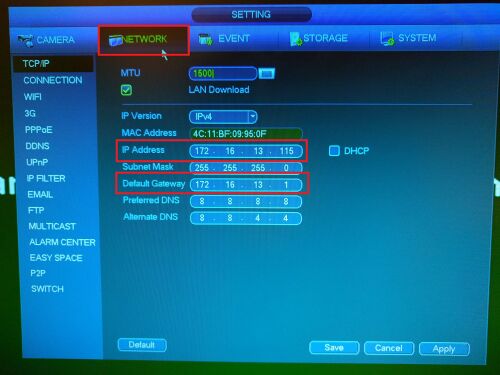
5. If the NVR is on another Default Gateway IP then you will notice that the camera feed will not be online. Now Select the network tab under SETTINGS. If the feed is online skip to step 10.
6. Notice on this page the IP settings for the NVR are different than the IP Camera. This is why the IP camera has a red status symbol:
- IP Camera – 192.168.1.108 (default gateway 192.168.1.1)
- NVR – 172.16.13.115 (default gateway 172.16.13.1)
The default gateway and the first 3 segments of the IP addresses do no match.
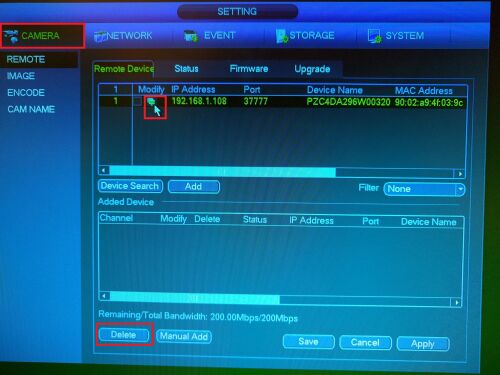
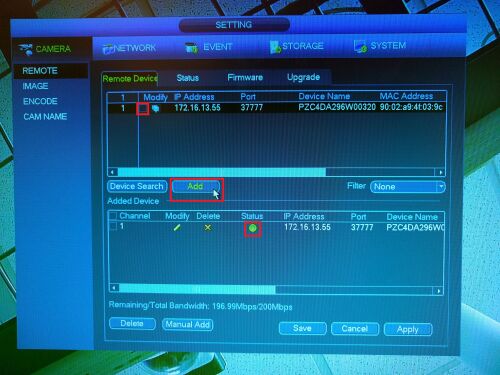
7. Delete the camera from Added Device(s). Now select the modify icon.
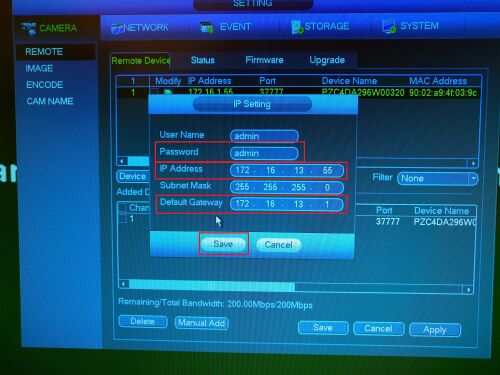
8. In the IP Settings menu match the IP Camera’s settings with the NVR or HCVR’s IP Settings:
- Default user name – admin
- Default password – admin
- IP Camera – 172.16.13.55
- Subnet Mask – 255.255.255.0
- Default Gateway – 172.16.13.1
Now click save.
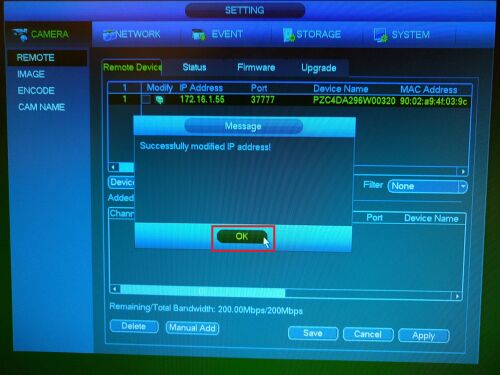
9. The Message should prompt a successful IP modification, click OK.
10. The IP camera is now working with the recorder. The default gateway and the first 3 segments of both device’s IP addresses now match. At the end of the IP address you can select any number from 2-254 if it is not already taken. Although, if there is a DHCP server on the LAN, you will need to match it’s default gateway and IP addressing settings.
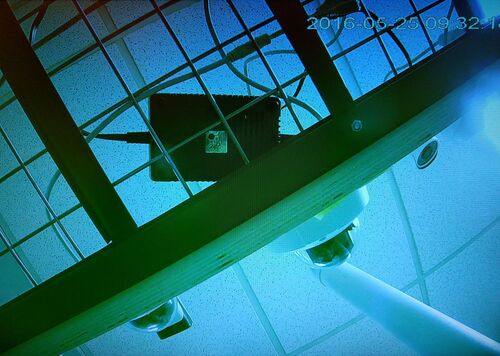
11. Check if the camera feed is live.




I am having trouble with the installation
hi how can i do
please provide support for me i leave my email address
I can’t upload
my recorder is not working
please provide support for me i leave my email address
It was a great sharing
It really worked, I appreciate it!
I can’t upload
I can’t upload
I am having trouble with the installation
I sent an e-mail from the communication channel. Can you help?
can you help me please
It was a great sharing
problem not solved thanks
It really worked, I appreciate it!
I sent an e-mail from the communication channel. Can you help?
I sent an e-mail from the communication channel. Can you help?
I can’t upload
It really worked, I appreciate it!
It was a great sharing
hi how can i do
It was a great sharing
I can’t upload
can you help me please
It was a great sharing
my recorder is not working
my recorder is not working
I sent an e-mail from the communication channel. Can you help?
can you help me please
problem not solved thanks
my recorder is not working
It was a great sharing
can you help me please
my recorder is not working
I can’t upload
It was a great sharing
please provide support for me i leave my email address
Can you write your contact number?
Can you write your contact number?
please provide support for me i leave my email address
I sent an e-mail from the communication channel. Can you help?