Purpose: If you have no NVR system and just would like to have the IP camera as a standalone camera, it is OK for the live view on the APP. Only the POE cameras with built-in SD card slot can store recordings.
Here are the steps for you:
If you confirm that the Live view of a camera is enough for you, and please kindly follow the below guide to set the camera up on the mobile phone.
First of all, please make sure the POE camera is activated. If not, please refer to this instruction before going ahead:
Please directly connect the cameras to your router. If your router is the standard router, you need to have an adapter(12V/1A) to power the camera on, then connect it to the router with the ethernet cable. If your router is a built-in POE switch, you can directly connect it with the ethernet cable without an additional power supply.
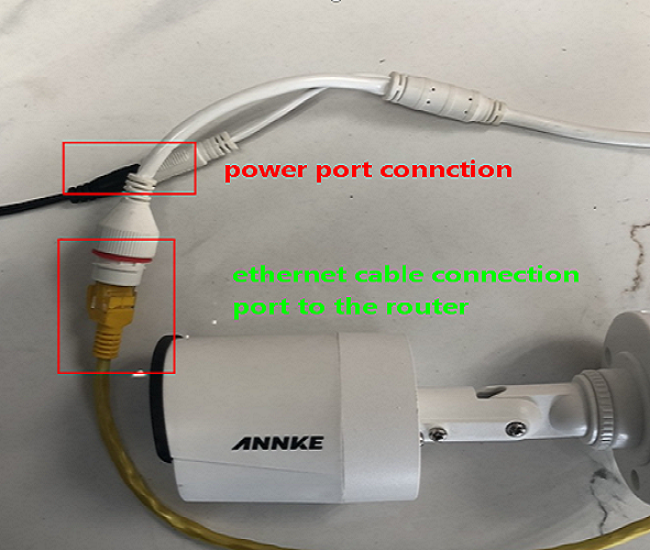
- Access the camera’s settings page and set up the camera for remote access.
2.1 Access the camera on a computer browser by following this instruction:
Annke Vision — How to Access the Web interface of ANNKE PoE Cameras via Browser? (Without NVR)
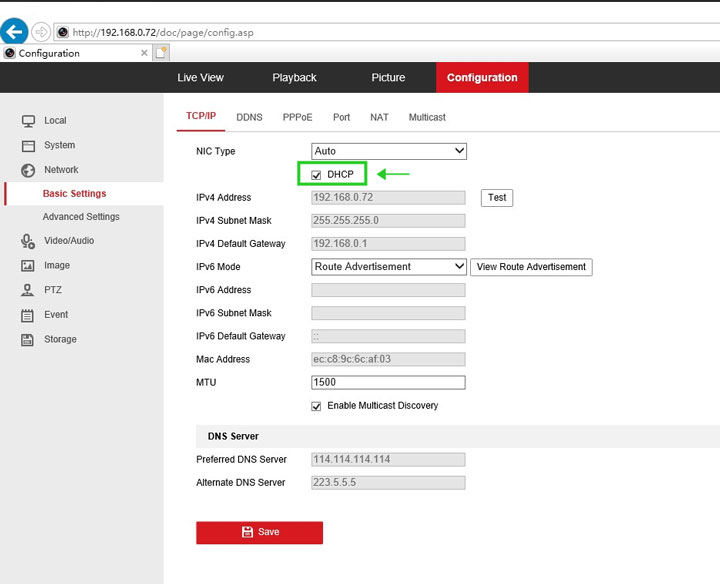
Navigate to [Configuration—Network–Basic Settings–TCP/IP], check the box DHCP then click Save.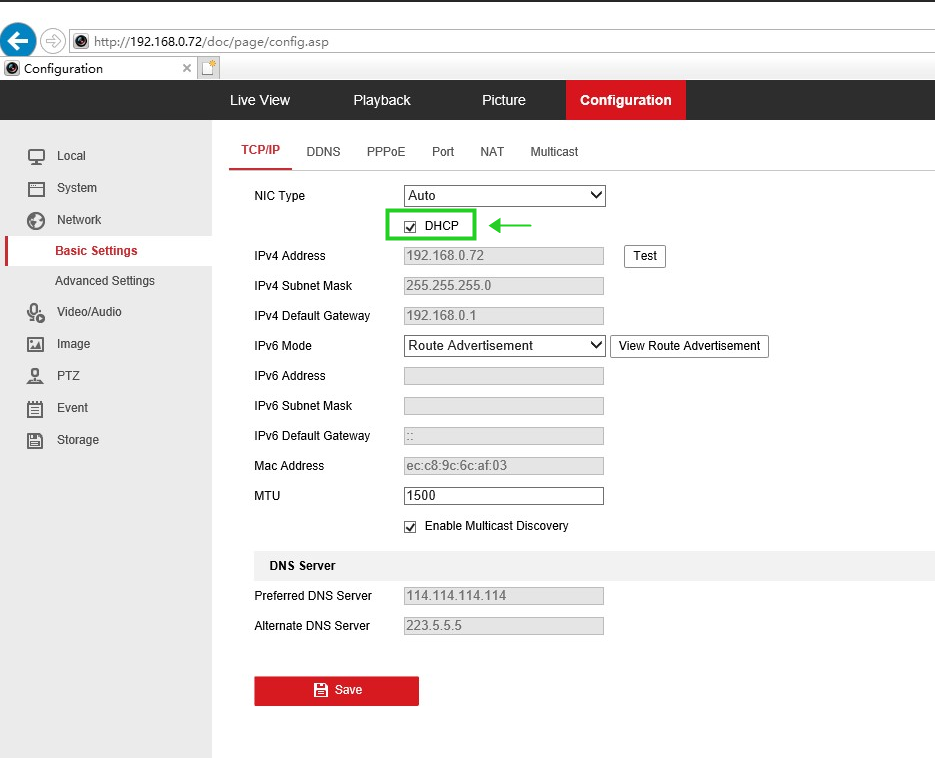
2.2 Navigate to [Configuration–Network–Advanced Settings–Platform Access], set Platform Access Mode as Guarding Vision, check the box Enable, keep Server IP as default, input/create a verification code in the box Verification Code by following the note below the box, then click Save.
Then the box Register Status should become ‘Online‘, which means the camera is ready from remote access.
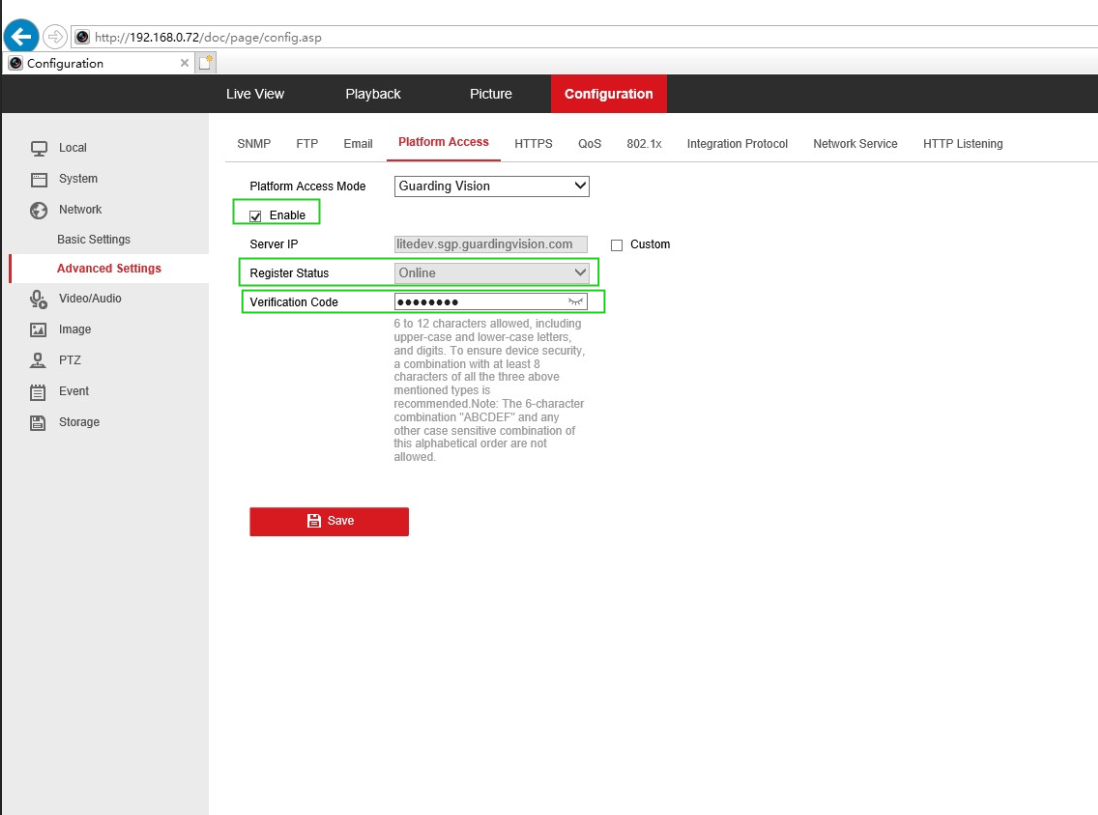
Note: If it still shows ‘Offline‘, please navigate to another setting page and get back to check the latest network status. - Please download the APP Annke Vision and finish the account registration. Click the Add button to add the cameras to your APP, and you could directly scan the QR code on the camera label.
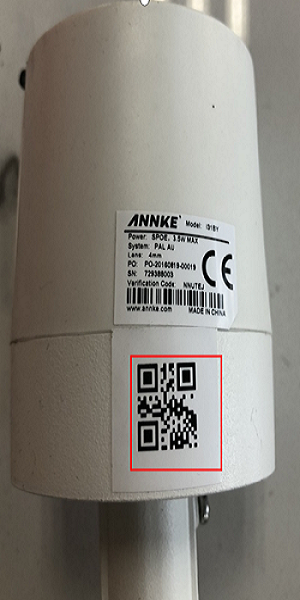
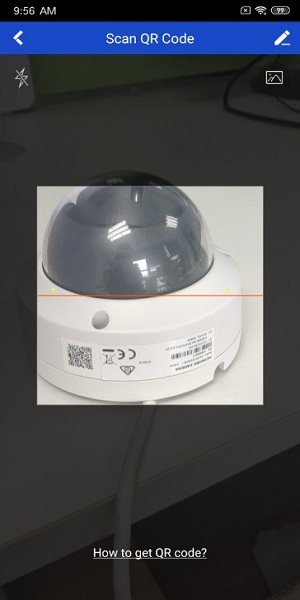
Note: If there is no QR code on the label for the camera, please try to input the SN manually on the APP.

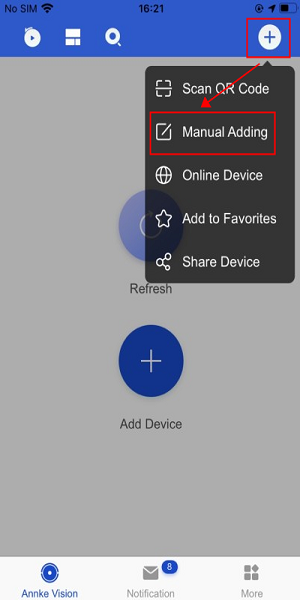
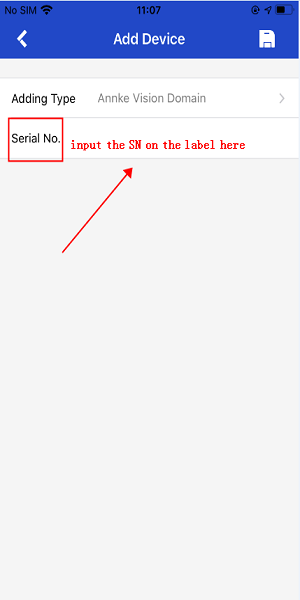
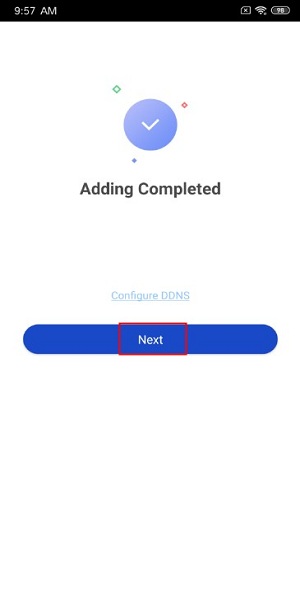
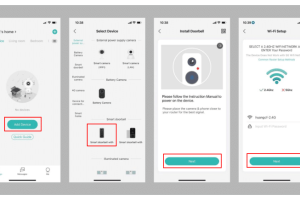
- After that, please follow the steps to add the camera to the APP:
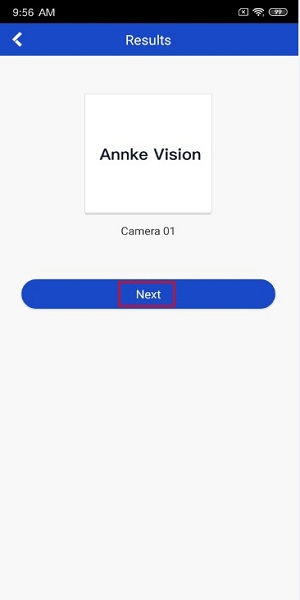
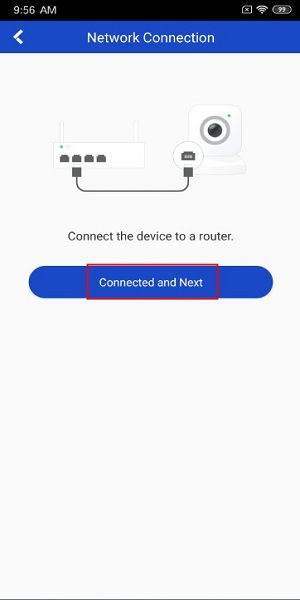
- Then, the APP will ask you to activate the system by creating the password and the verification code.
Note: The password and verification code is very important for the camera.
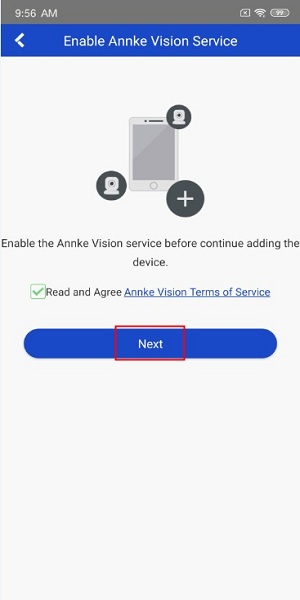
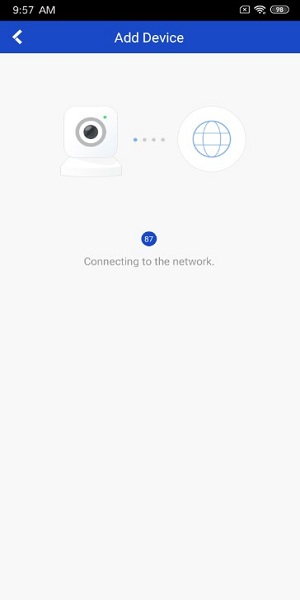
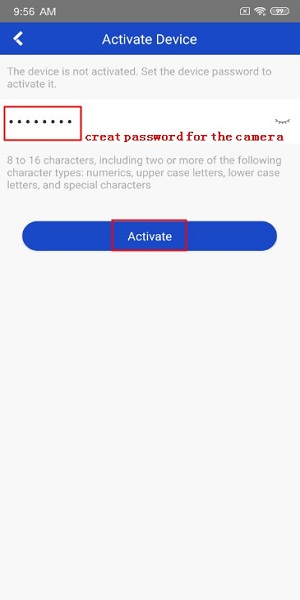
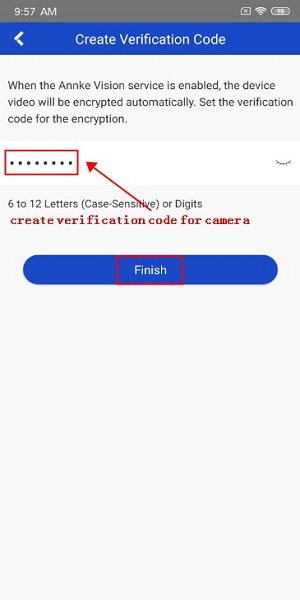
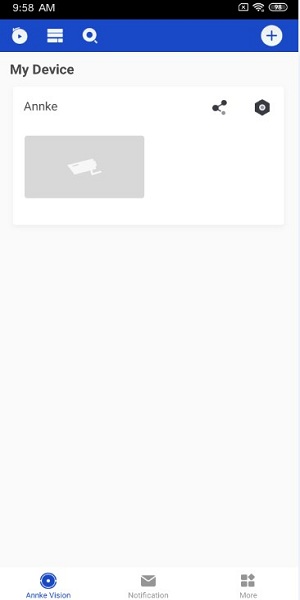
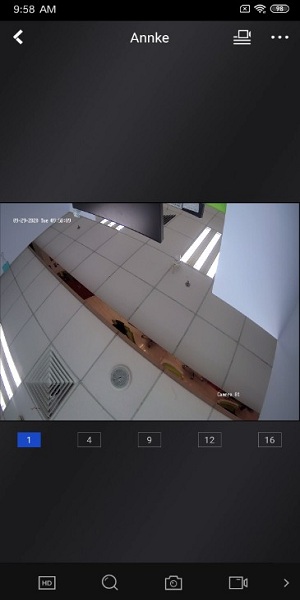
- Finally, you could view the camera’s image on the APP as below.






I really love you
I am having trouble with the installation
can you help me please
Can you write your contact number?